
Table Of Contents
- Disclaimer
- The Login Screen
- The Project Selection Screen
- Overview of Appli IDE Interface
- Tools palette
- Keyboard Shortcuts
- Screen Management
- Property Inspector
- Responsive Design
- Low-Code & Action Scripts
- Data Management
- Tutorial: Cool Coffee Shops
- Elements
- Element: Browser
- Element: Button
- Element: Camera
- Element: Create Account
- Element: Dropdown
- Element: Field
- Element: Graphic
- Element: Image
- Element: Layout
- Element: Login
- Element: Map
- Element: Radio Group
- Element: Search Field
- Element: Switch
- Element: Tab Menu
- Element: Table
- Element: Text
- Element: Media
- Element: Form
- Element: LineGraph
- Image Credits
Tutorial: Cool Coffee Shops
In this tutorial we’re going to create a simple application to highlight my favorite coffee shops in London. You are going to go from zero to have a running app in your mobile device in less than one hour. So, fasten your seat belt because working with Appli is fast.
Creating the project
After logging in to our Appli account, we’re presented with the project selection screen:
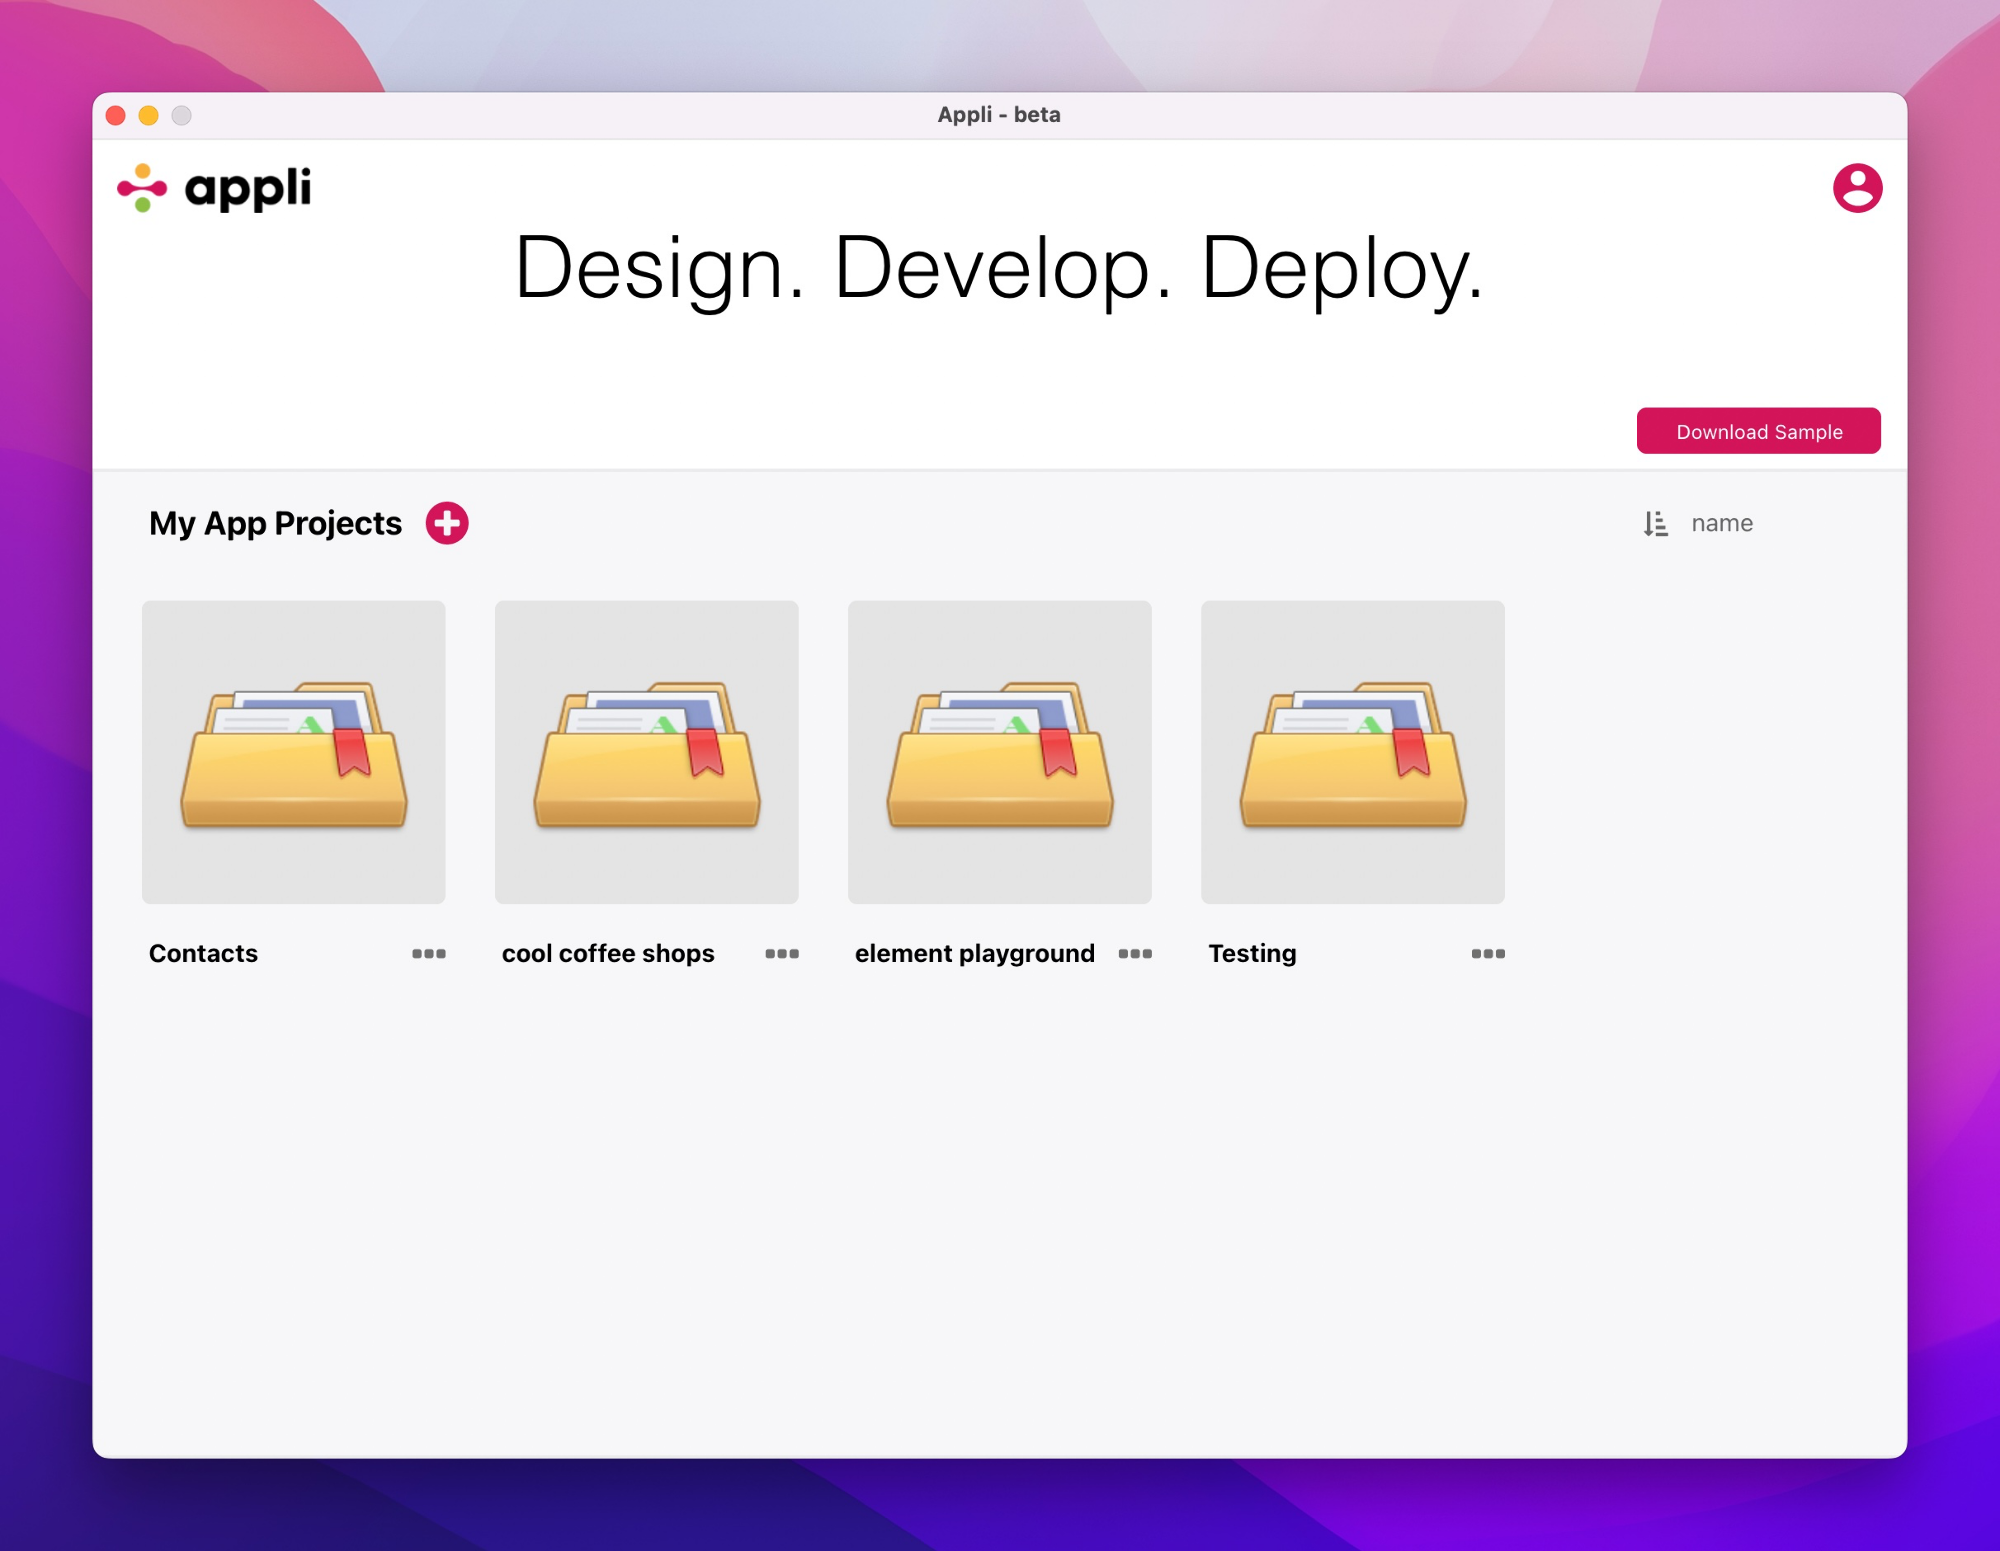
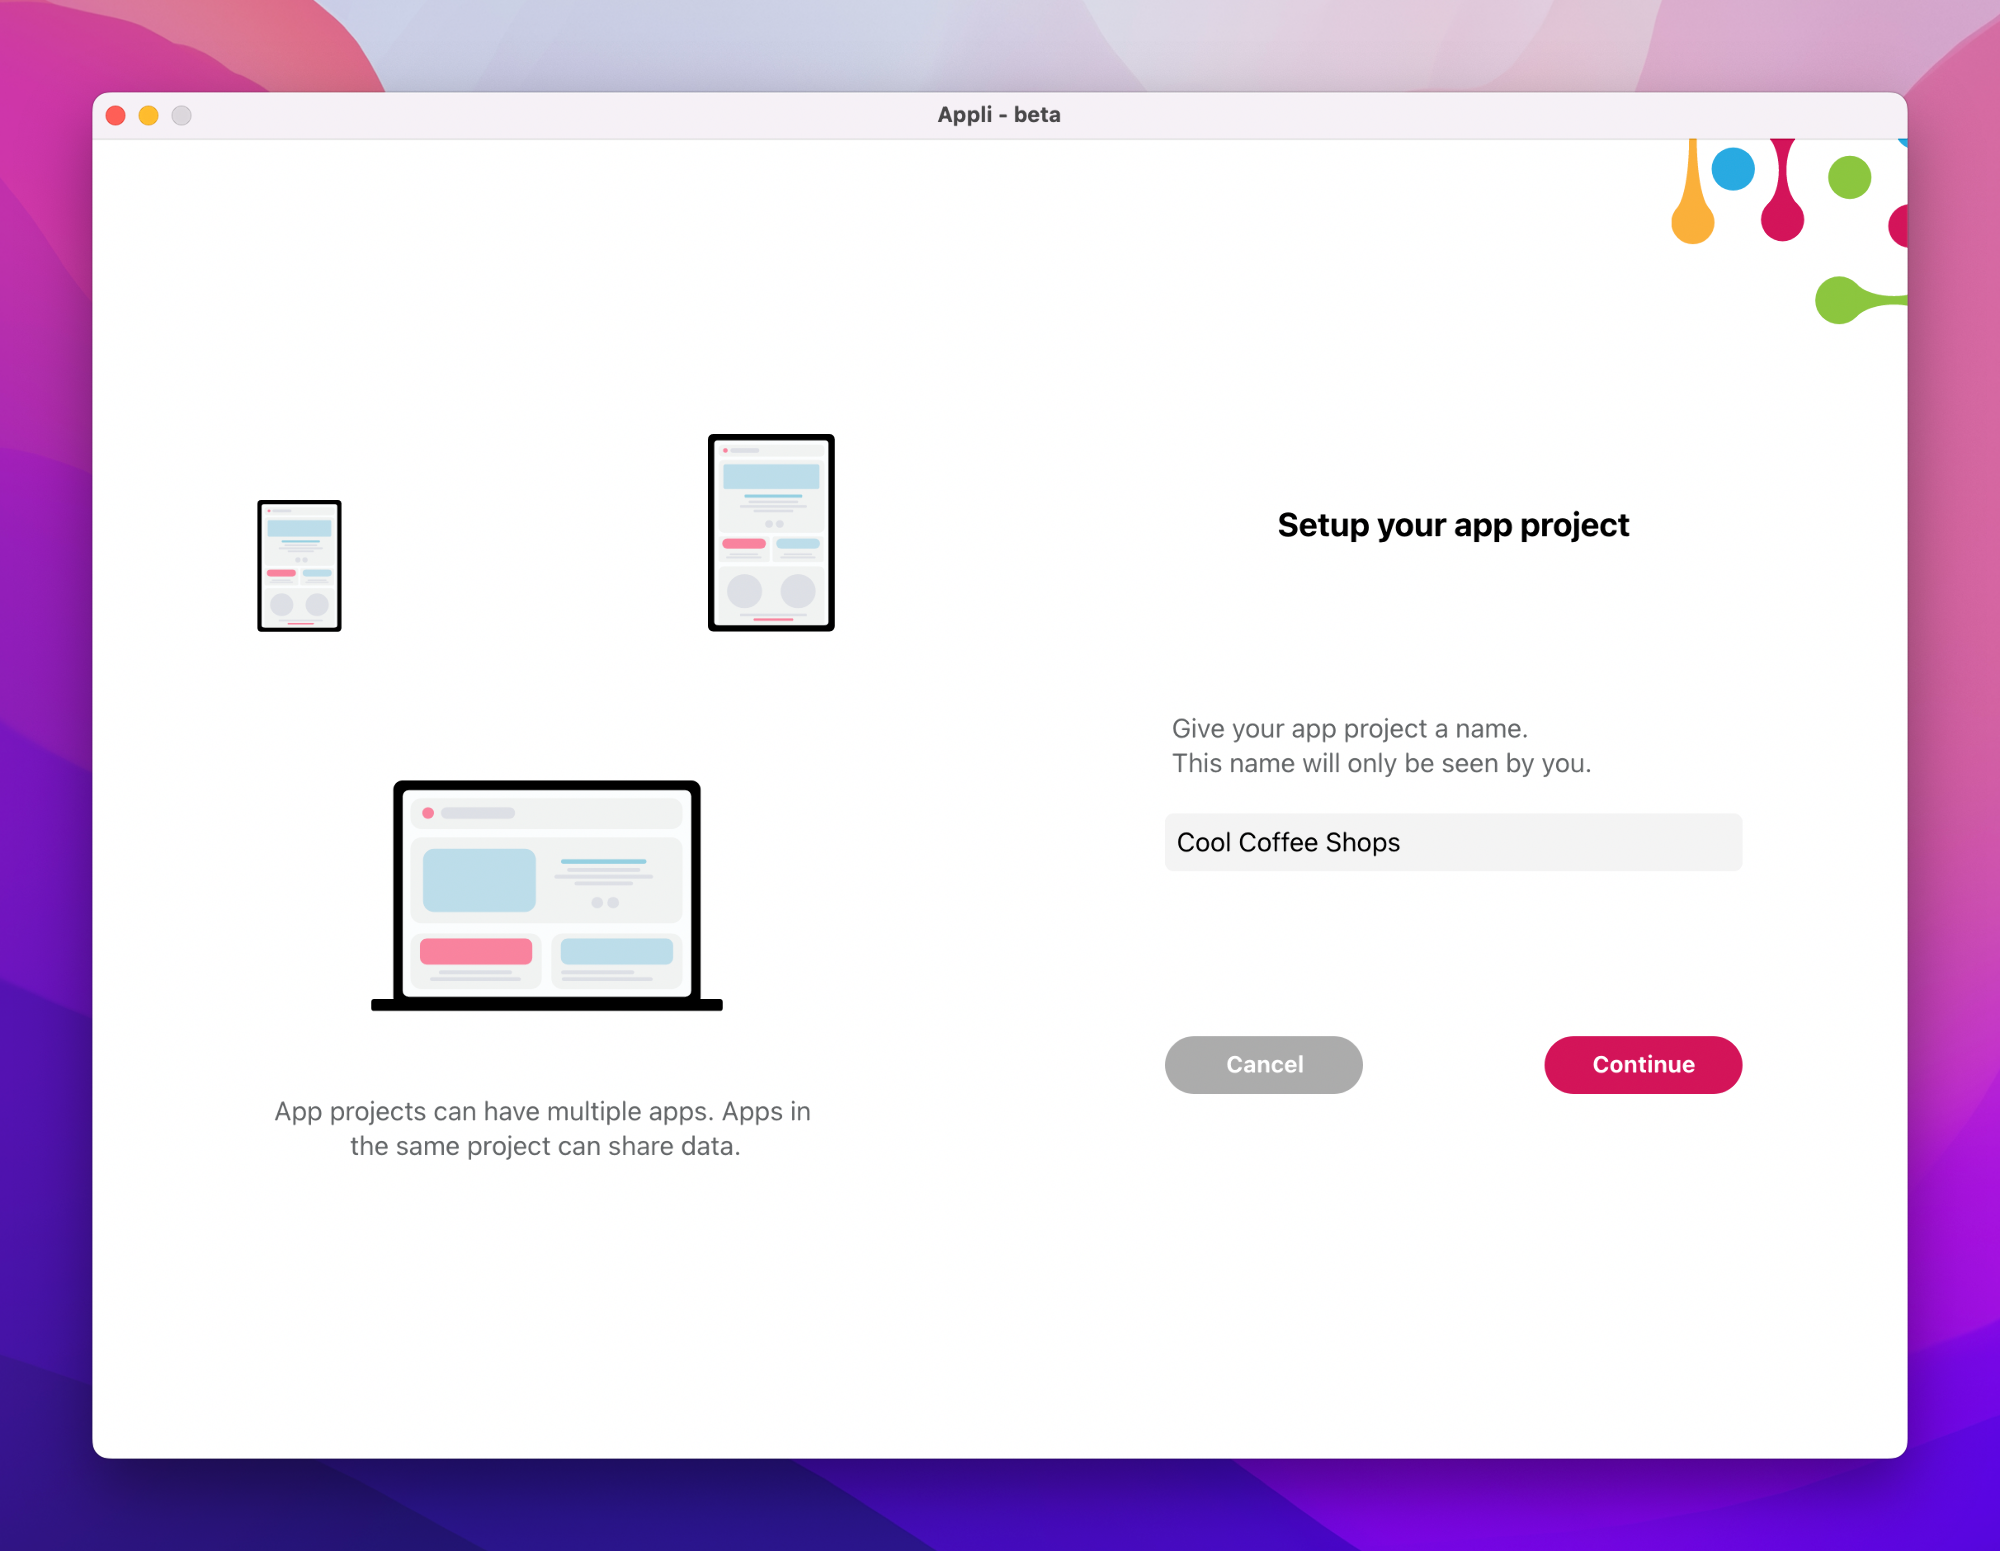
Click on the plus button to create a new project named: Cool Coffee Shops.
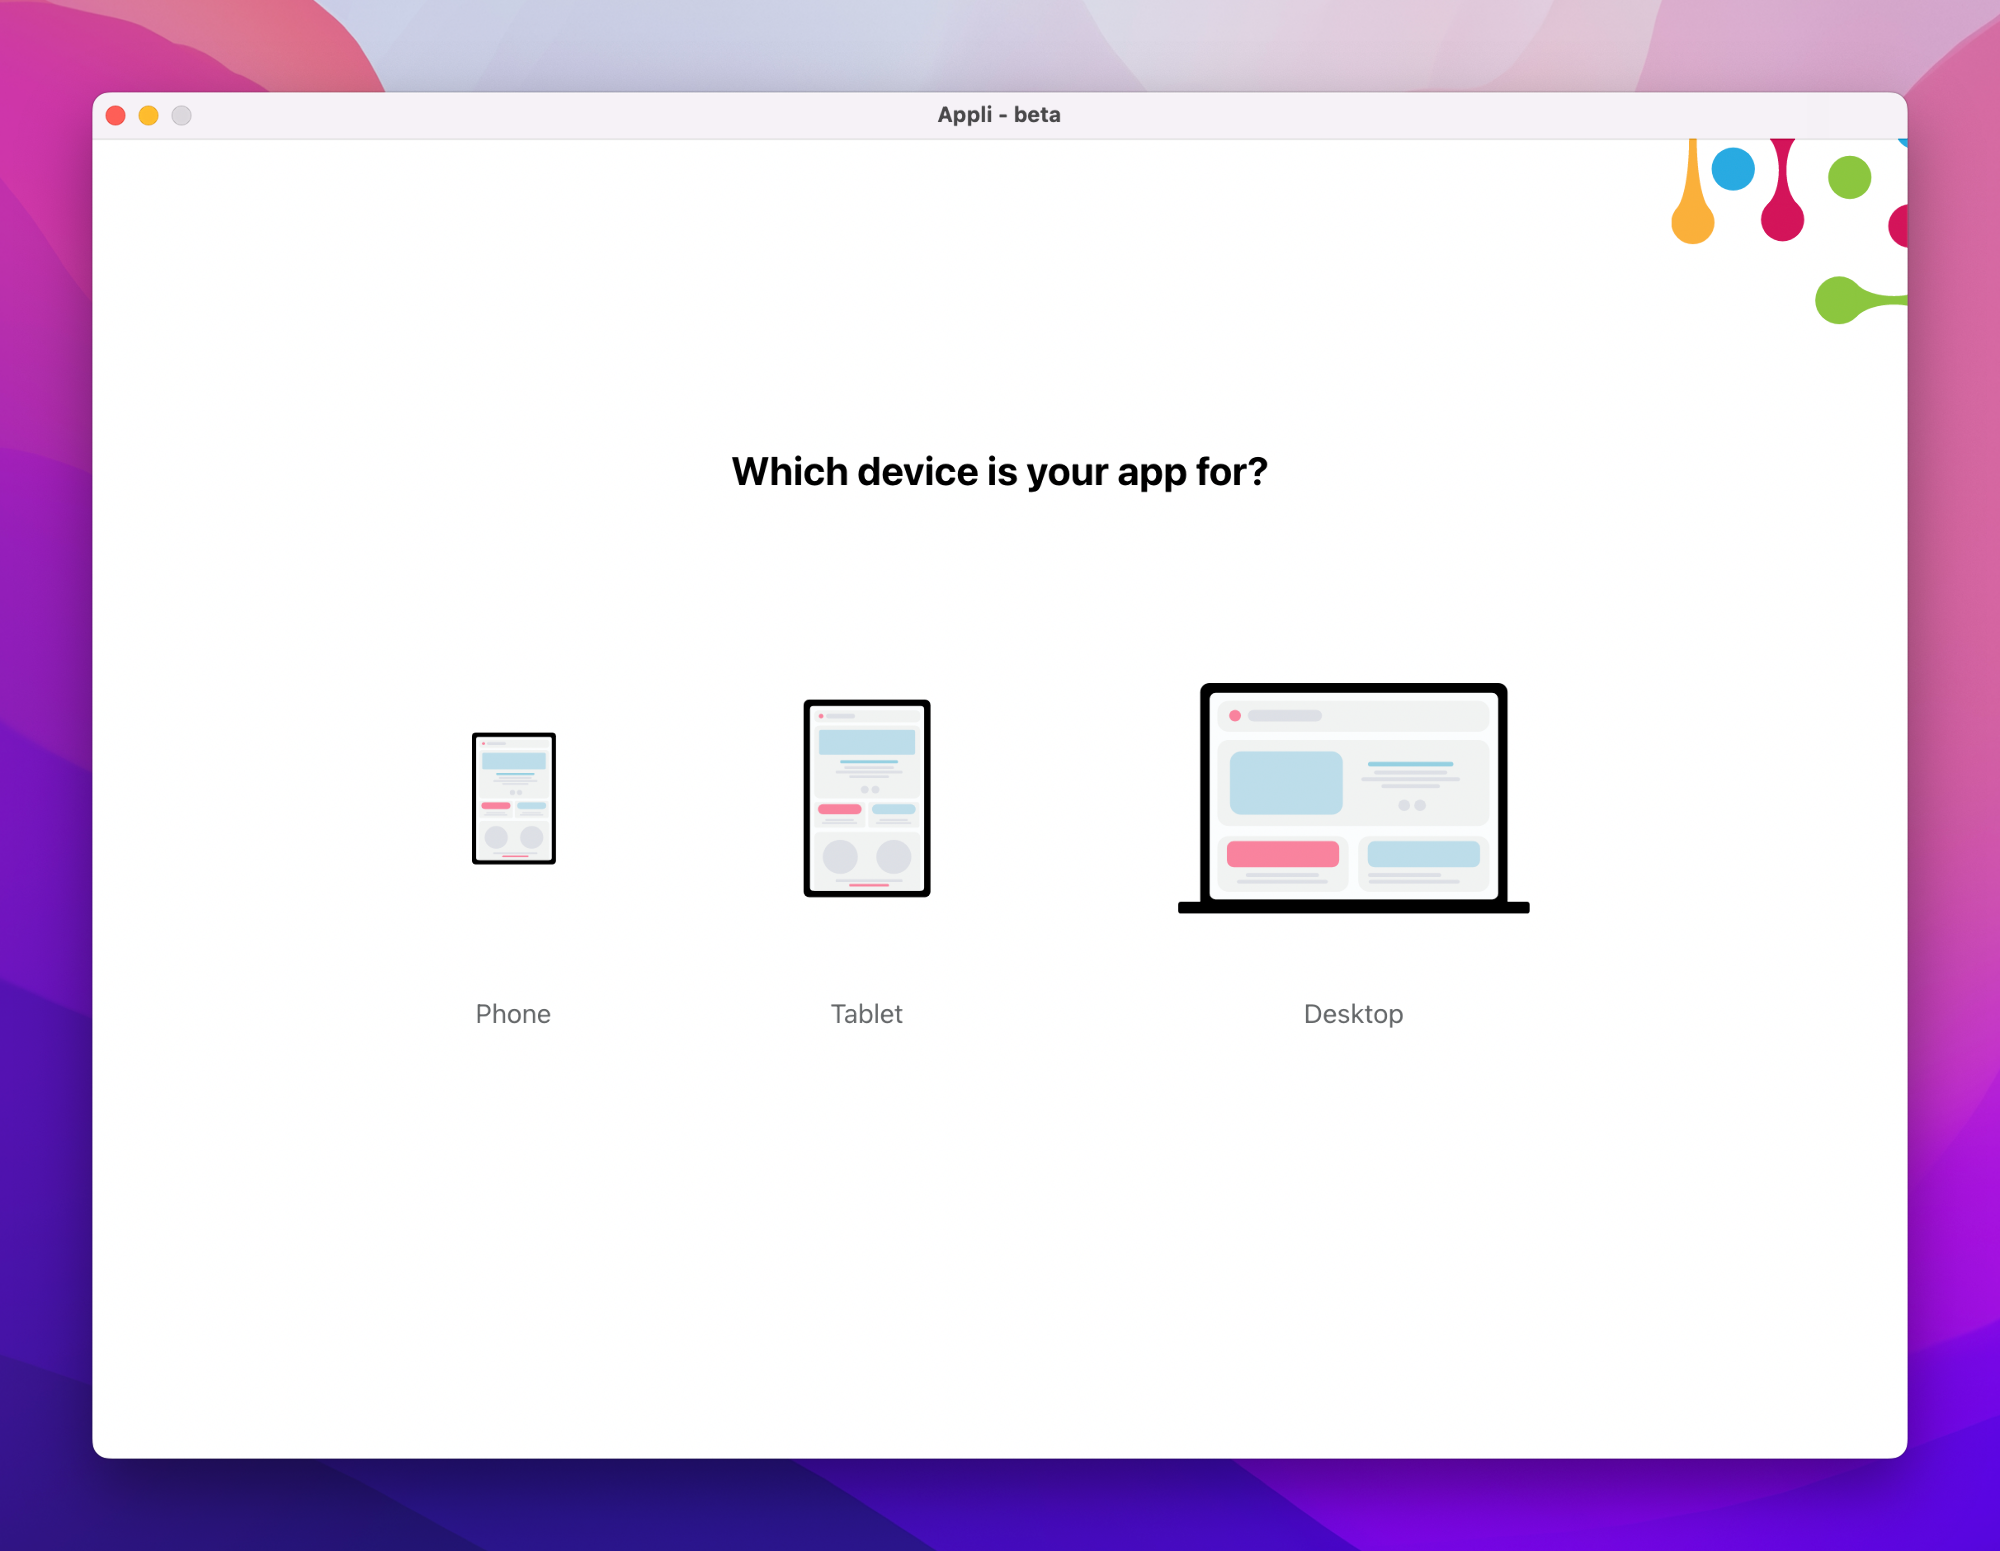
Let’s create a smartphone app first. Click on the phone button to select that platform.
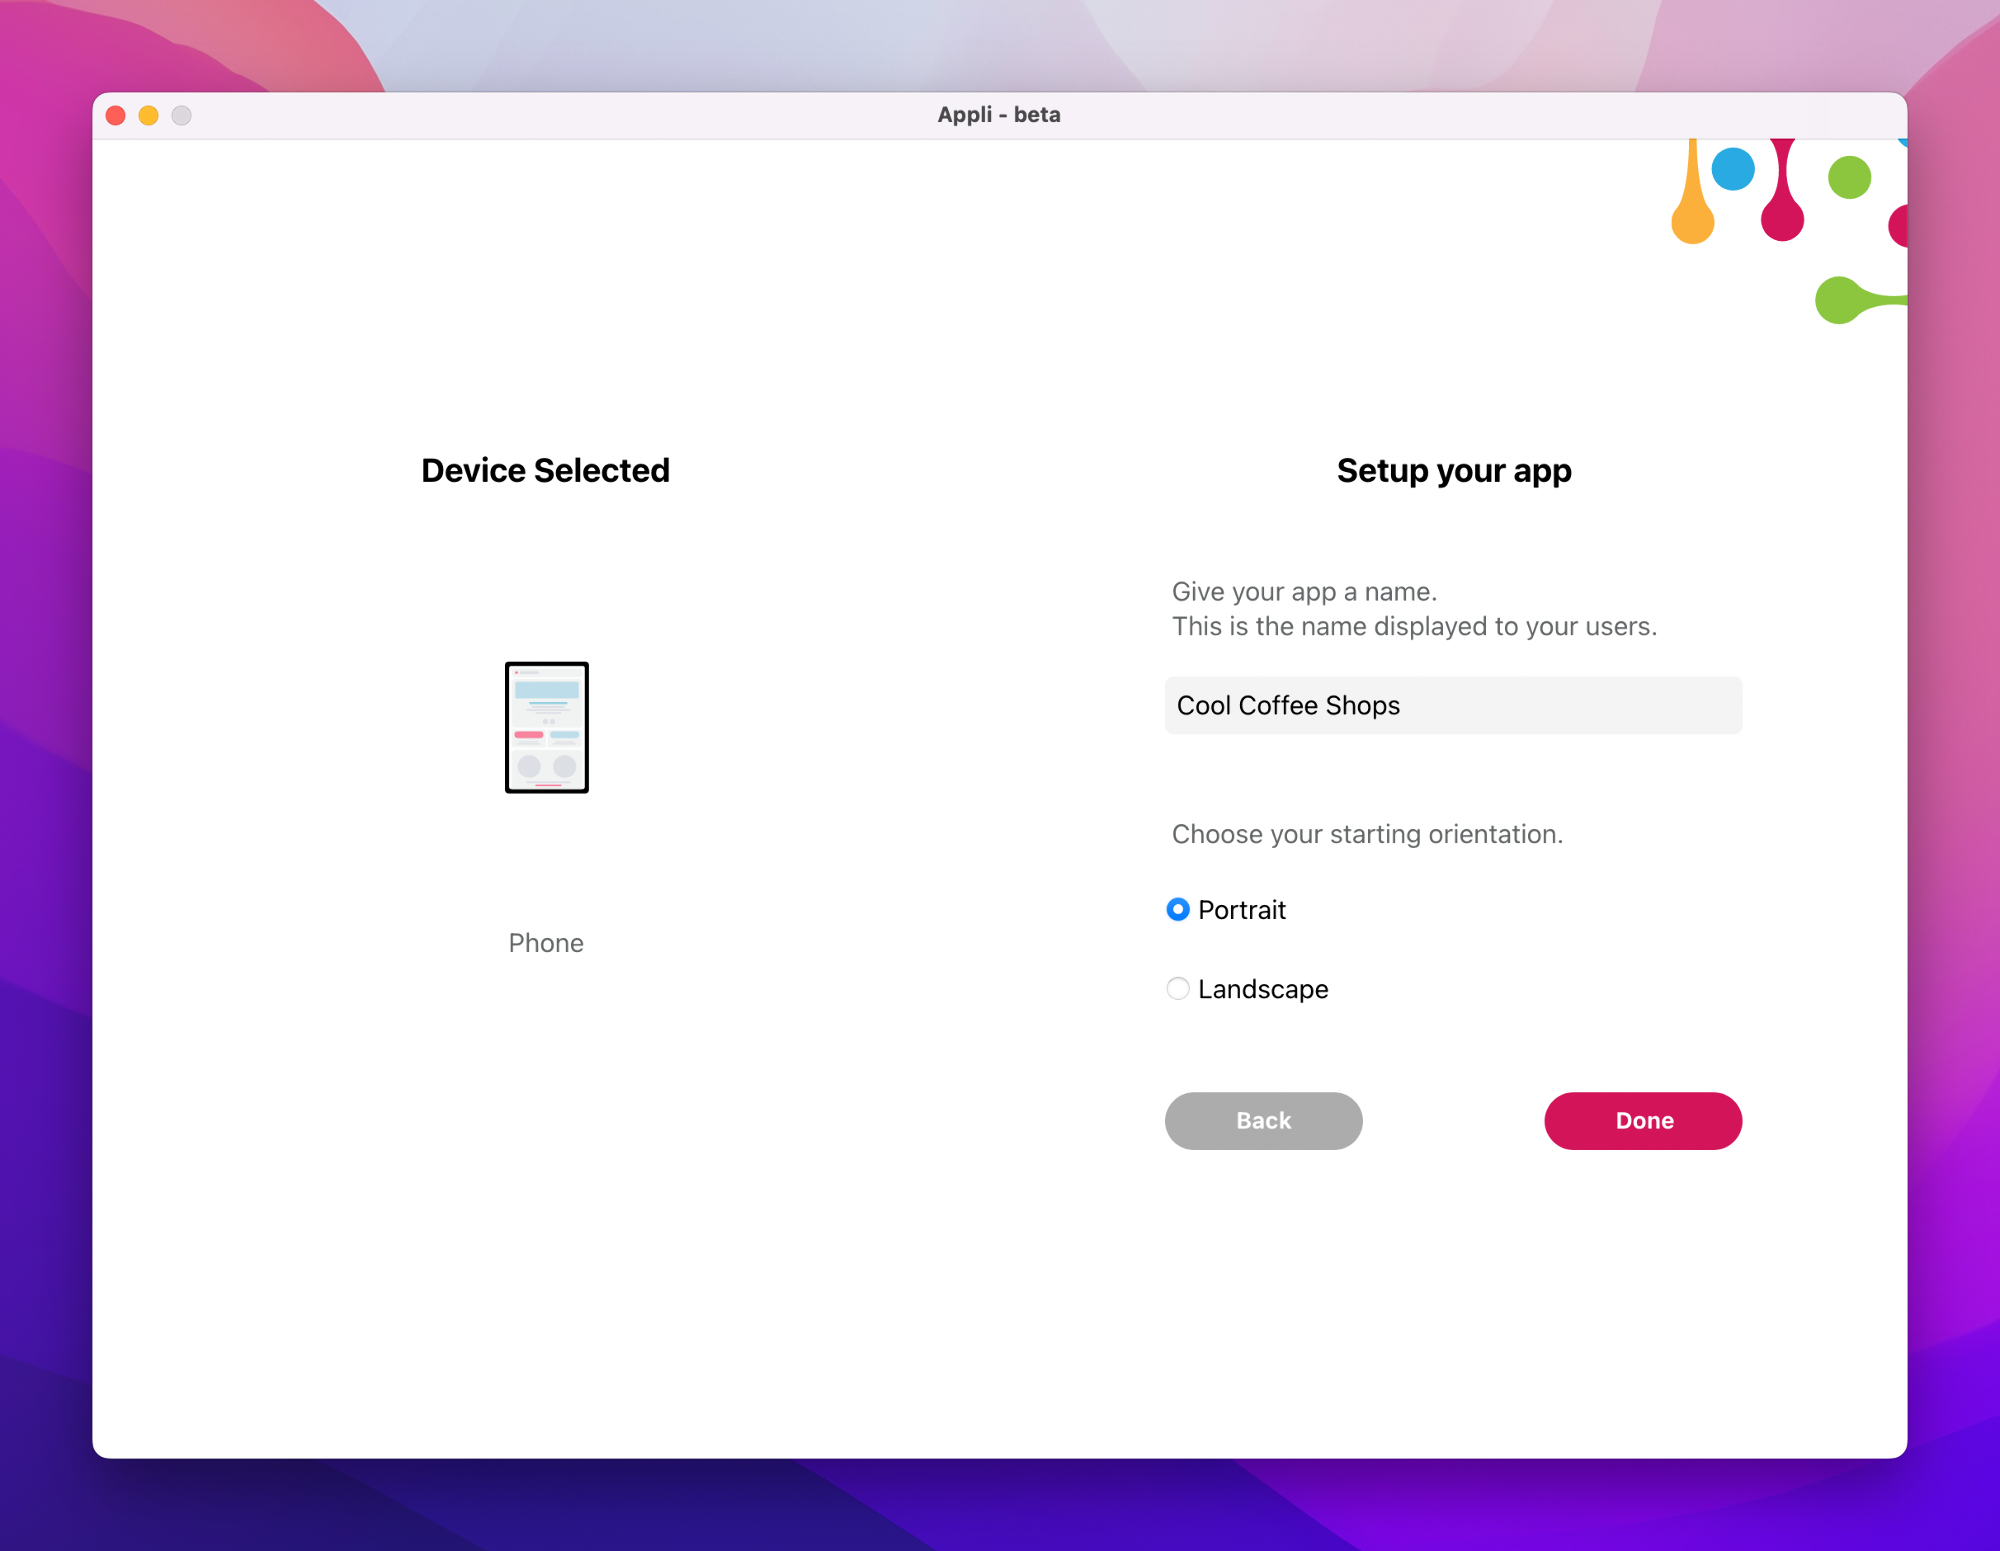
And then fill in the name for the app and select the portrait orientation.
Desigining the interface
After clicking save, your new project is automatically saved to the Appli cloud and opened in the playground screen:
It may look a bit empty right now, but it is actually full of possibilities.
Creating the home screen
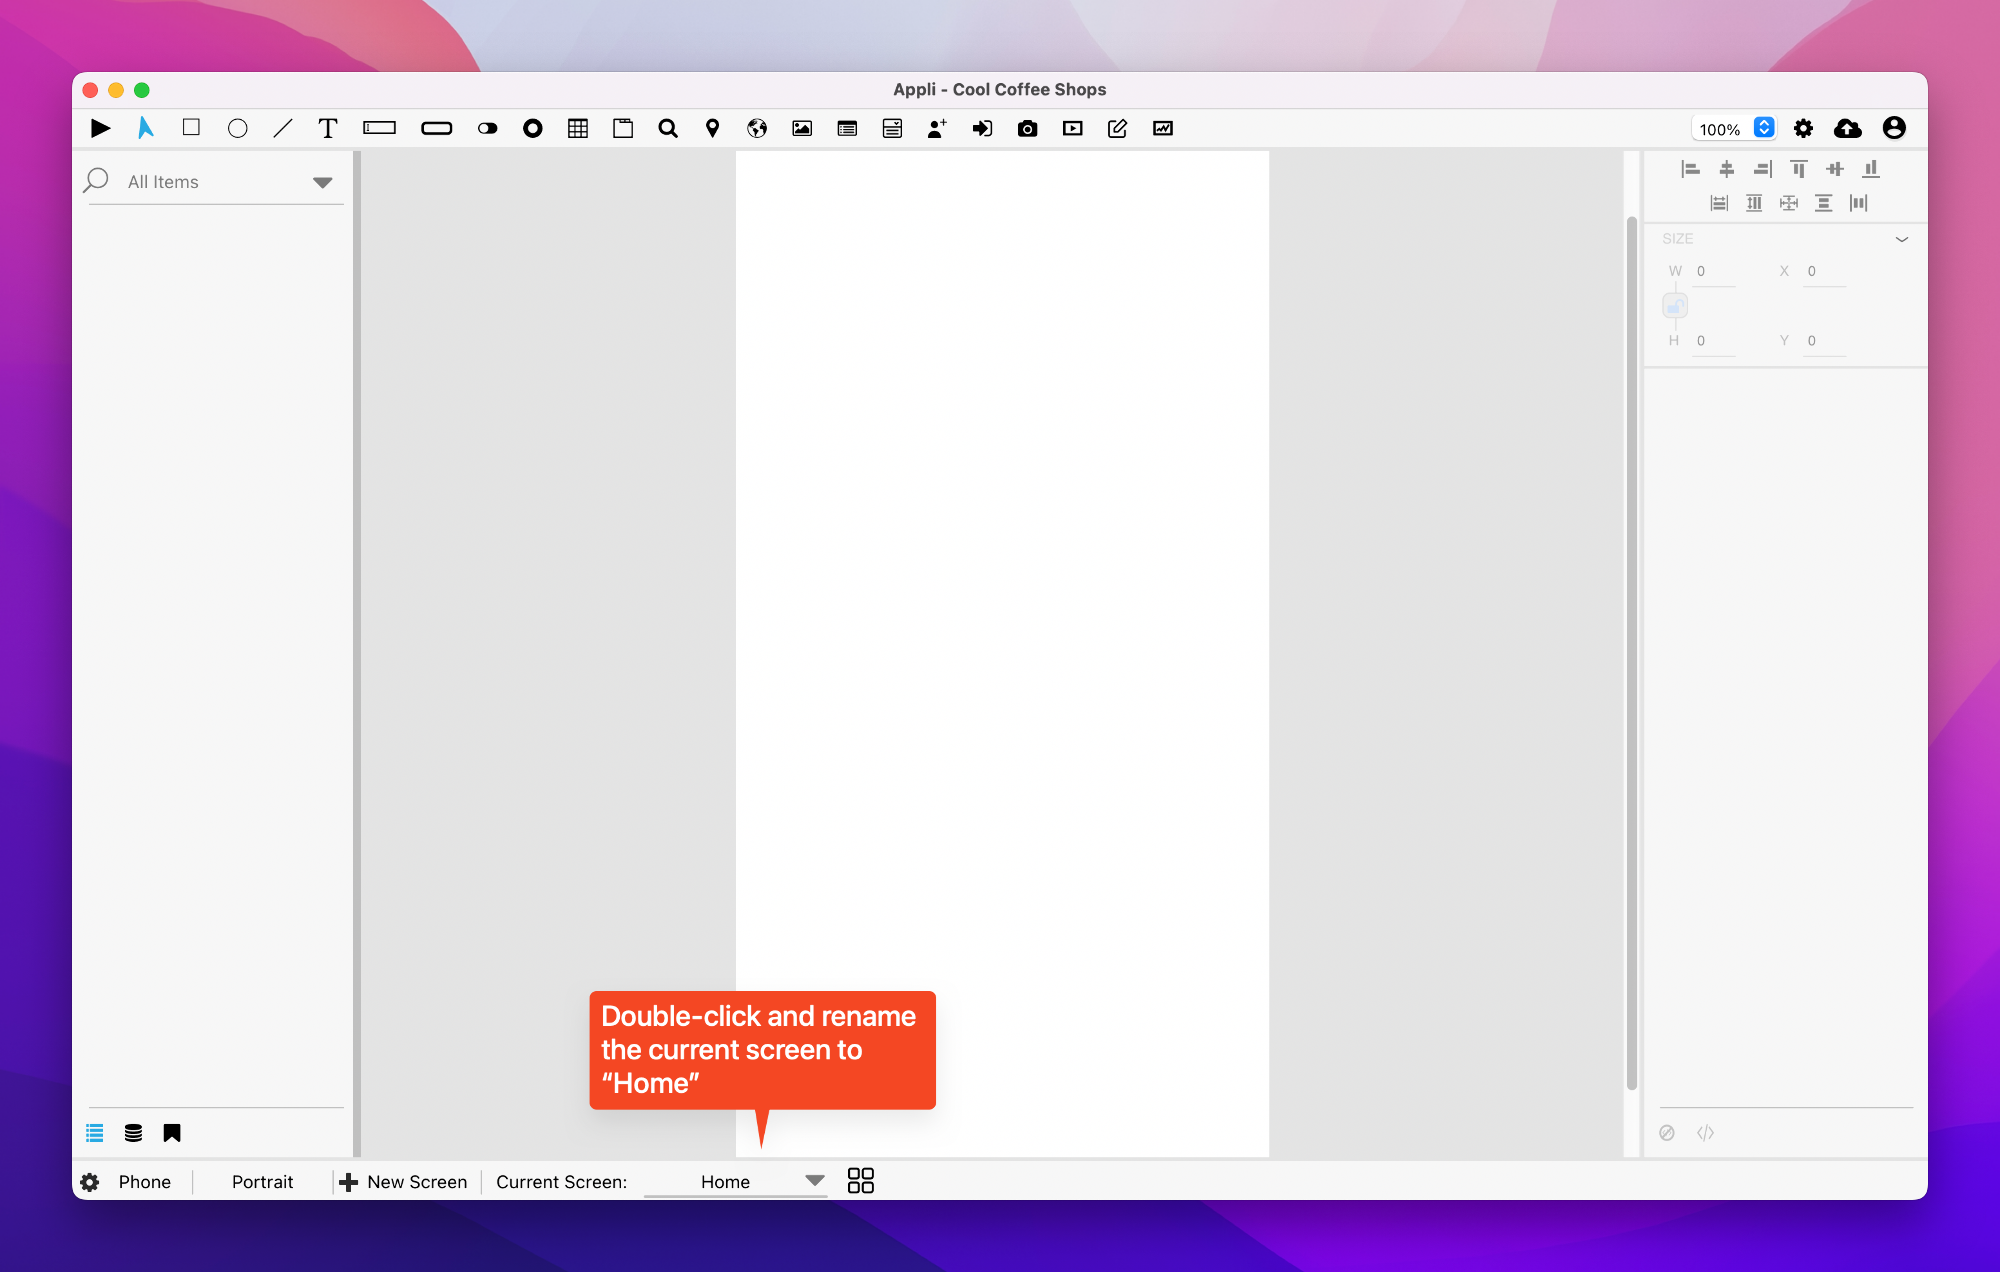
Let’s begin by renaming our current screen using the controls in the footer.
Double-click the “Untitled” name in the footer to make it editable. Type in Home:
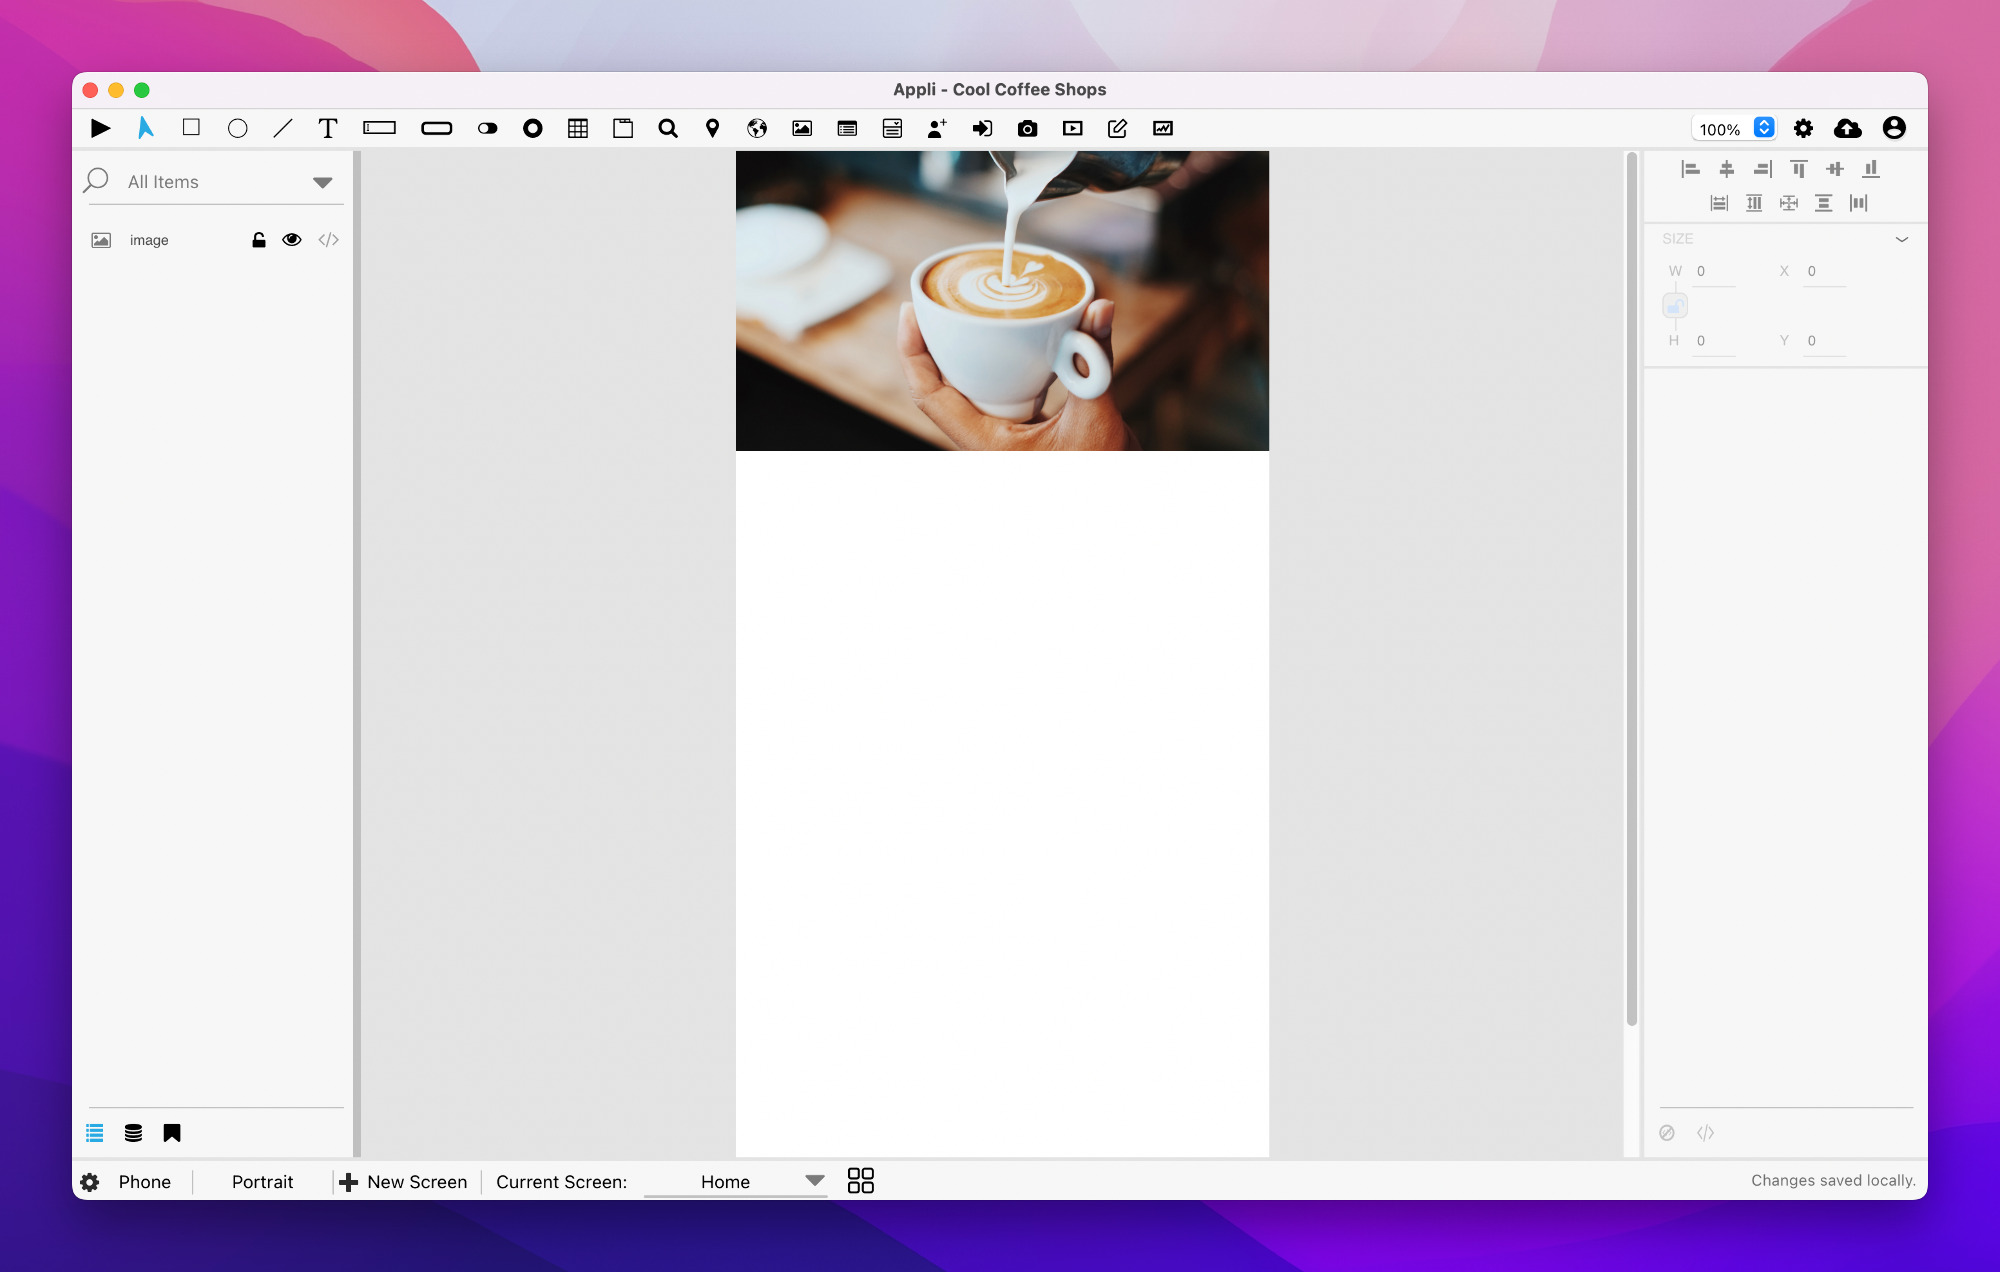
Let’s add an image to our home screen to make it more fun. You can download this photo to your computer and then just drag and drop it into Appli. Resize the image in Appli using the corners to make it fit onto the top of our app:
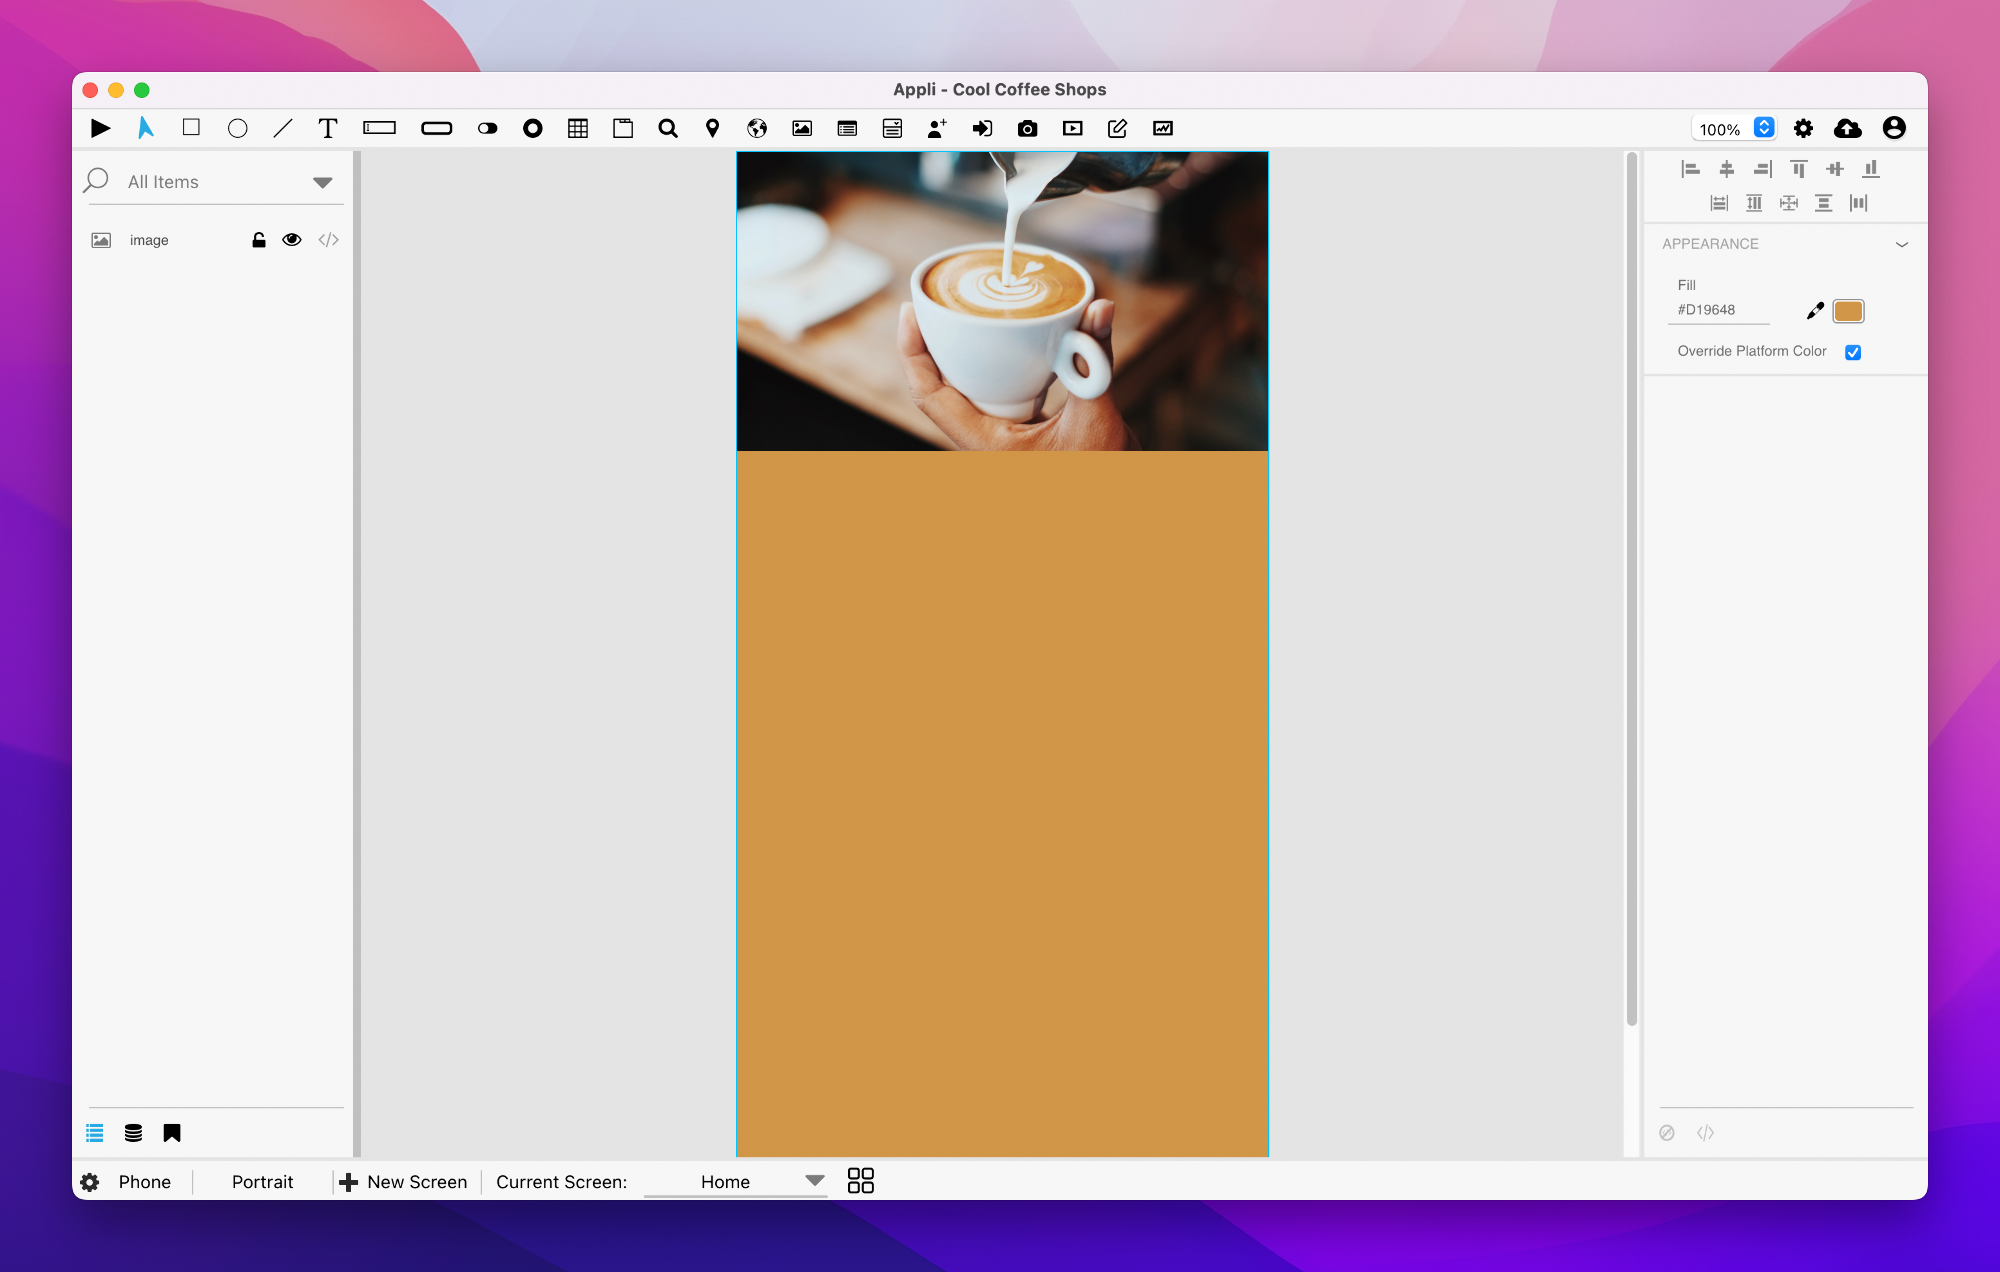
Next, let’s change the background color of the app to be more like coffee. Click anywhere on the white background of the playground, and let’s change the platformBackgroundColor property:
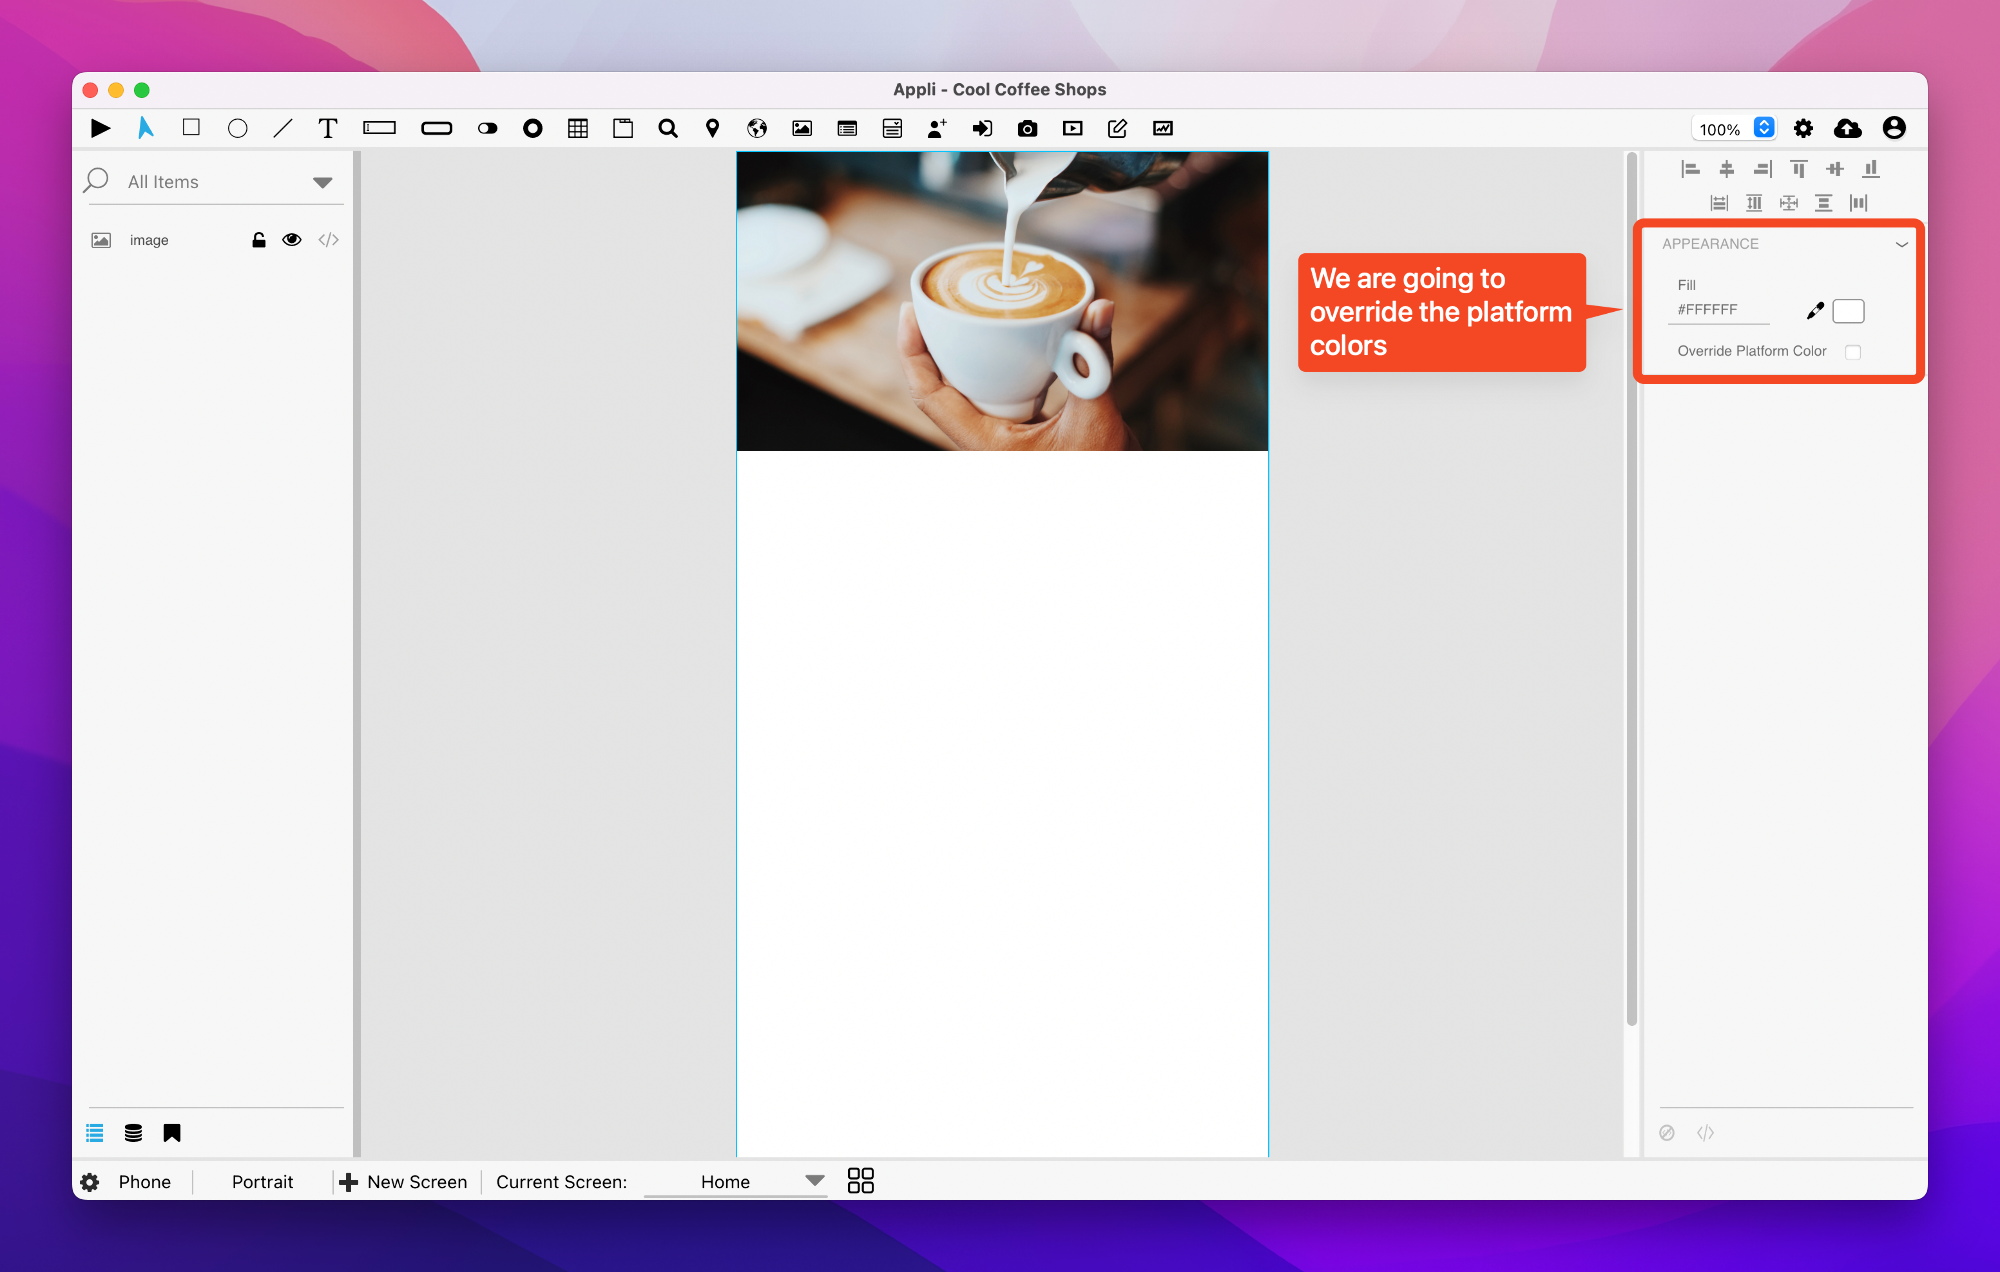
Using the color picker tool (the little eye dropper next to the hexcoded color) pick a nice shade of brown for the background.
Next, we’re adding a little header text to ensure everyone understands what our demo app is all about.
Add a text element by selecting it from the tools palette, and drawing it just below our header photo. When you add a text element to a screen, you have the opportunity to change its text. Change it to Cool Coffee Shops.
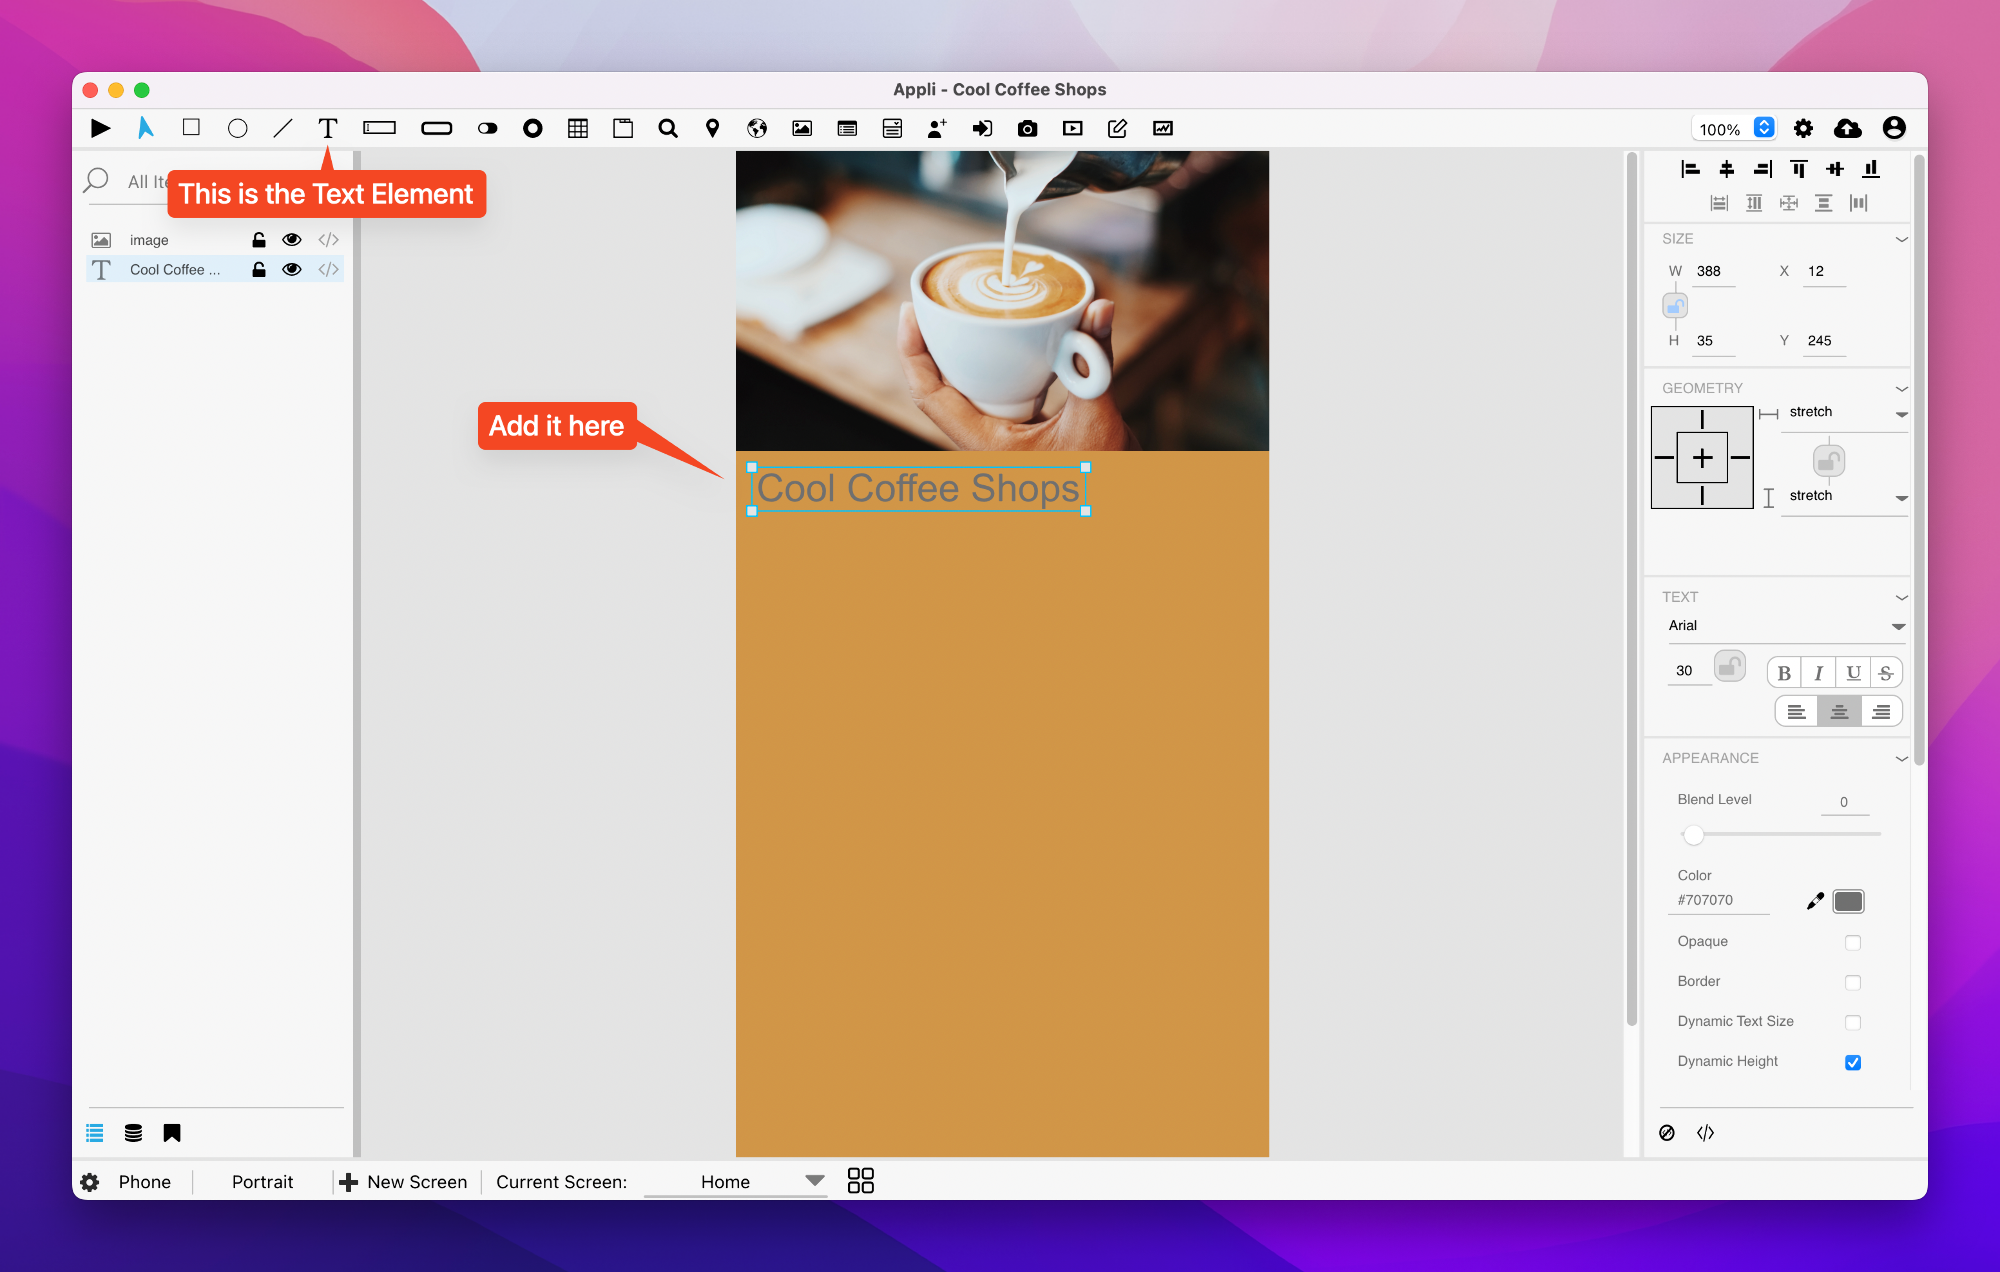
We can dress that text element up using the property inspector. In the Text & Appearance sections, change the font to bold, the font size to 40, and center the text.
Be aware that to change the text to bold, you need to double-click the text element to make it editable and select the text you want to change.
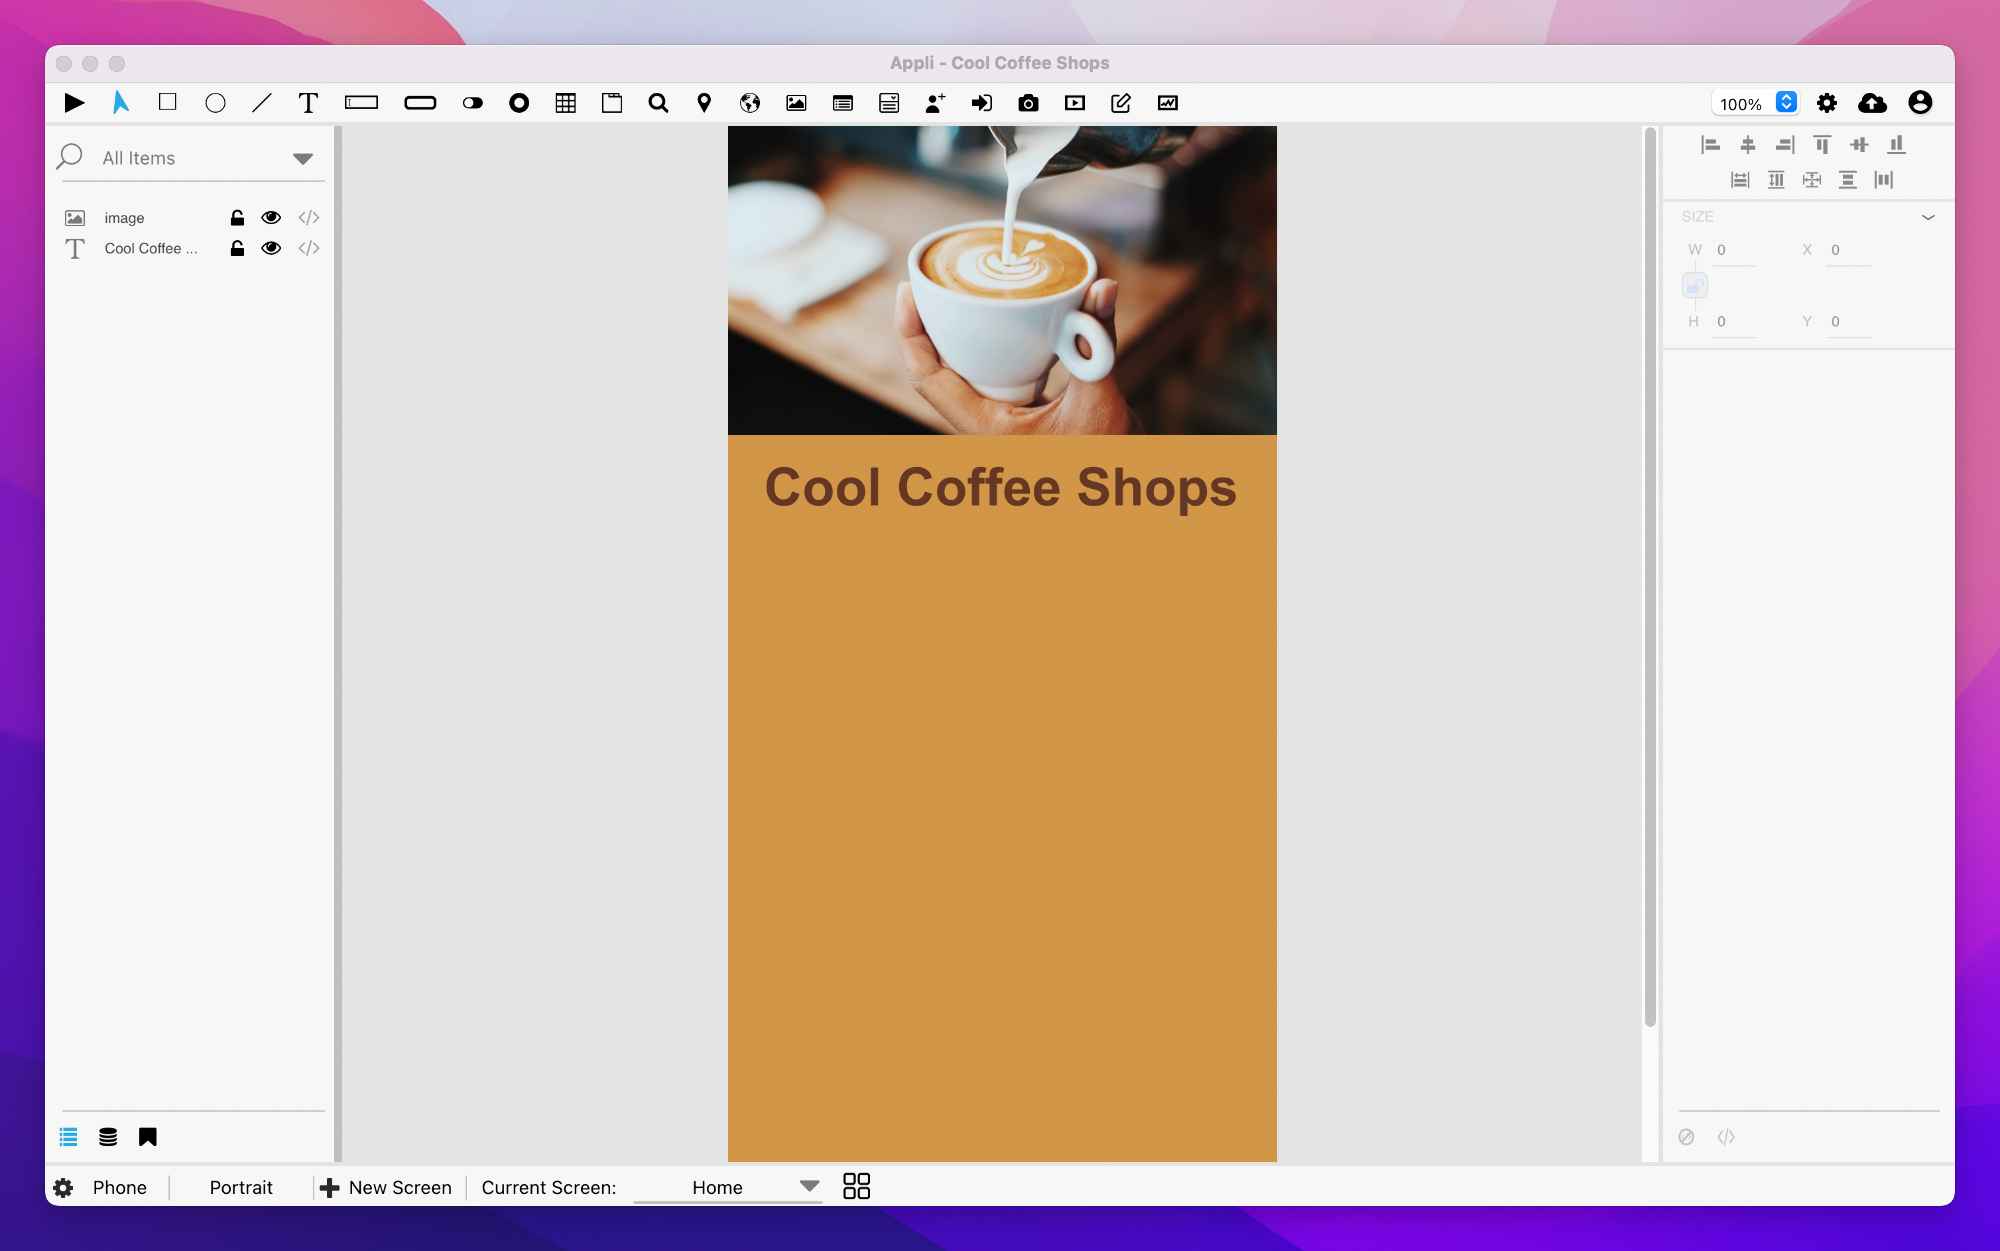
Scrolling down on the property inspector, you’ll find the textColor property. It also has an eye dropper tool next to it. Use it to pick some darker tone in the photo.
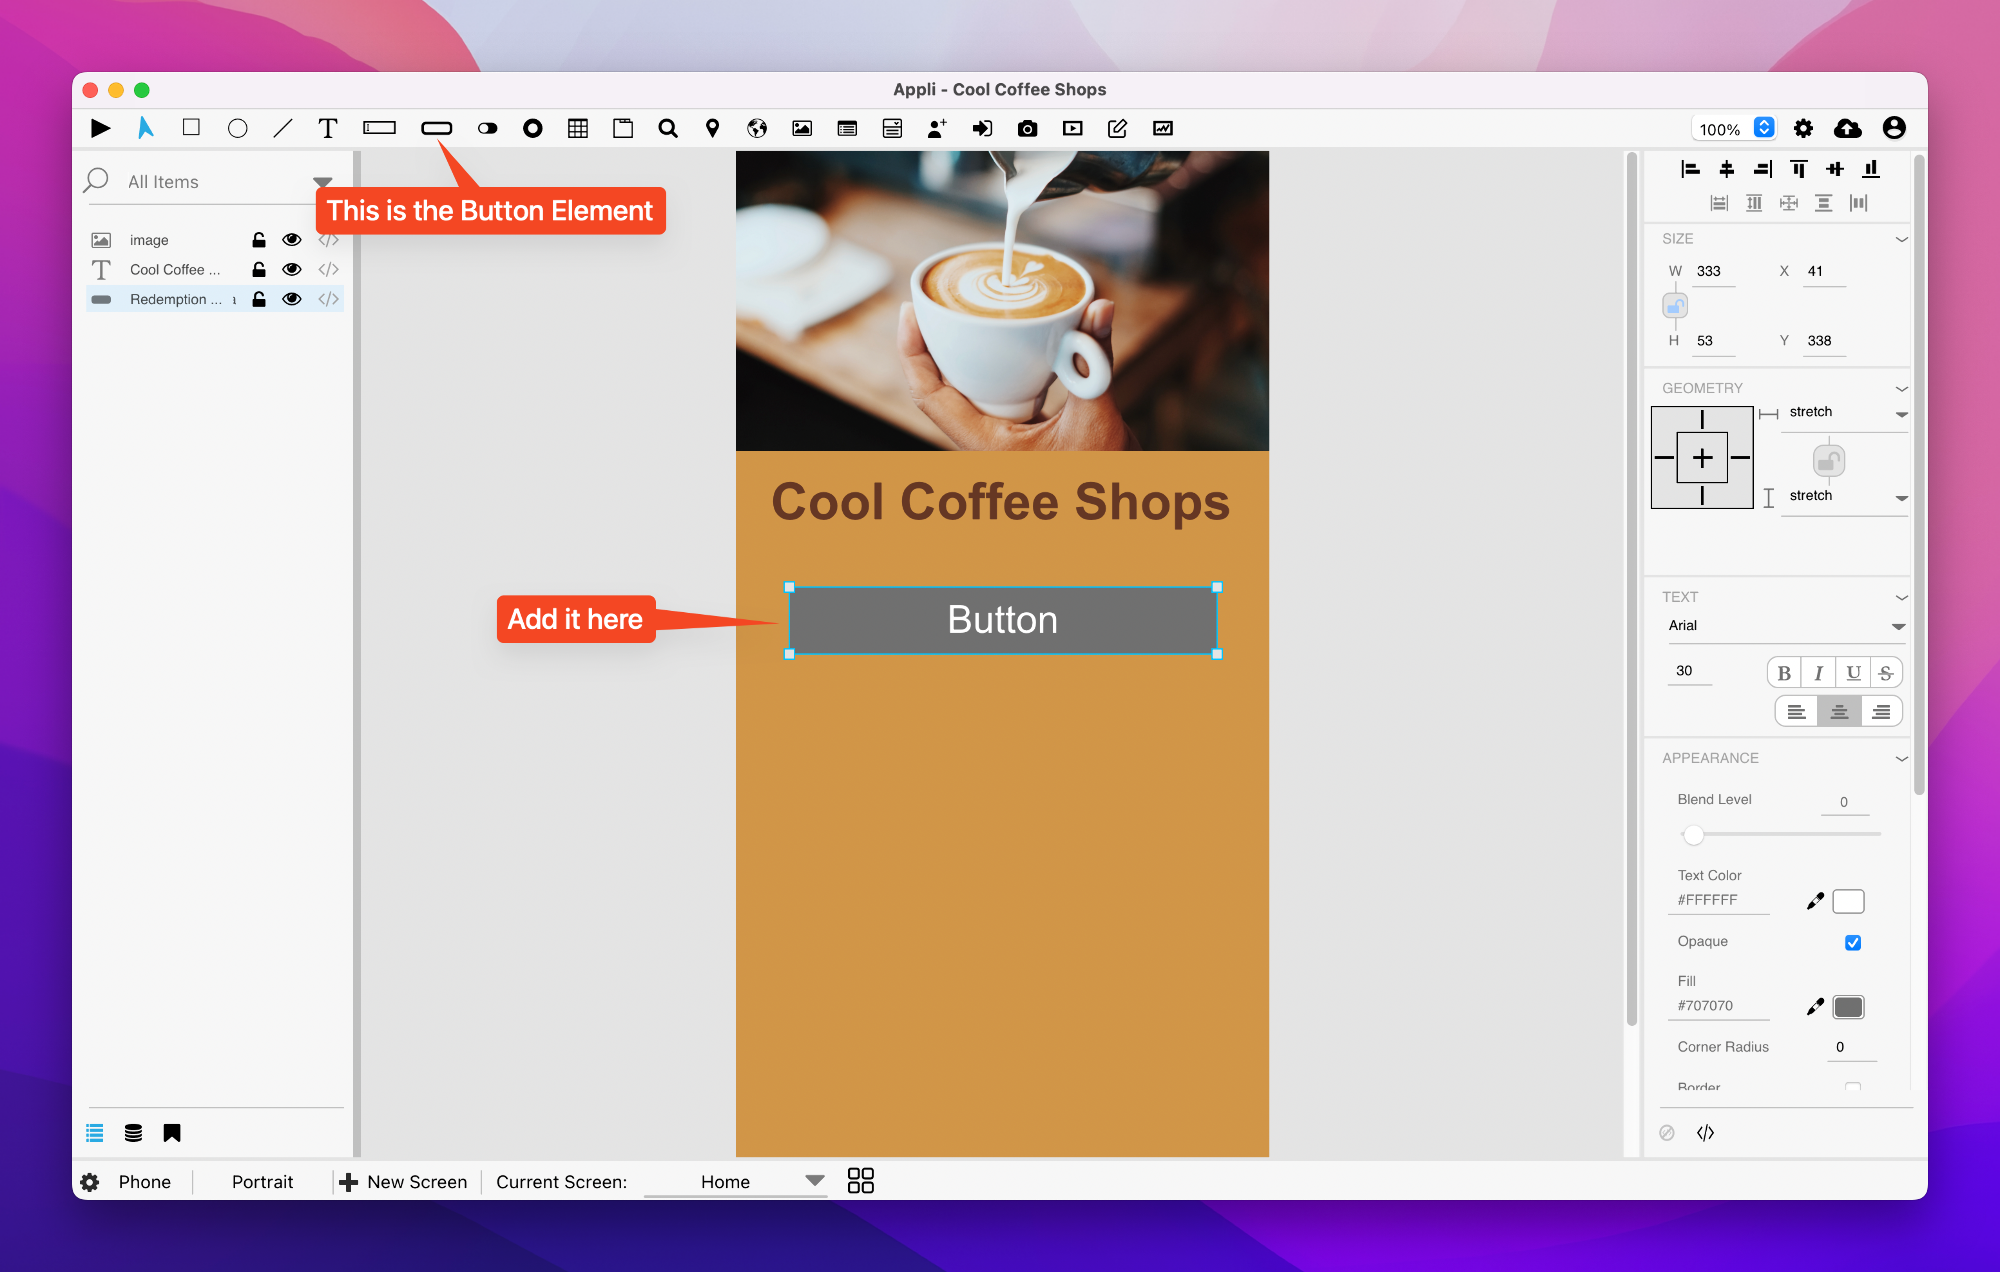
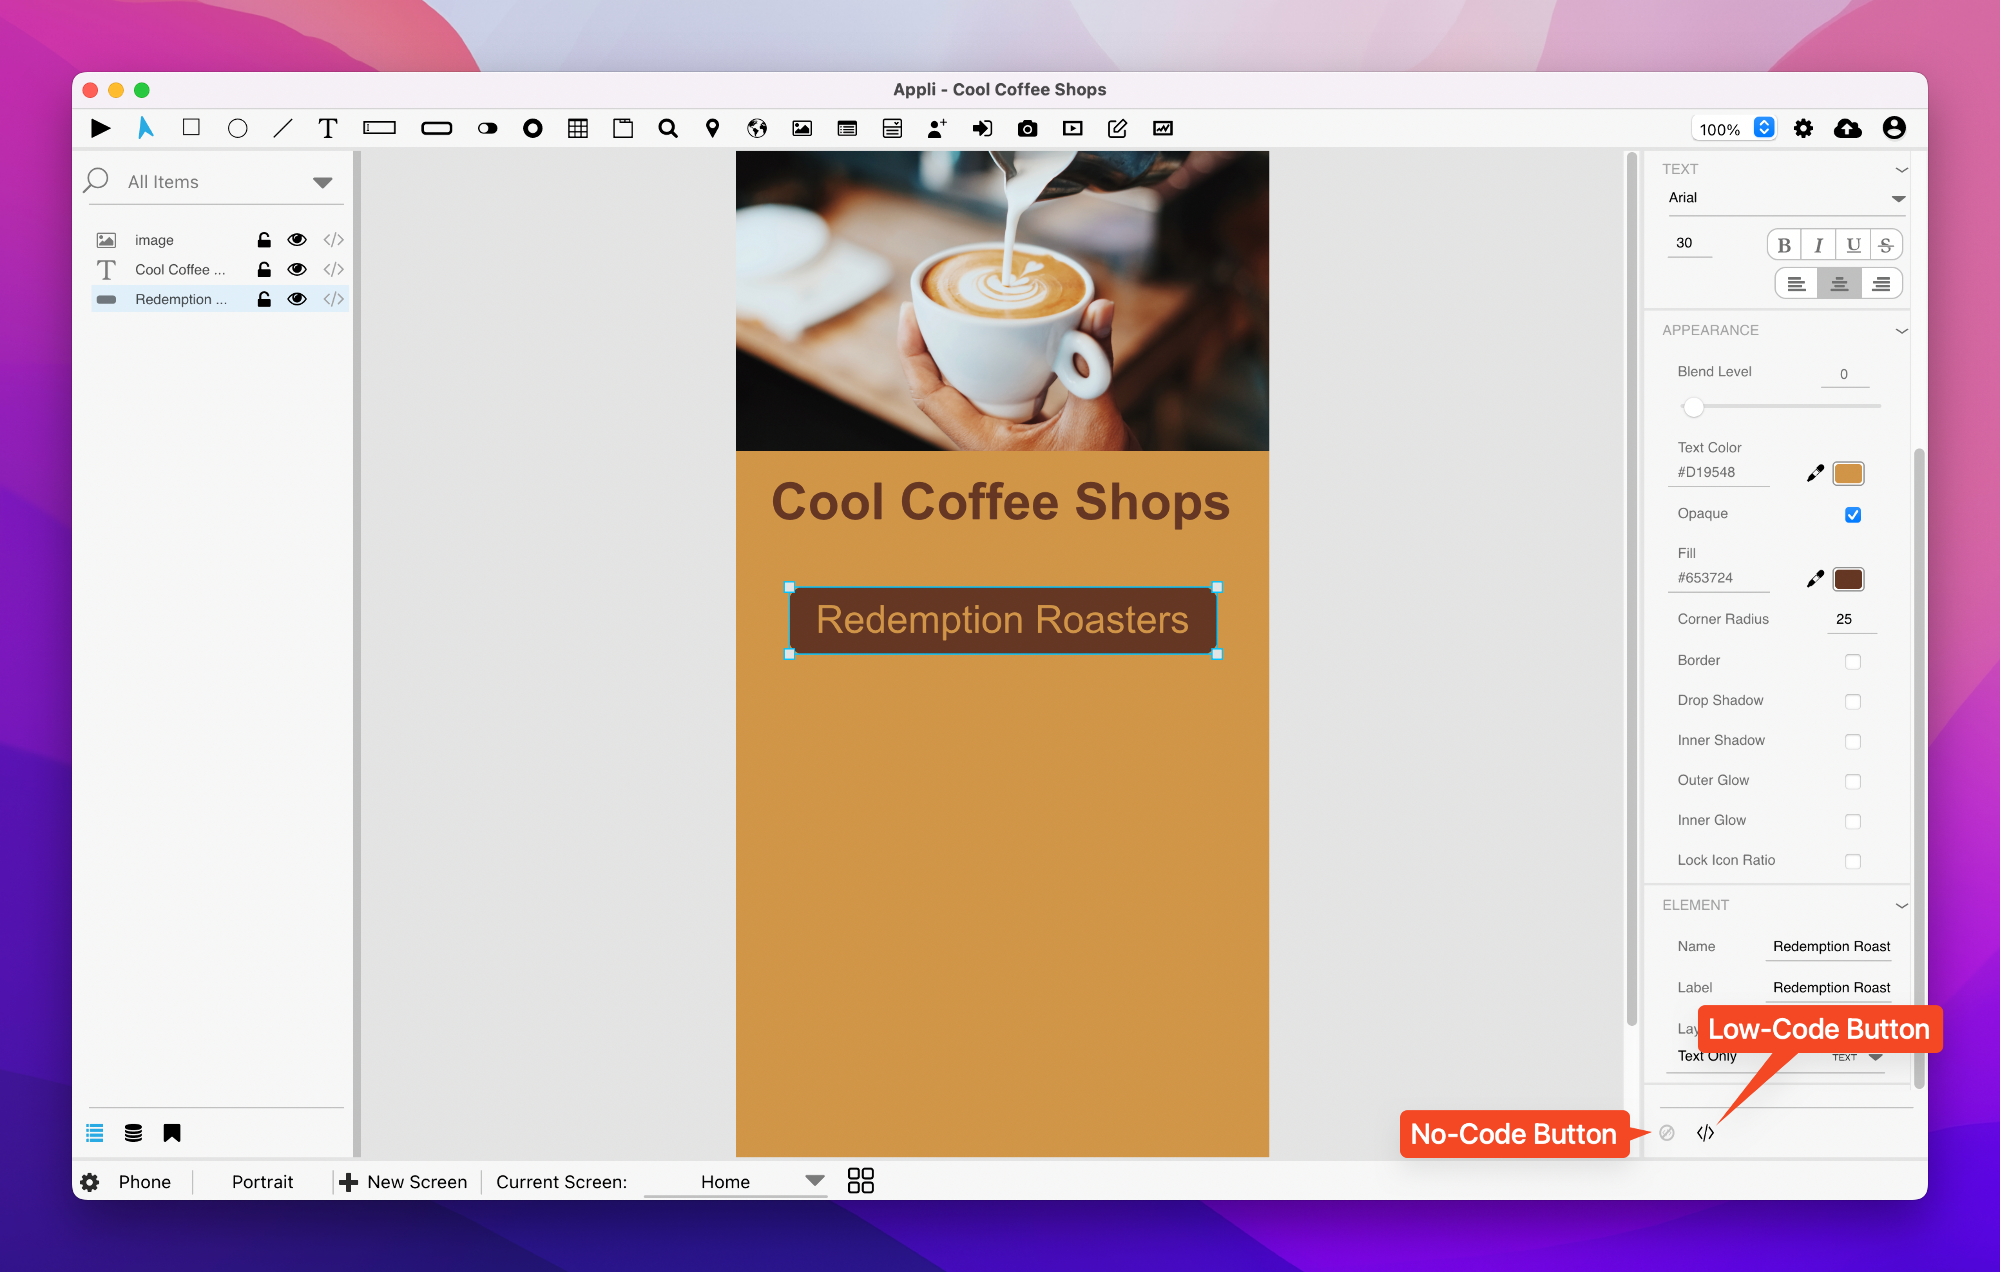
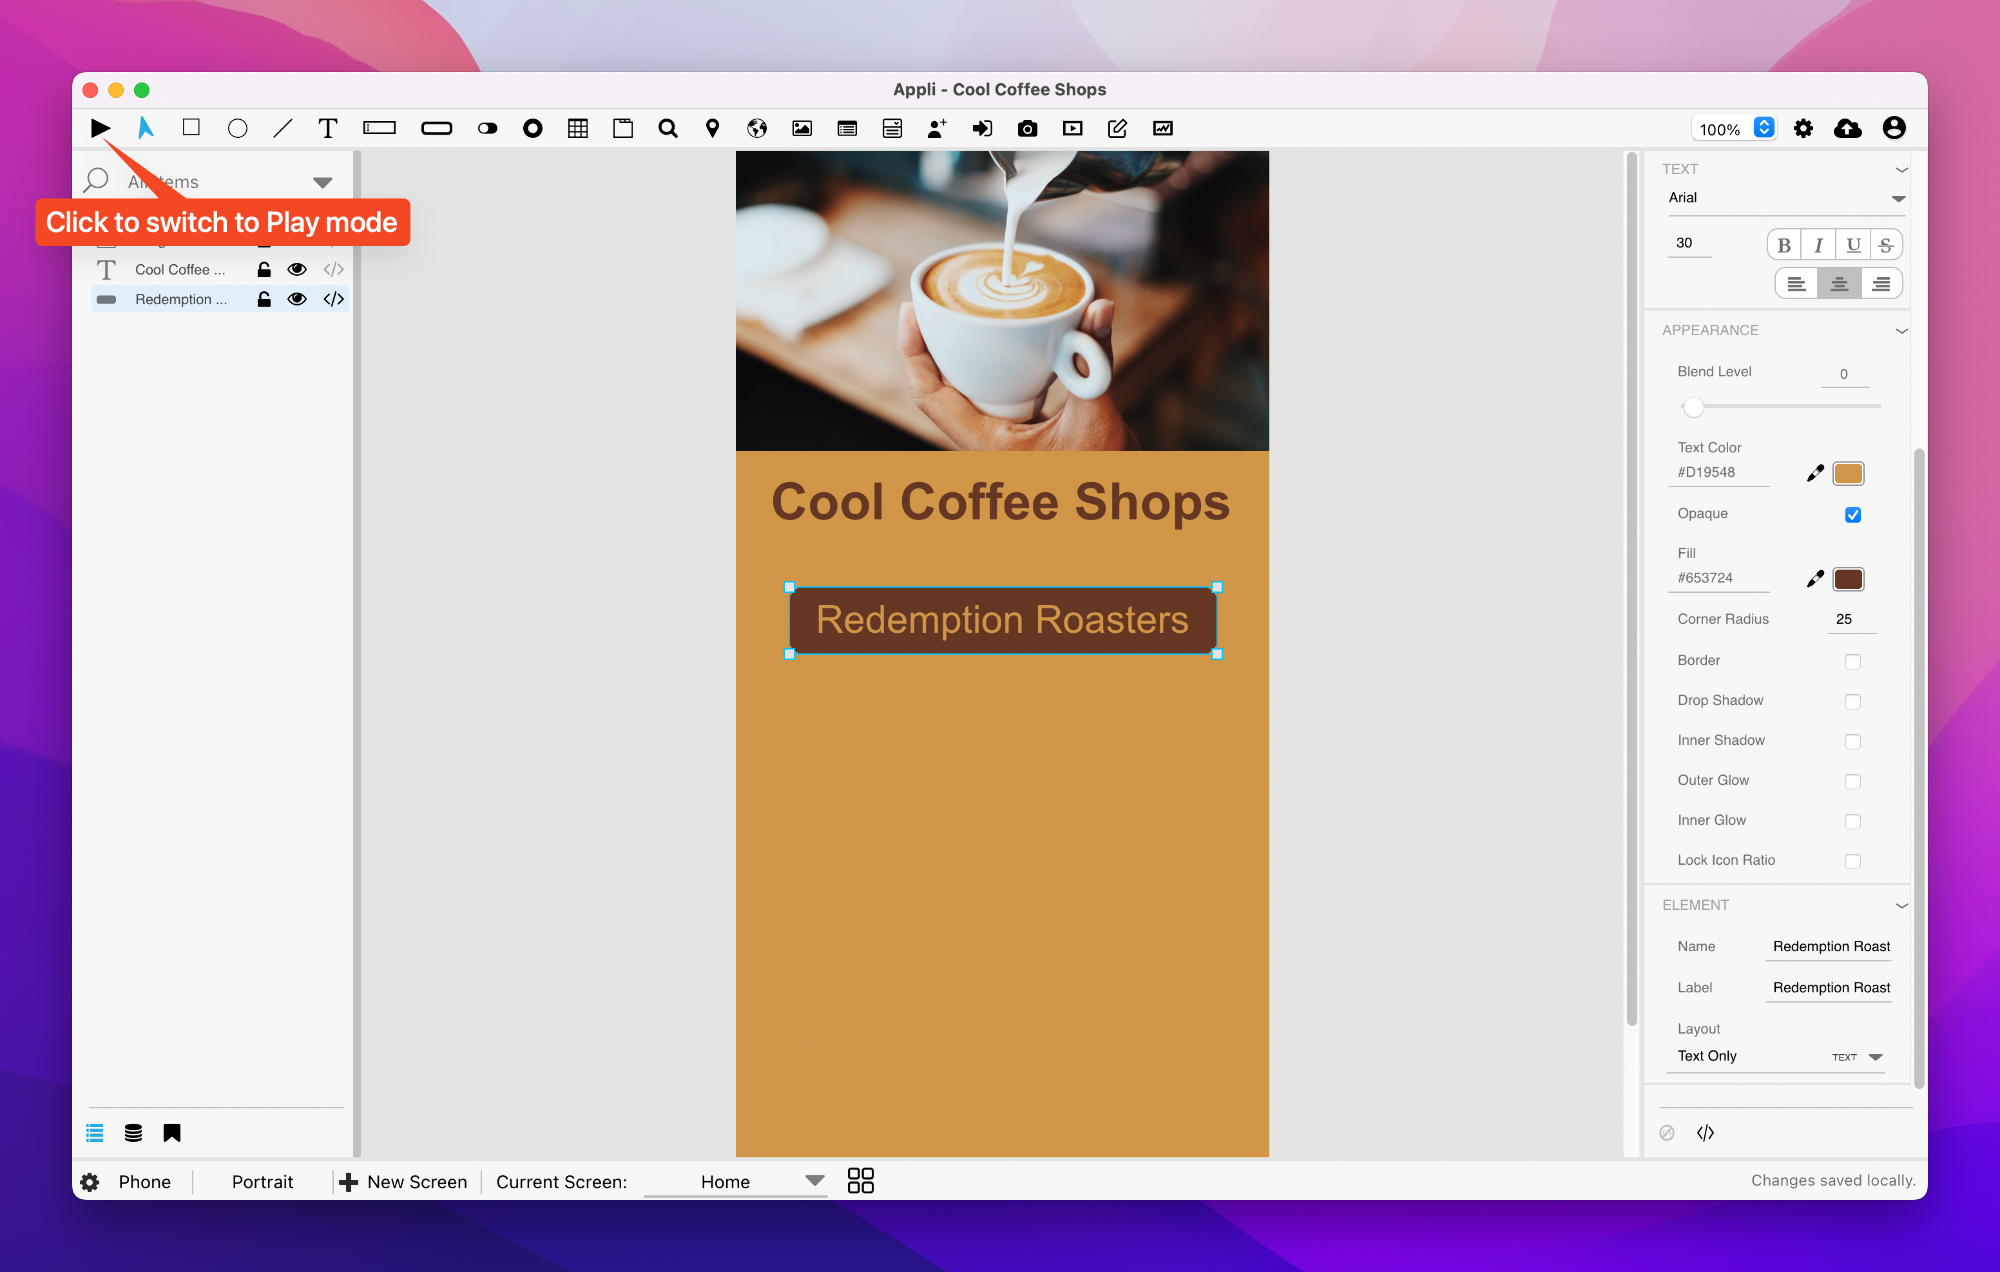
Add a button to the screen. That button is what the user will use to navigate to a specific coffee shop. We’ll make the first one, then duplicate it to make the second one. You can name that button whatever you want, but I named it Redemption Roasters because that is the name of the coffee shop it will go to.
Much like our header text, the default appearance of the button doesn’t match our application design. Let’s change it using the property inspector on the right-side of the screen.
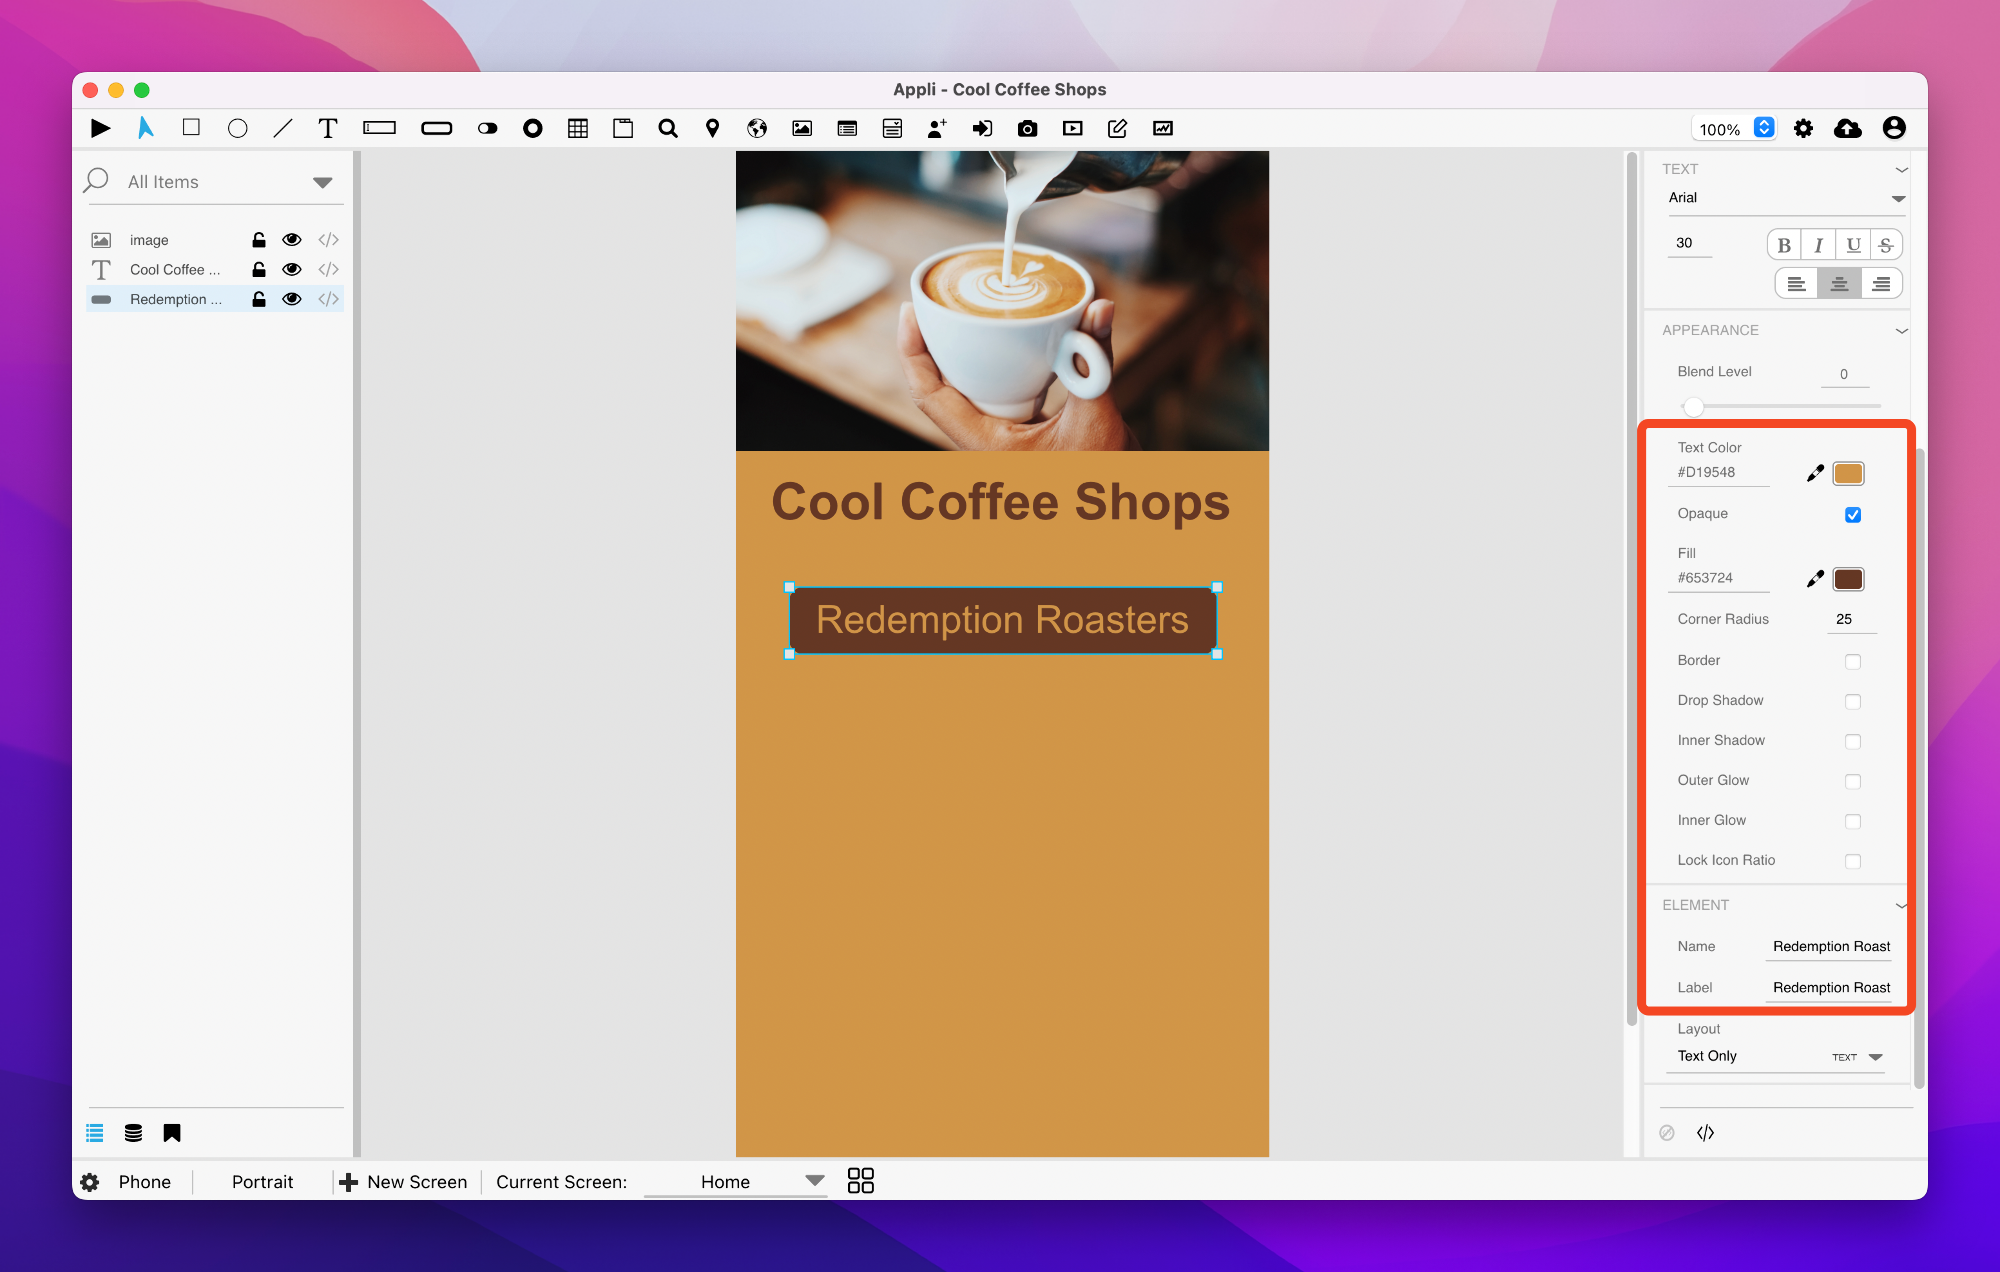
The properties we changed:
Corner Radius: 25. (be aware that)Fill Color: #653724 (we actually used the eye dropper tool to pick the text header color).Text Color: #D19548 (Used the eye dropper to pick the screen background color).
For the purposes of this demo application, we’re going to list just two shops. Change the label of the button to Redemption Roasters.
Now, we’re ready to create a our first specific shop screen.
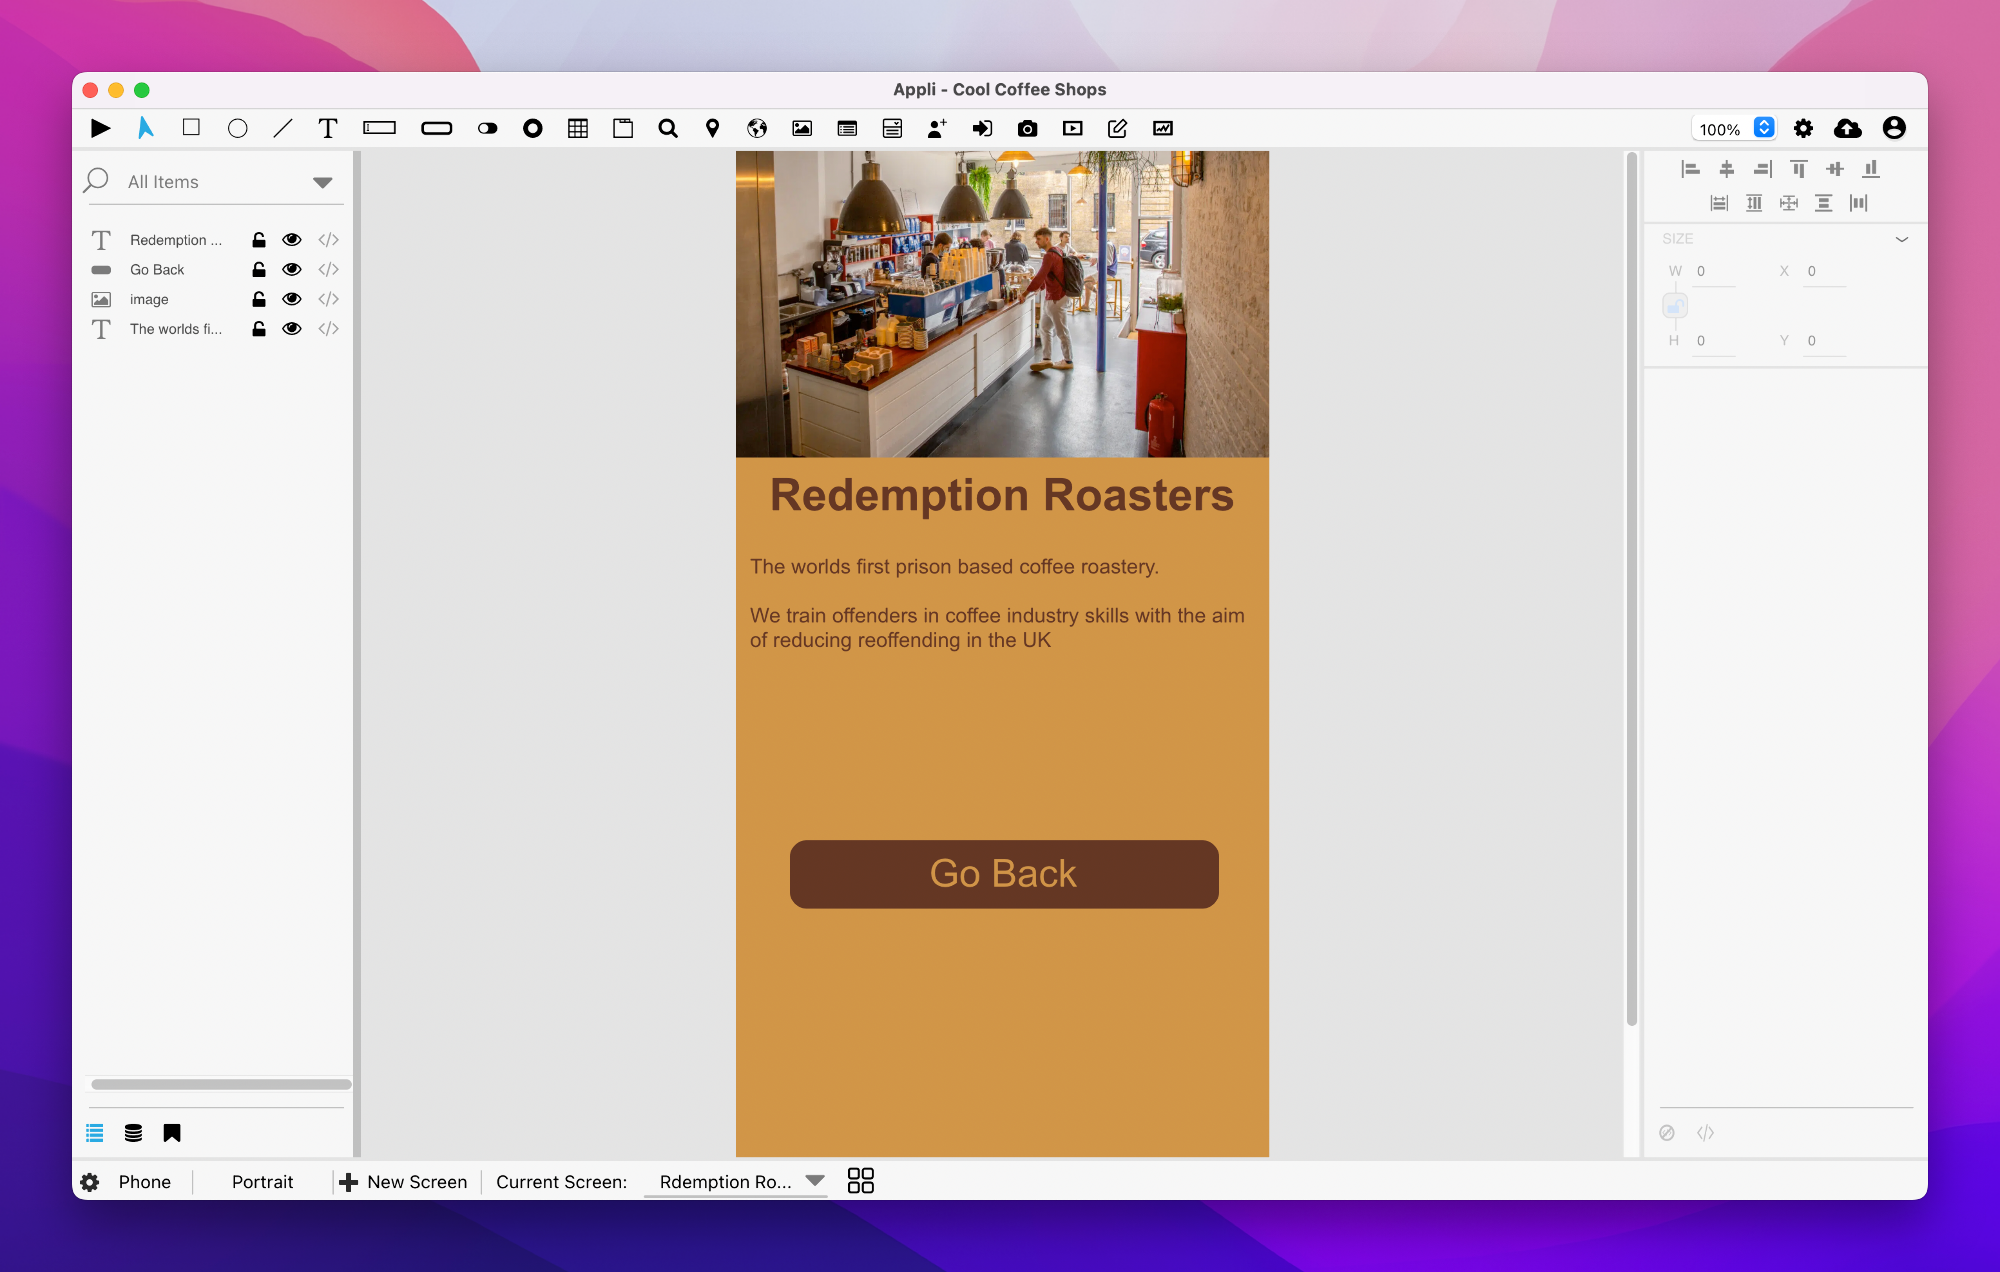
Redemption Roasters Screen
Using the controls at the footer, create a new screen named Redemption Roasters. You’ll notice that the backgroundColor already matches the previous screen, that is because they’re set per platform.
Our new screen will be quite simple. It will contain:
- A photo from the shop.
- Two text elements, one for the header, another for a description.
- A button to go back to the Home screen.
Quick tip: you can copy and paste elements between screens. I assembled the screen in the screenshot below by copying the elements from the Home screen, pasting them on the Redemption Roasters screen, and altering their text.
Make your version of the screen look like this:
With those two screens in place, we’re ready to add actions to those buttons and hook things up.
Adding an action to a button
Go back to the Home screen. Select the Redemption Roasters button. Look towards the property inspector. You’ll see the no-code button and the Low-Code button. You can use them to set actions for the selected element or alter complex behaviours that are beyond what you can set using properties.
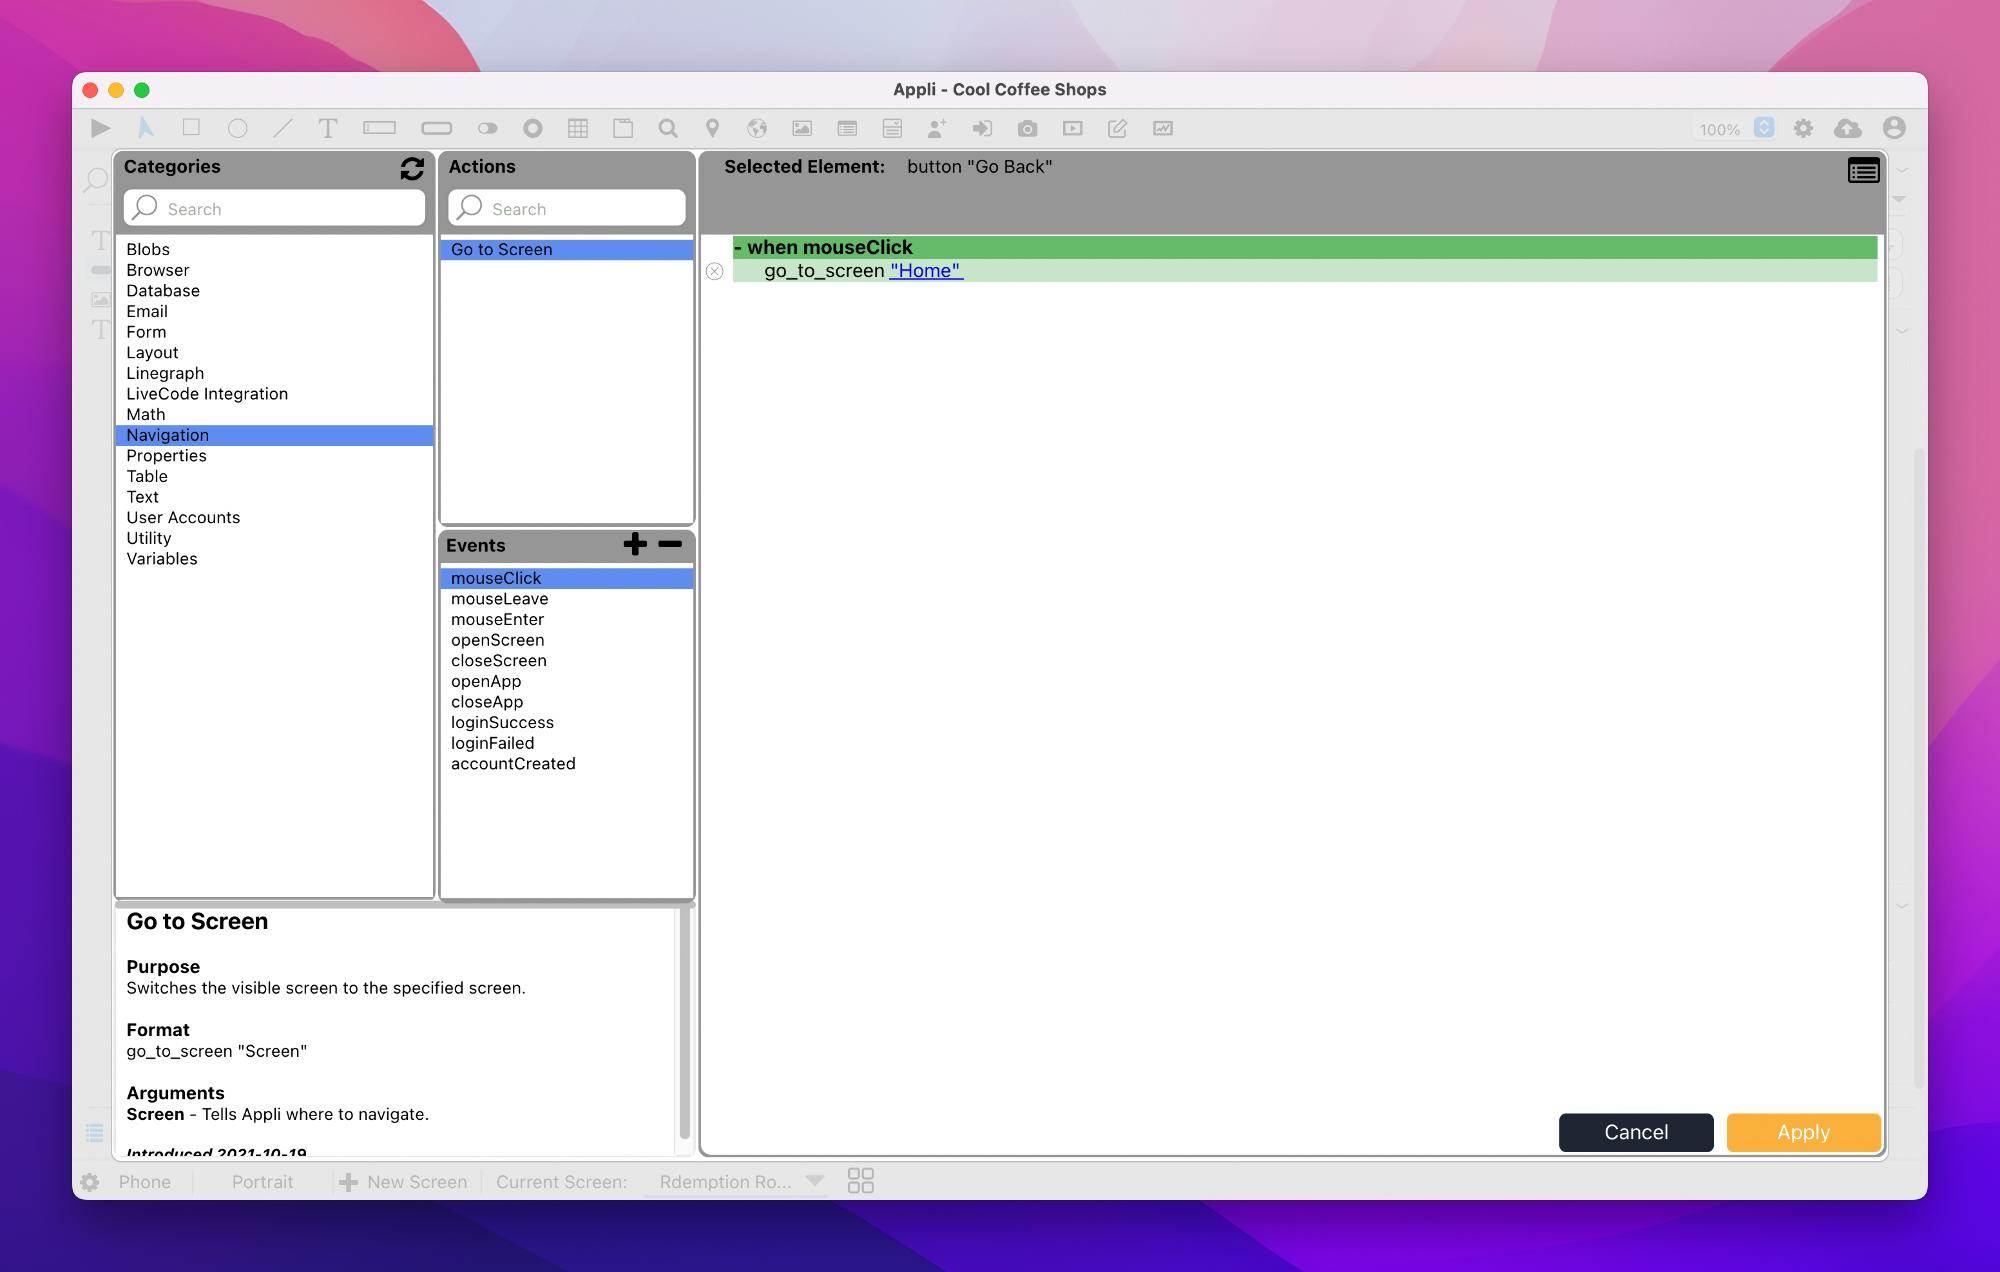
Buttons don’t have no-code features, so that button is disabled. Clicking the Low-Code button will open the Low-Code Action Script Editor:
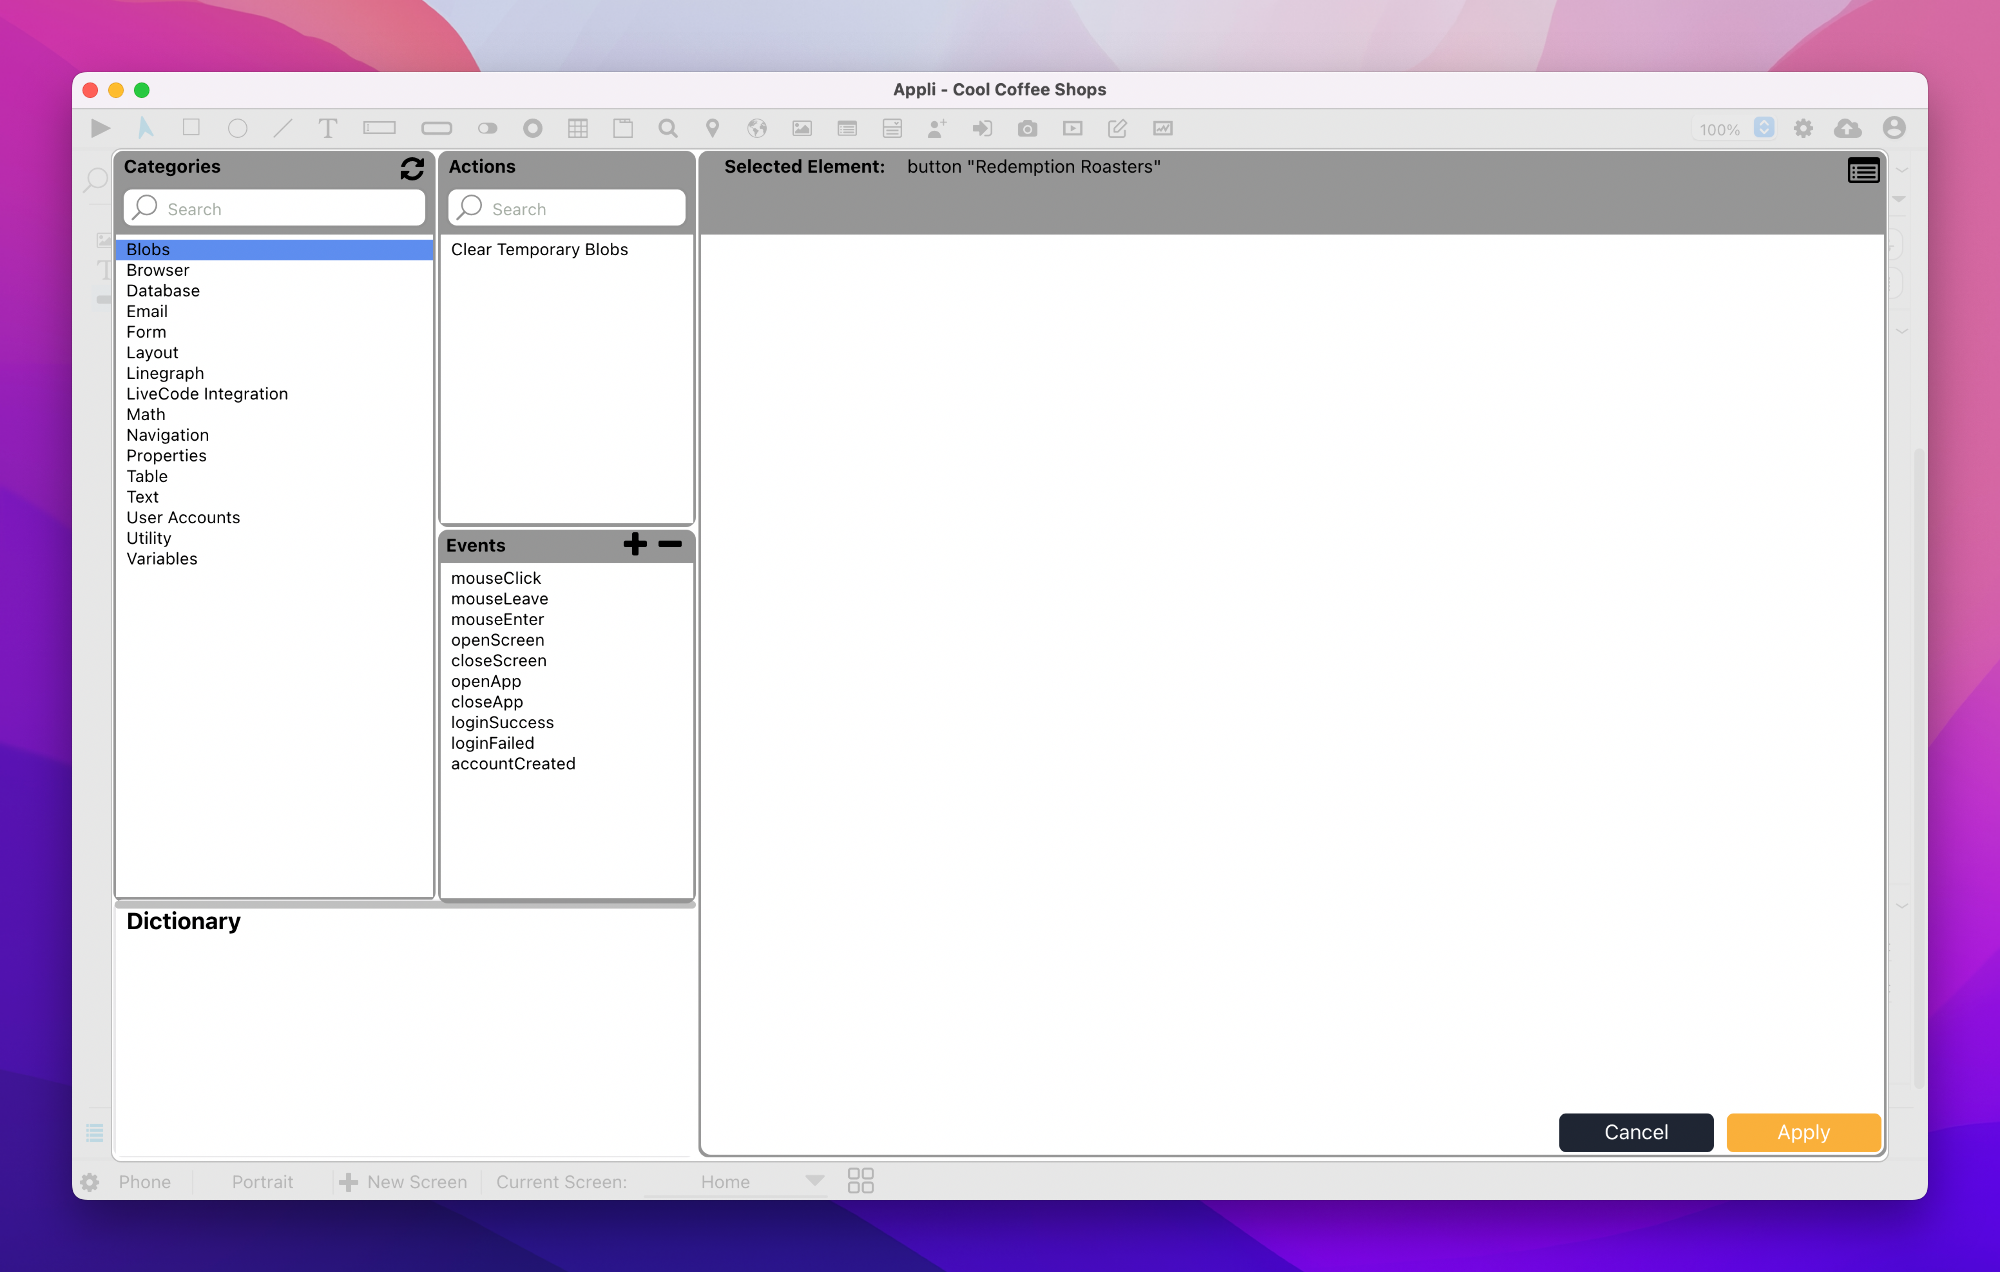
This editor is what we use to add actions to elements, you can learn more by reading the action editor documentation.
The action we want to use is Go To Screen under the Navigation category. Once you select it, the action script will be displayed in the pane on the right. Click the blue Screen link to select which screen you want the button to go to when clicked.
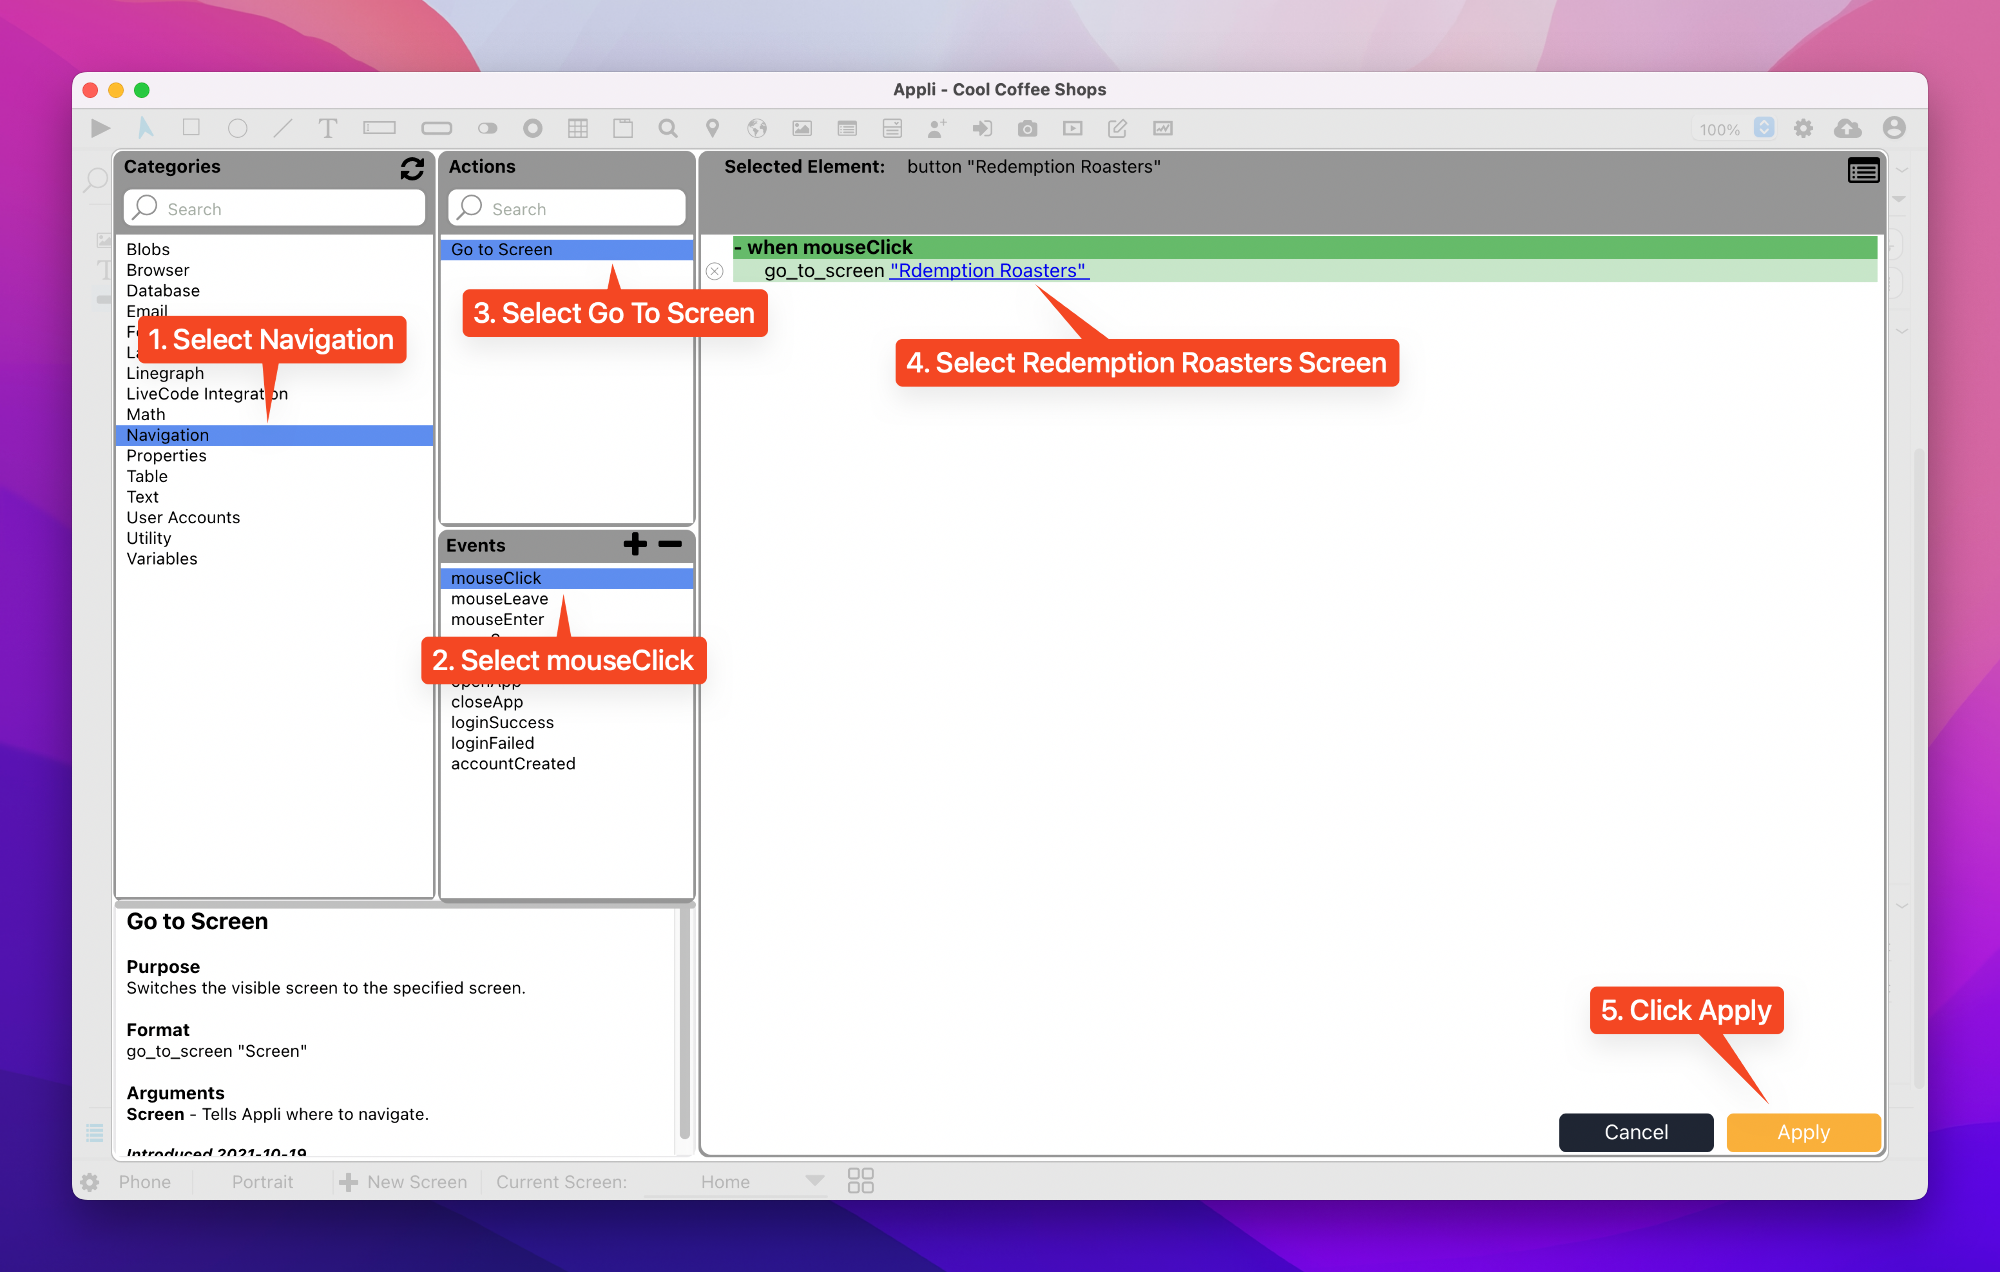
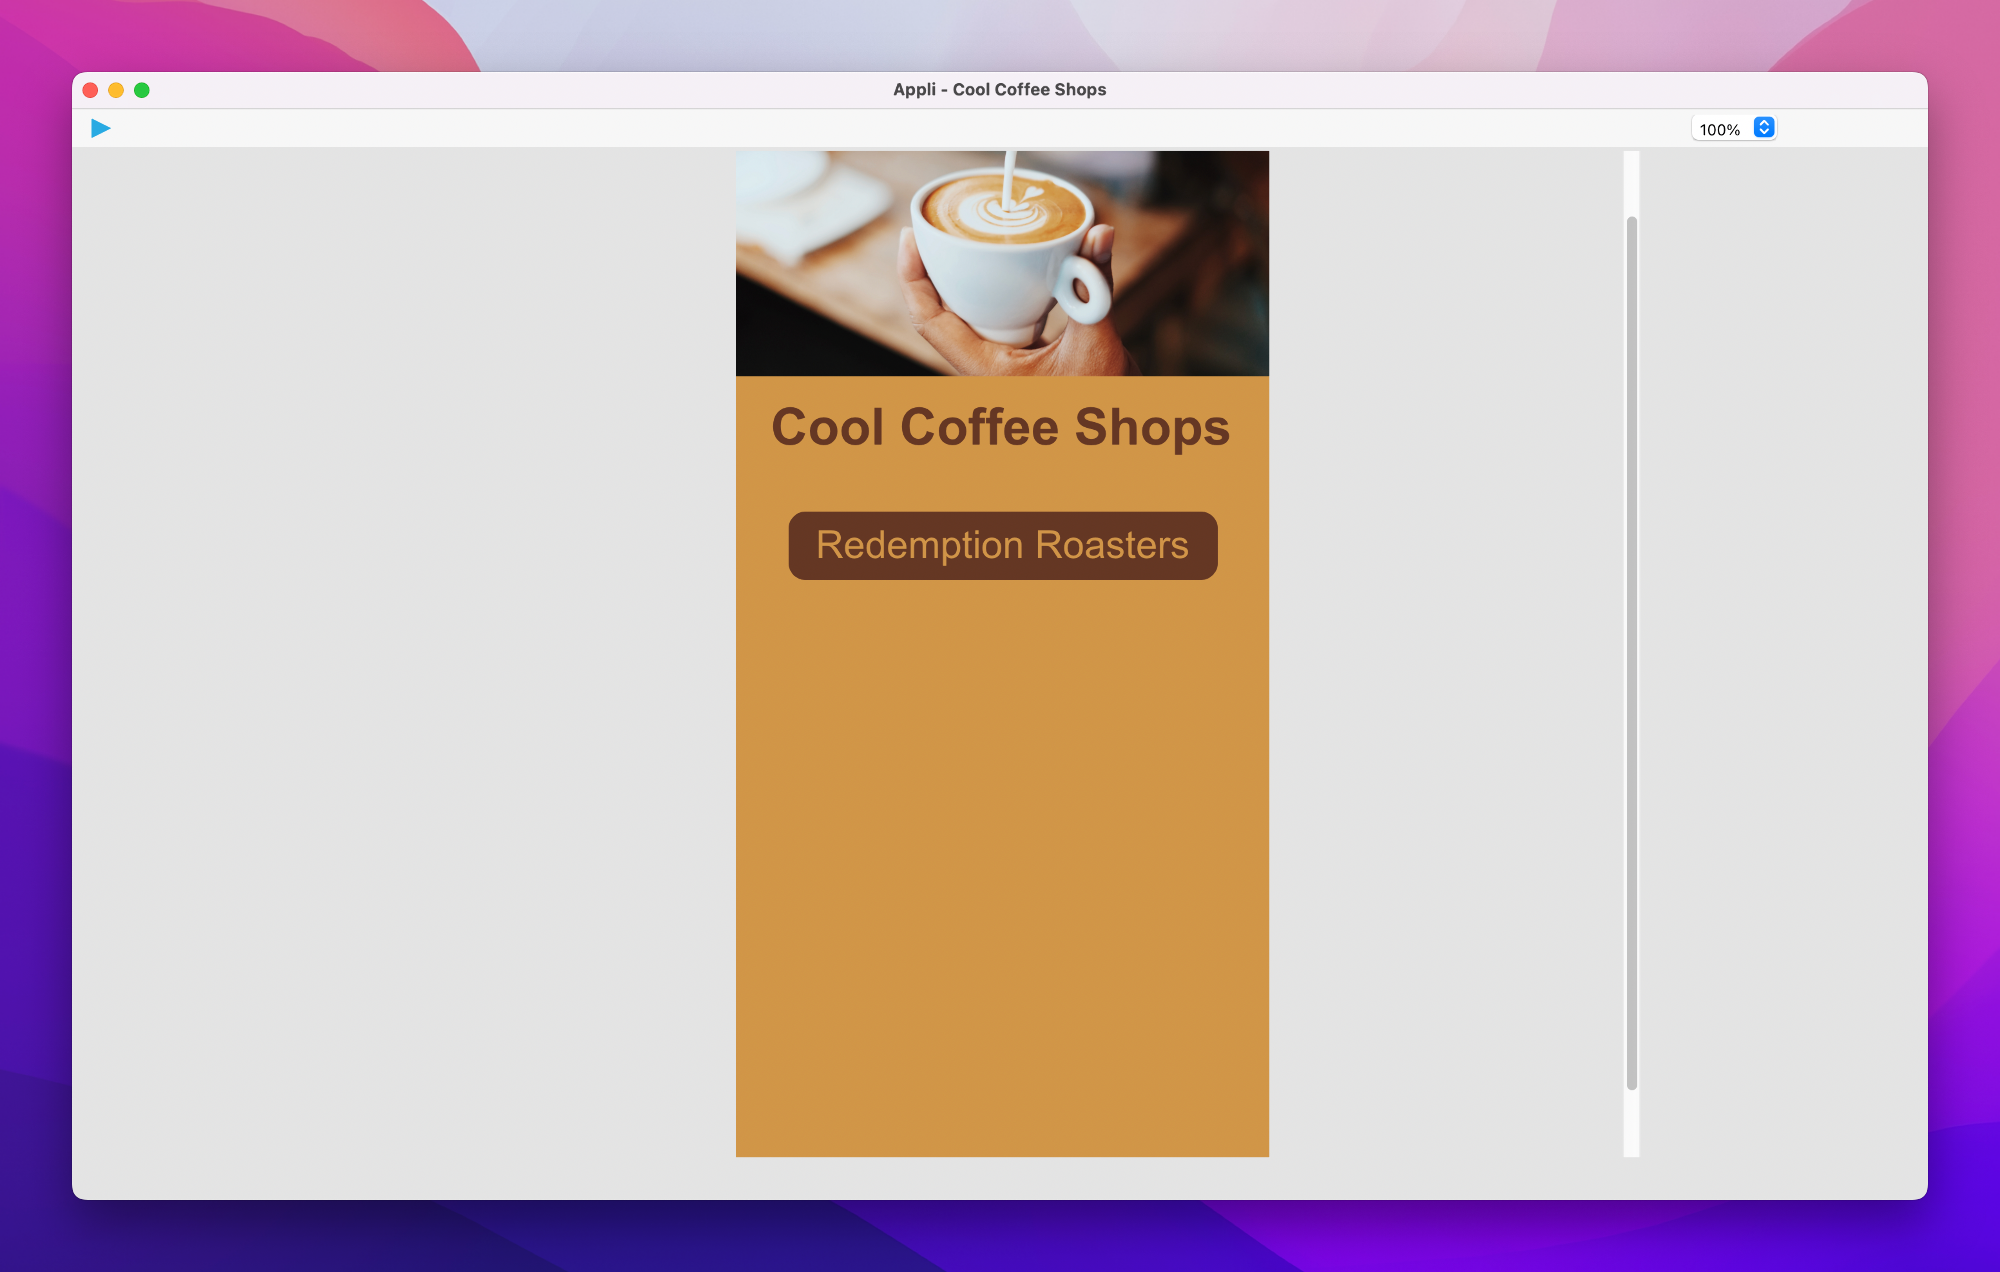
Done! You can click the Play button at the top-right of the Tools palette to switch to play mode. This mode allows you to test out your application.
Try clicking the Redemption Roasters button, it should navigate to the Redemption Roasters page.
Once you’re done with your testing, you can switch back to design mode by selecing the Pointer tool at the top-left side of the Tools palette.
Going back to the Home screen
Go to the Redemption Roasters screen. We need to wire the Go Back button so that it has an action to navigate back to the Home screen.
It is the exact same process as before. Select the element, click the Low-Code button, add a Go To Screen action and select the Home screen.
We’re done with our little app! Read on to learn how to try it out in your mobile device.
Running on mobile
You should have the Appli Player installed on your mobile device for this section of the tutorial to work.
Launch the Appli Player app, and enter your login details. They are the same as the ones you used for your Appli IDE login.

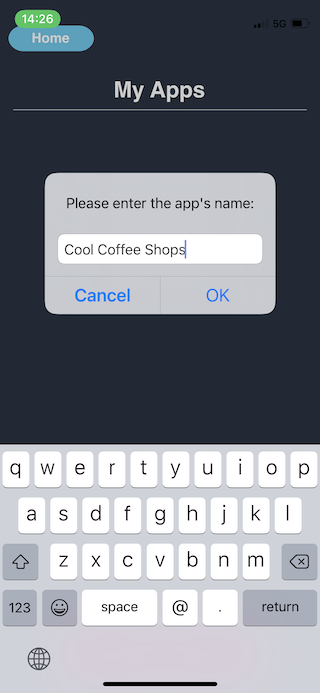
After logging in, you’ll see the Player Home Screen that lists the apps you have added to it. It doesn’t list your apps automatically. You need to click the + Add App button at the bottom of the screen…
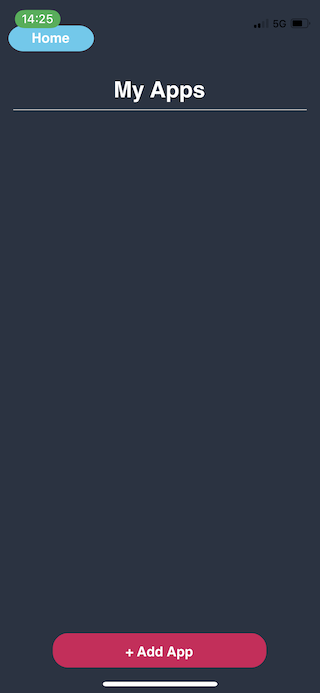
… and type in the name of the app you want to add.
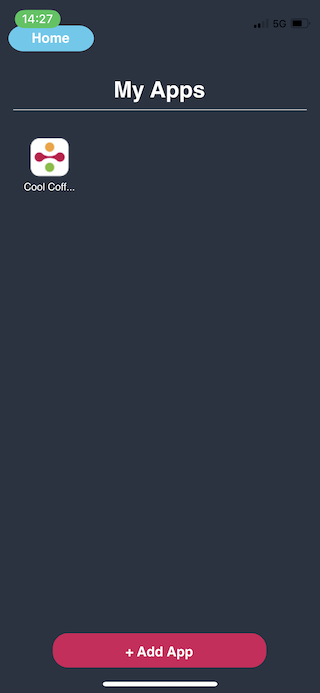
The app will be appear listed on the Home screen.
Clicking on it will launch your app. You can interact with it. There is a floating draggable round button that you can use to refresh the app in case you made changes since launching it, and other controls to sign out and go back home.
Final words and where to go next
You might have noticed that I mentioned that we would add two coffee shops to this app. That second coffee shop page is your homework. Add in your favourite coffee shop, or any other kind of shop, to the app and test it on the Appli player.