Data Management
Appli offers robust data management features thanks to the many years of experience that the team spent developing LiveCloud. Appli itself is backed by the LiveCloud database. When you save your application to the Cloud, what happens behind the scene is that your app is stored in LiveCloud, where it can be retrieved by the Appli Player.
The same powerful database system that powers Appli is available to you as a developer. It is easy to use and matches Appli development workflow in a way that other database systems simply can’t.
Tables
Tables represent a collection of data in Appli. You can think of them in the same mental model you use for spreadsheets or a stack of forms. A collection of structured data you can manipulate and query to find the information you need.
Your app can have as many tables as you need, and tables can store their data locally and on the cloud. Appli provides a robust set of synchronization methods to make sure your local and cloud data match up.
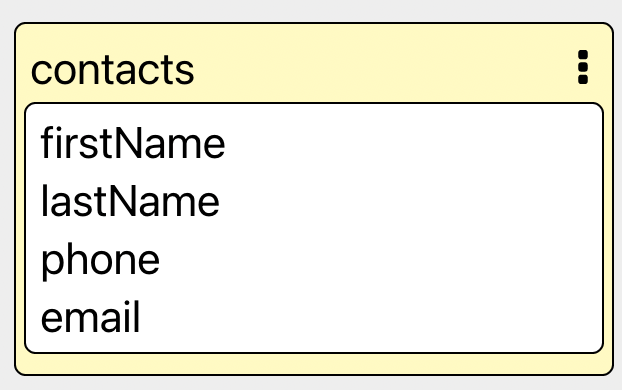
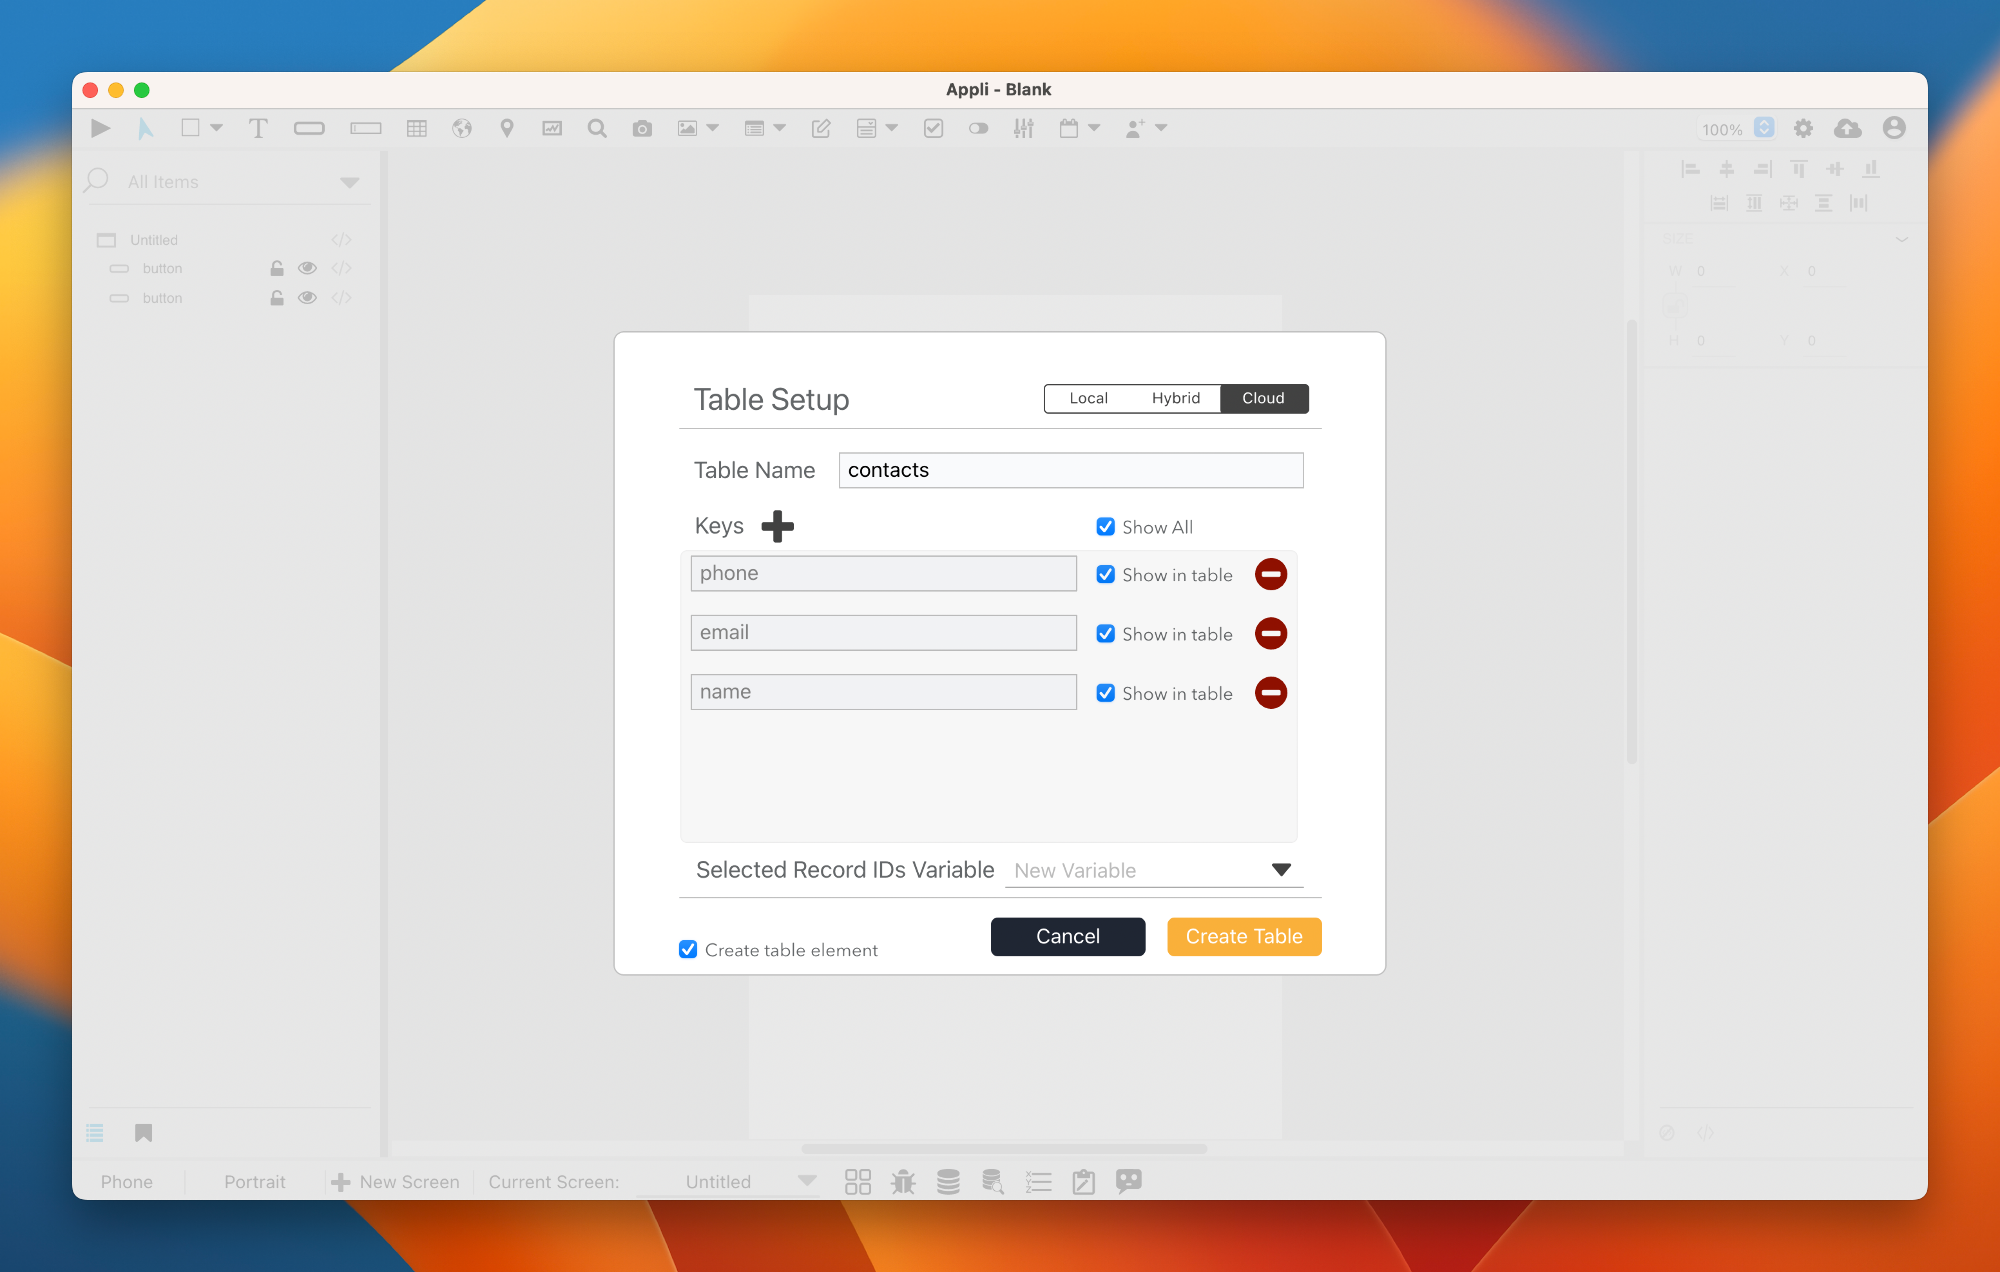
Each table has a set of keys. Much like a form would have fields. A good example is a contacts table. It could look like this:
Creating a new table from scratch
The Data Modeler button is a series of stacked discs on the footer. Clicking it opens the Data Modeler.
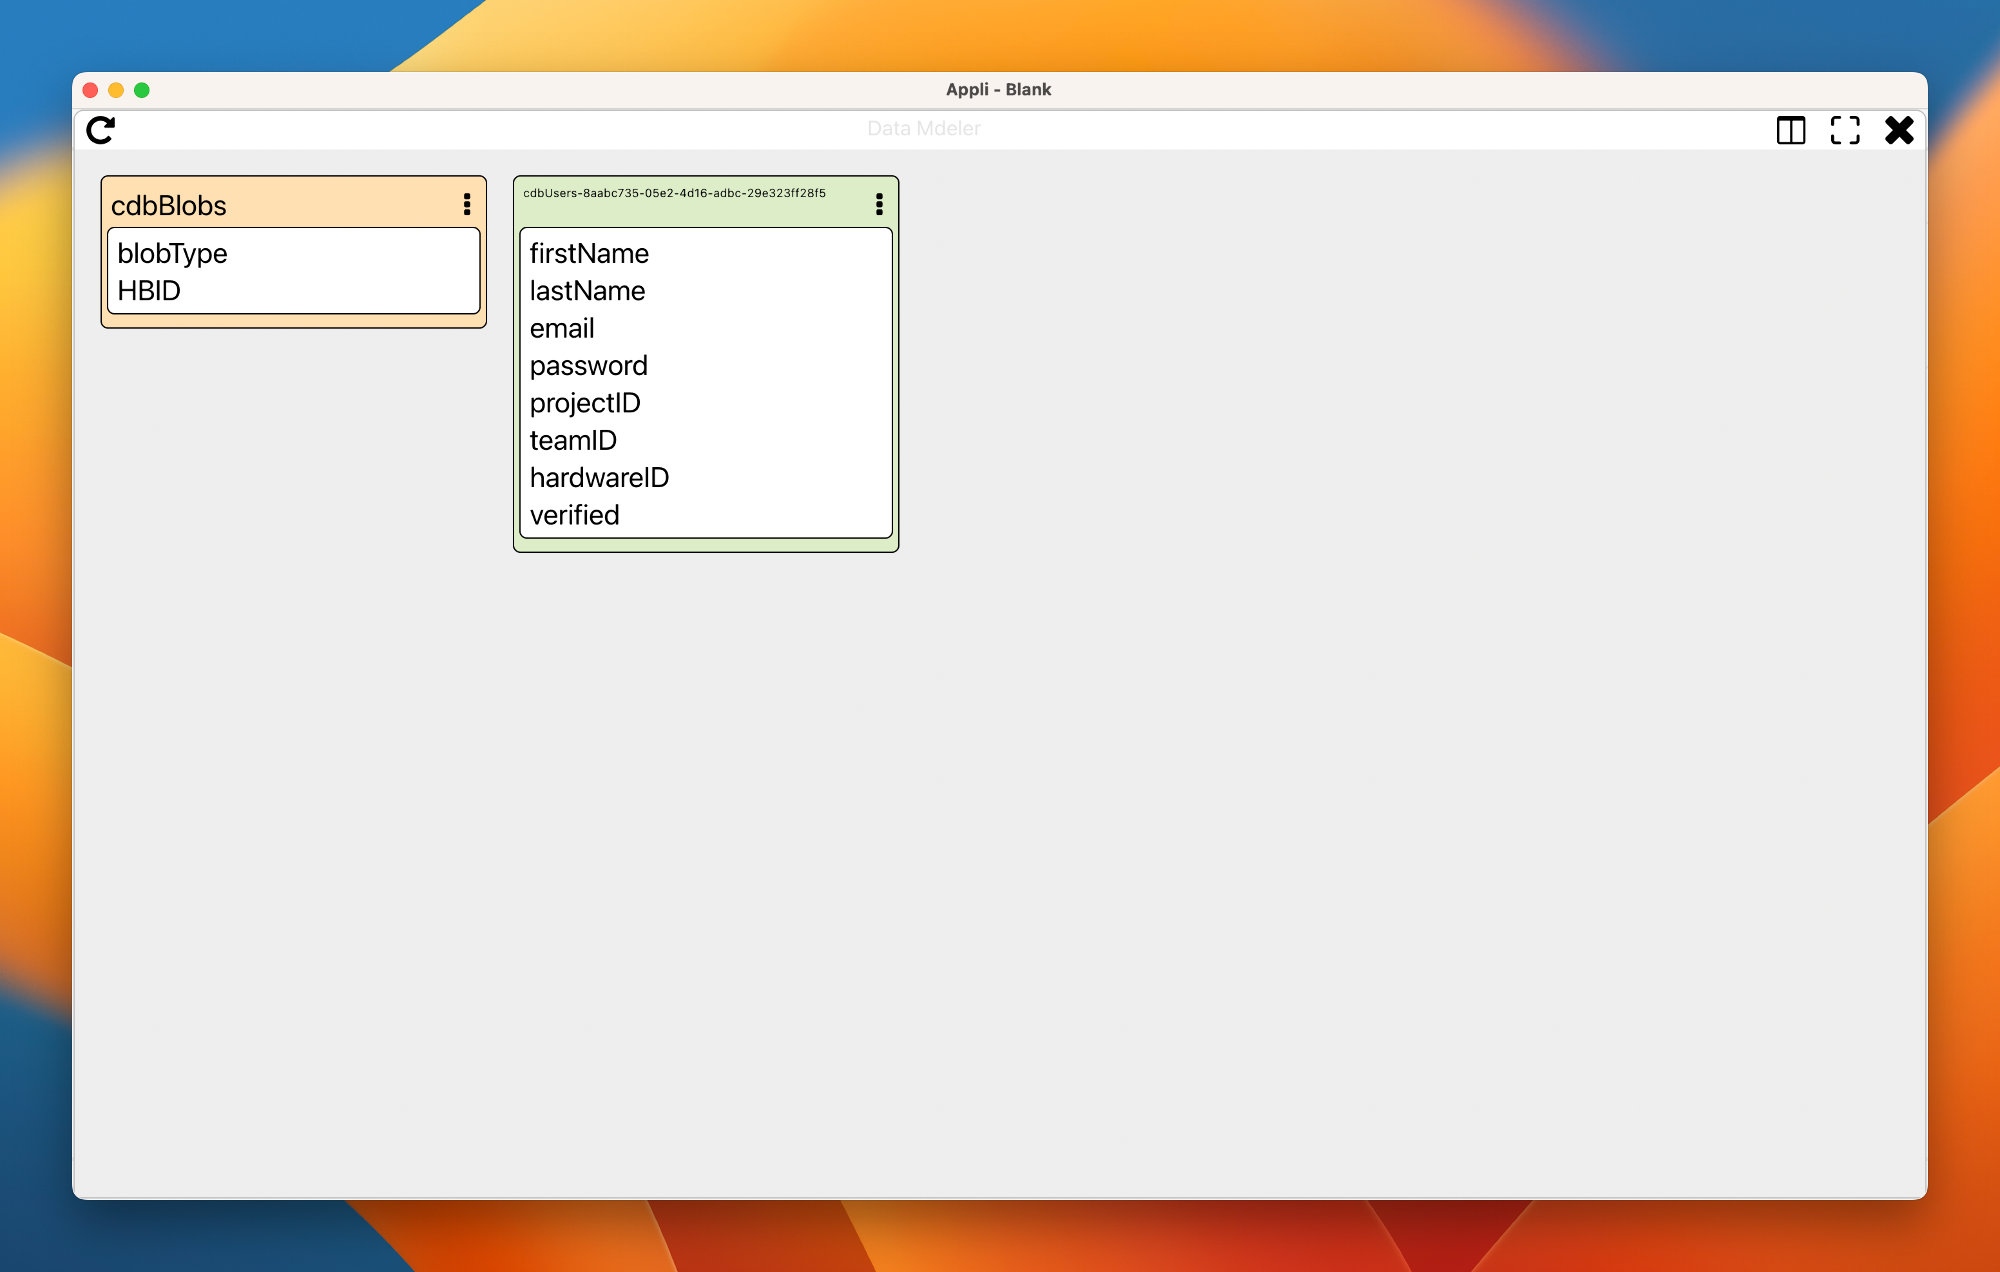
Attention: All Appli apps have two tables from the start, one to hold users and another to hold binary data. They are called cdbBlobs and cdbUsers. You will see them on the Data Modeler.
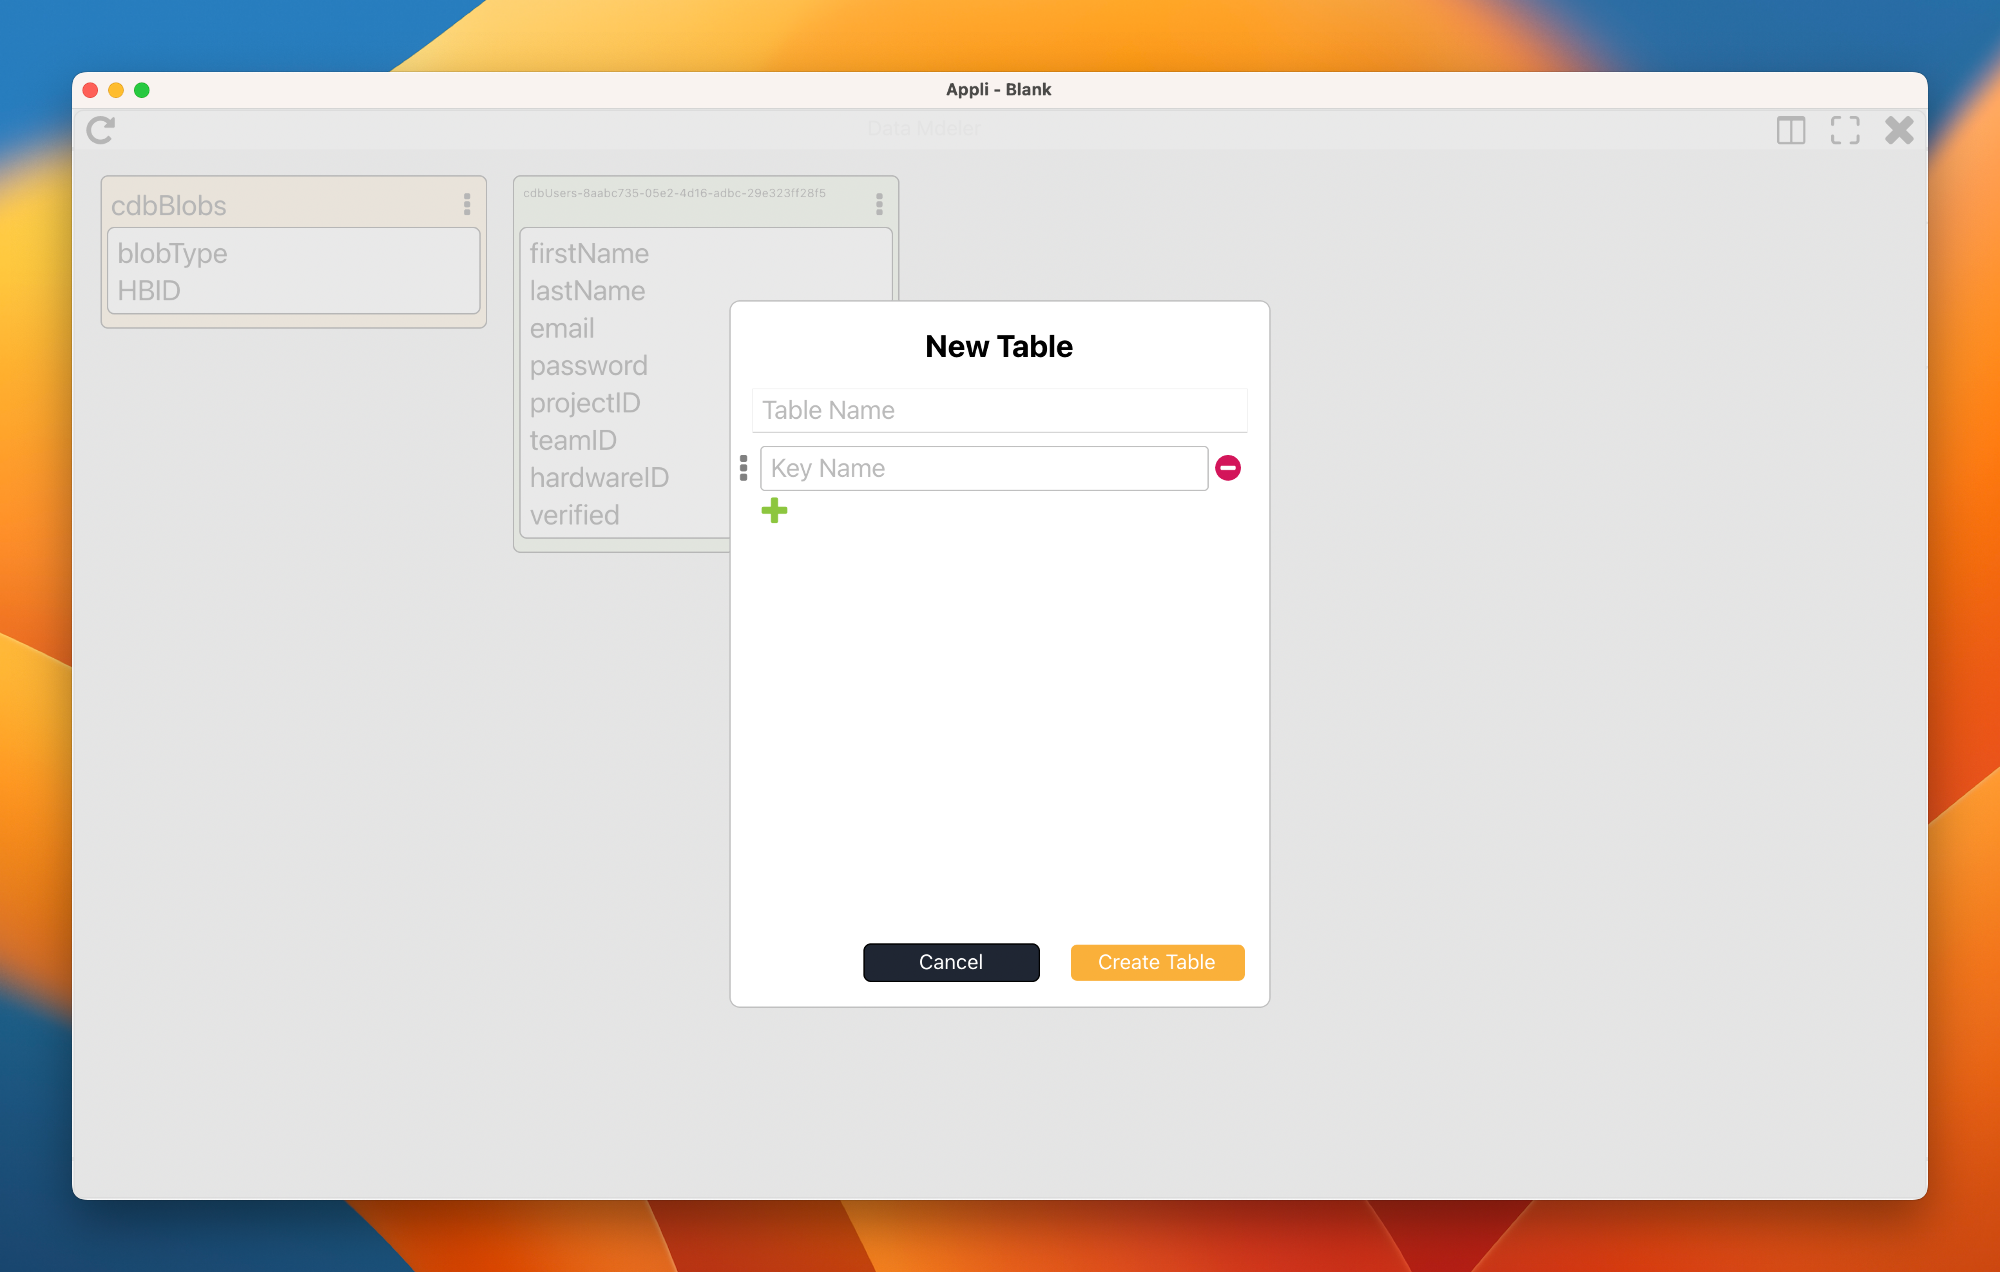
Create a new table by right-clicking the background and selecting the Add New Table from the contextual menu.

Once you have the Table Setup dialog open. You can fill in your table name and add keys.
Using CSV files to bootstrap a database
A good way to bootstrap a table from existing data is to export that data using the CSV format and dragging and dropping it into the playground (be aware, you can’t drag and drop a CSV file into the Data Modeler, you need to do it in the playground).
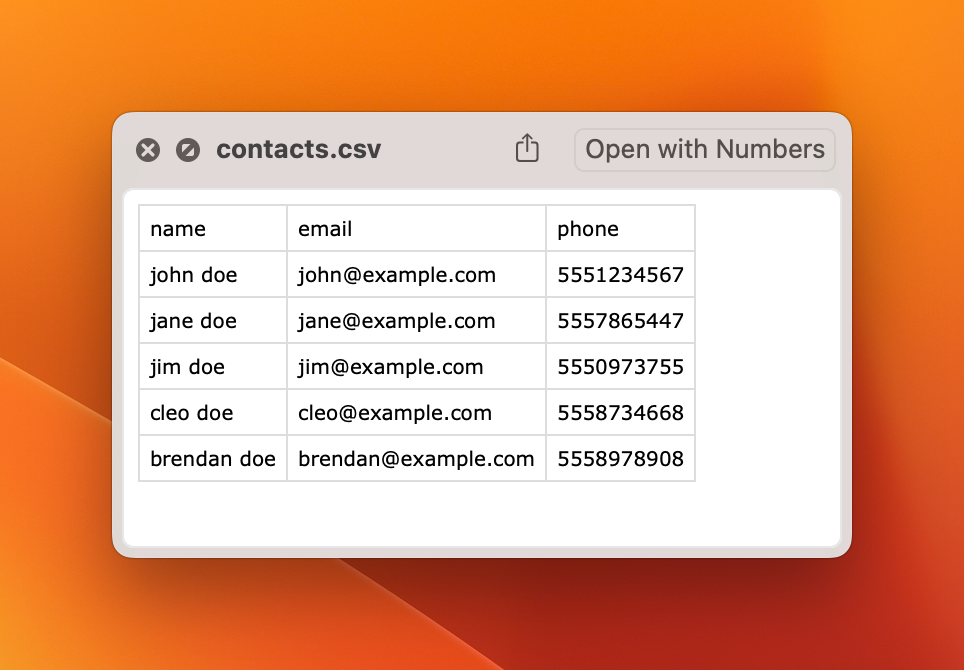
Appli will process the CSV file and open the Table Setup dialog pre-filled with the data from that file.
Notice that this also gives you the option of creating a table element linked to that table. Select the source of truth for the table element — local, cloud, hybrid — and there is a checkbox to flag if you want the table element or not. That is a fast and easy way to create tables, import data into them, and display that data in an app with a single action.
Binding data to elements
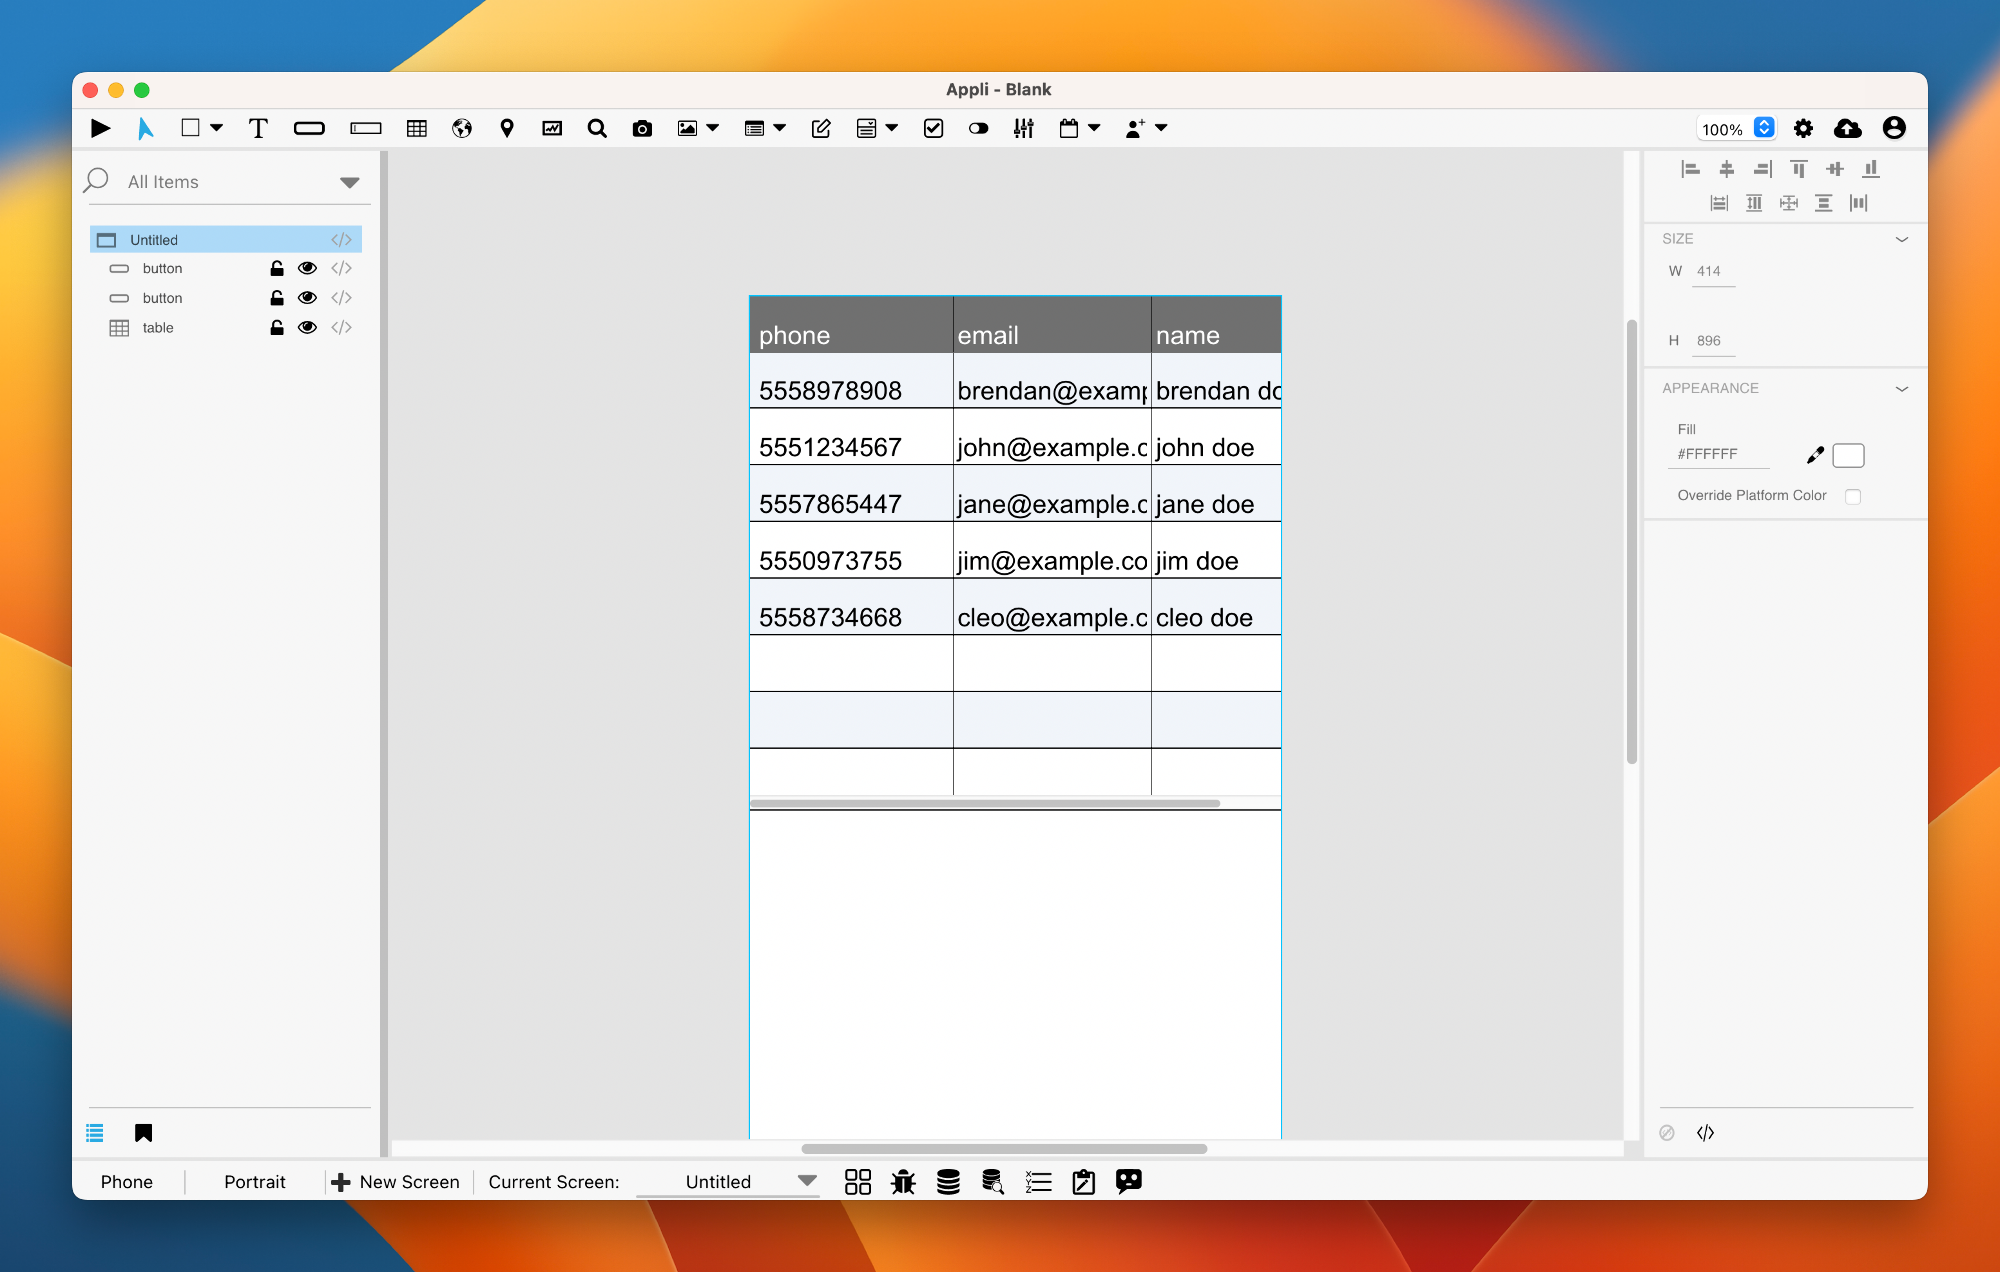
Once you have a table, you can use no-code to bind table data to elements. An obvious element to use is the table element. Using no-code, you can select which table to display and which columns to use.
Displaying records using the layout element
A table can be connected to a layout element Using no-code. Once connected, the elements placed inside the layout can be bound to data from the table.
The layout can be configured in a way that it is tied to a specific record in the table or display multiple records as a list. Use the multiple rows property to change between these two modes. Once that property is set to the desired value, the interface for no-code setup will change to reflect that option.
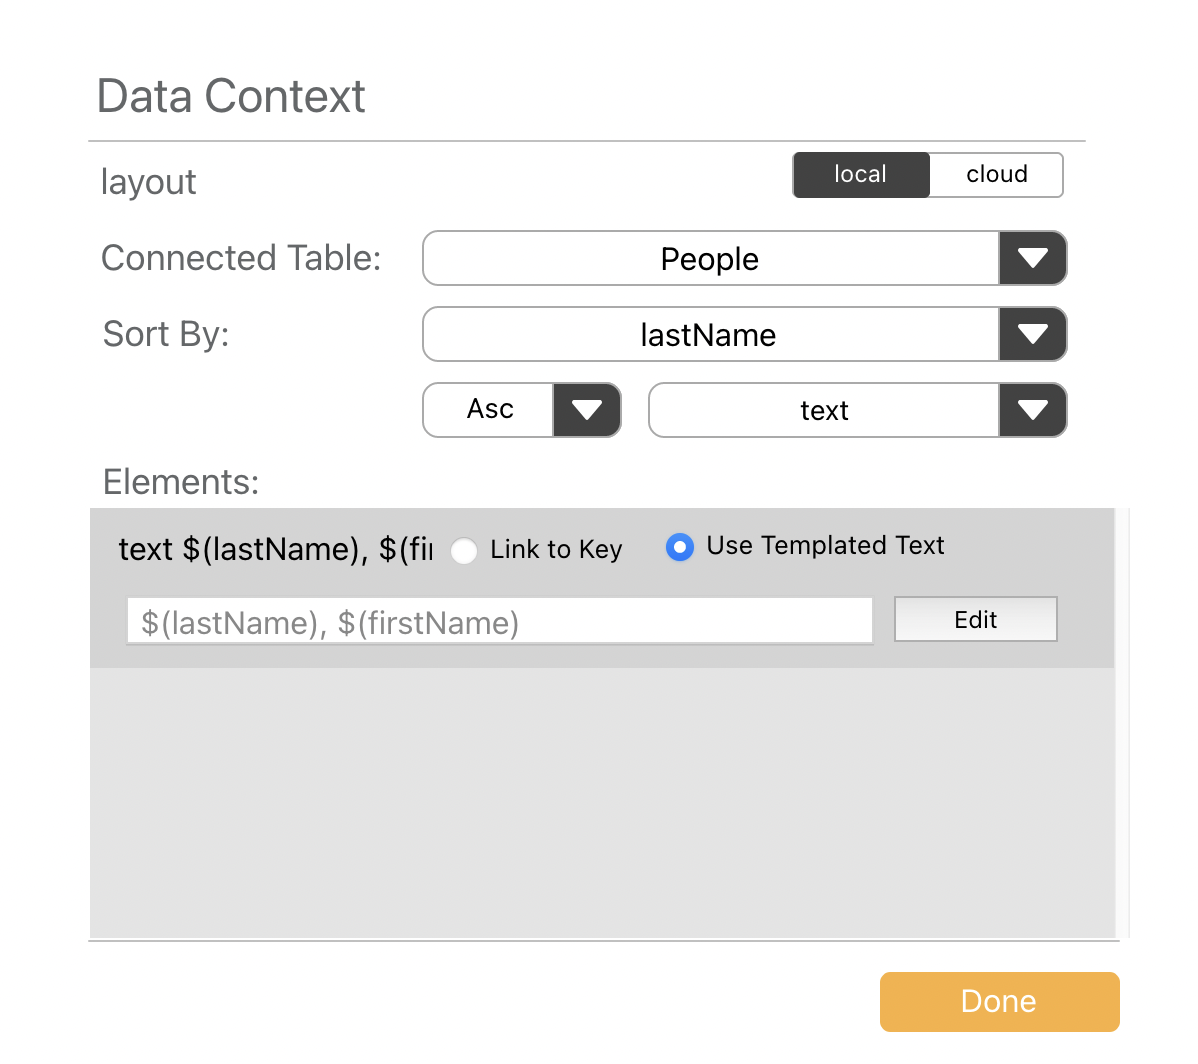
Elements inside the layout can be linked direct to keys from the table or use template text to interpolate data from the table into a formatted text.
For more information, check the Data Management tutorial for a hands-on guide about building database-aware apps.
Manipulating data
Low-code has a category just for database manipulation. Everything is fully documented with dictionary entries for each action.
Using forms to edit and create records
Similarly to layout elements, form elements can contain other elements inside it. The elements inside a form share a database context. They can be connected to a table via no-code configuration and can be further linked to a Record ID set using a combination of low-code actions:
set variable from context: to store the record id into a variable.set the property from variable: to set thedataRecordIDproperty of the form to the value in the variable set withset variable from context.
Elements inside the form will have access to the data from that record. Any change to them using bound fields or low-code can be saved back to the same record.
A form that is connected to a table but doesn’t have a
dataRecordID set can create new records in the connected
table via:
submit form to databasewhich picks data from the form and save to the database.
For more information, check the Data Management tutorial for a hands-on guide to building database-aware apps.
This chapter was last updated on Thu 21 Sep 2023 18:21:05 BST