Tutorial: Understanding Layouts
In the database tutorial, we didn’t explore layouts much, even though we made use of one to list records. Layouts are a flexible container that can be used to:
- Create scrollable regions in your app.
- List a single record.
- List multiple records.
Mastering layouts is an essential skill to be an effective developer, especially if you are working on mobile layouts. Building a complex UI on a small screen becomes much easier once you factor layouts into your app.
Using a layout is the most common way to display database records. While using them to create larger than screen sections is good, understanding how to display records with them is the most important aspect of this chapter.
Layouts are containers
A Layout is a container for other elements. After placing it on the playground, one should place elements inside it.
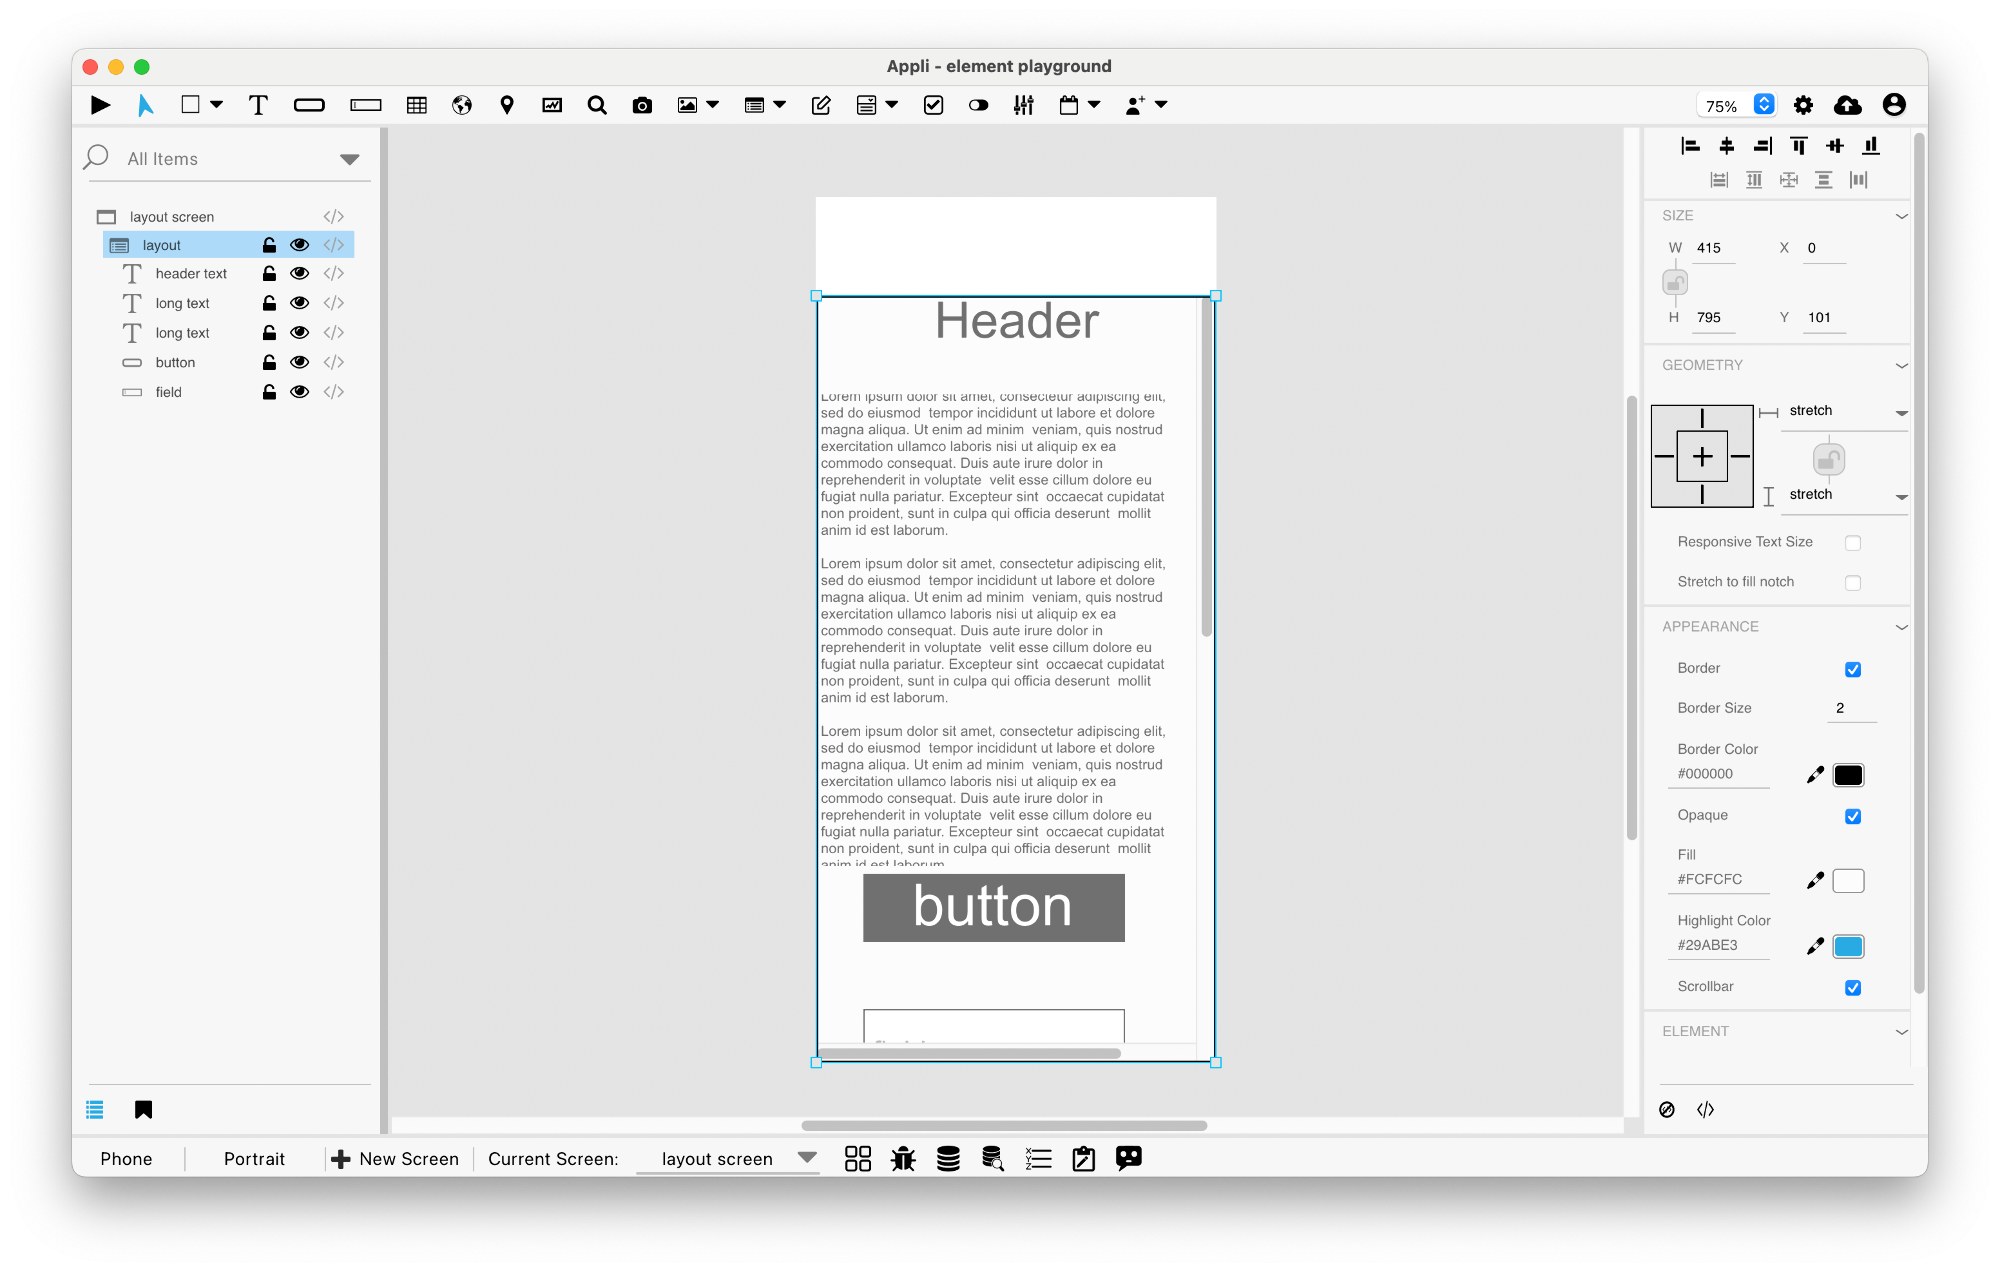
Above you can see a simple layout with text elements inside it. Notice that the layout is selected in the playground. You can see the blue rectangle showing the layout boundaries and the elements contained inside the form are shown under it in the project browser.
Adding elements to a layout
To add an element to a layout, either draw the element inside the layout or move it into the layout boundaries. You can also drag an element in the project browser and place it under the layout.
Creating a scrollable region
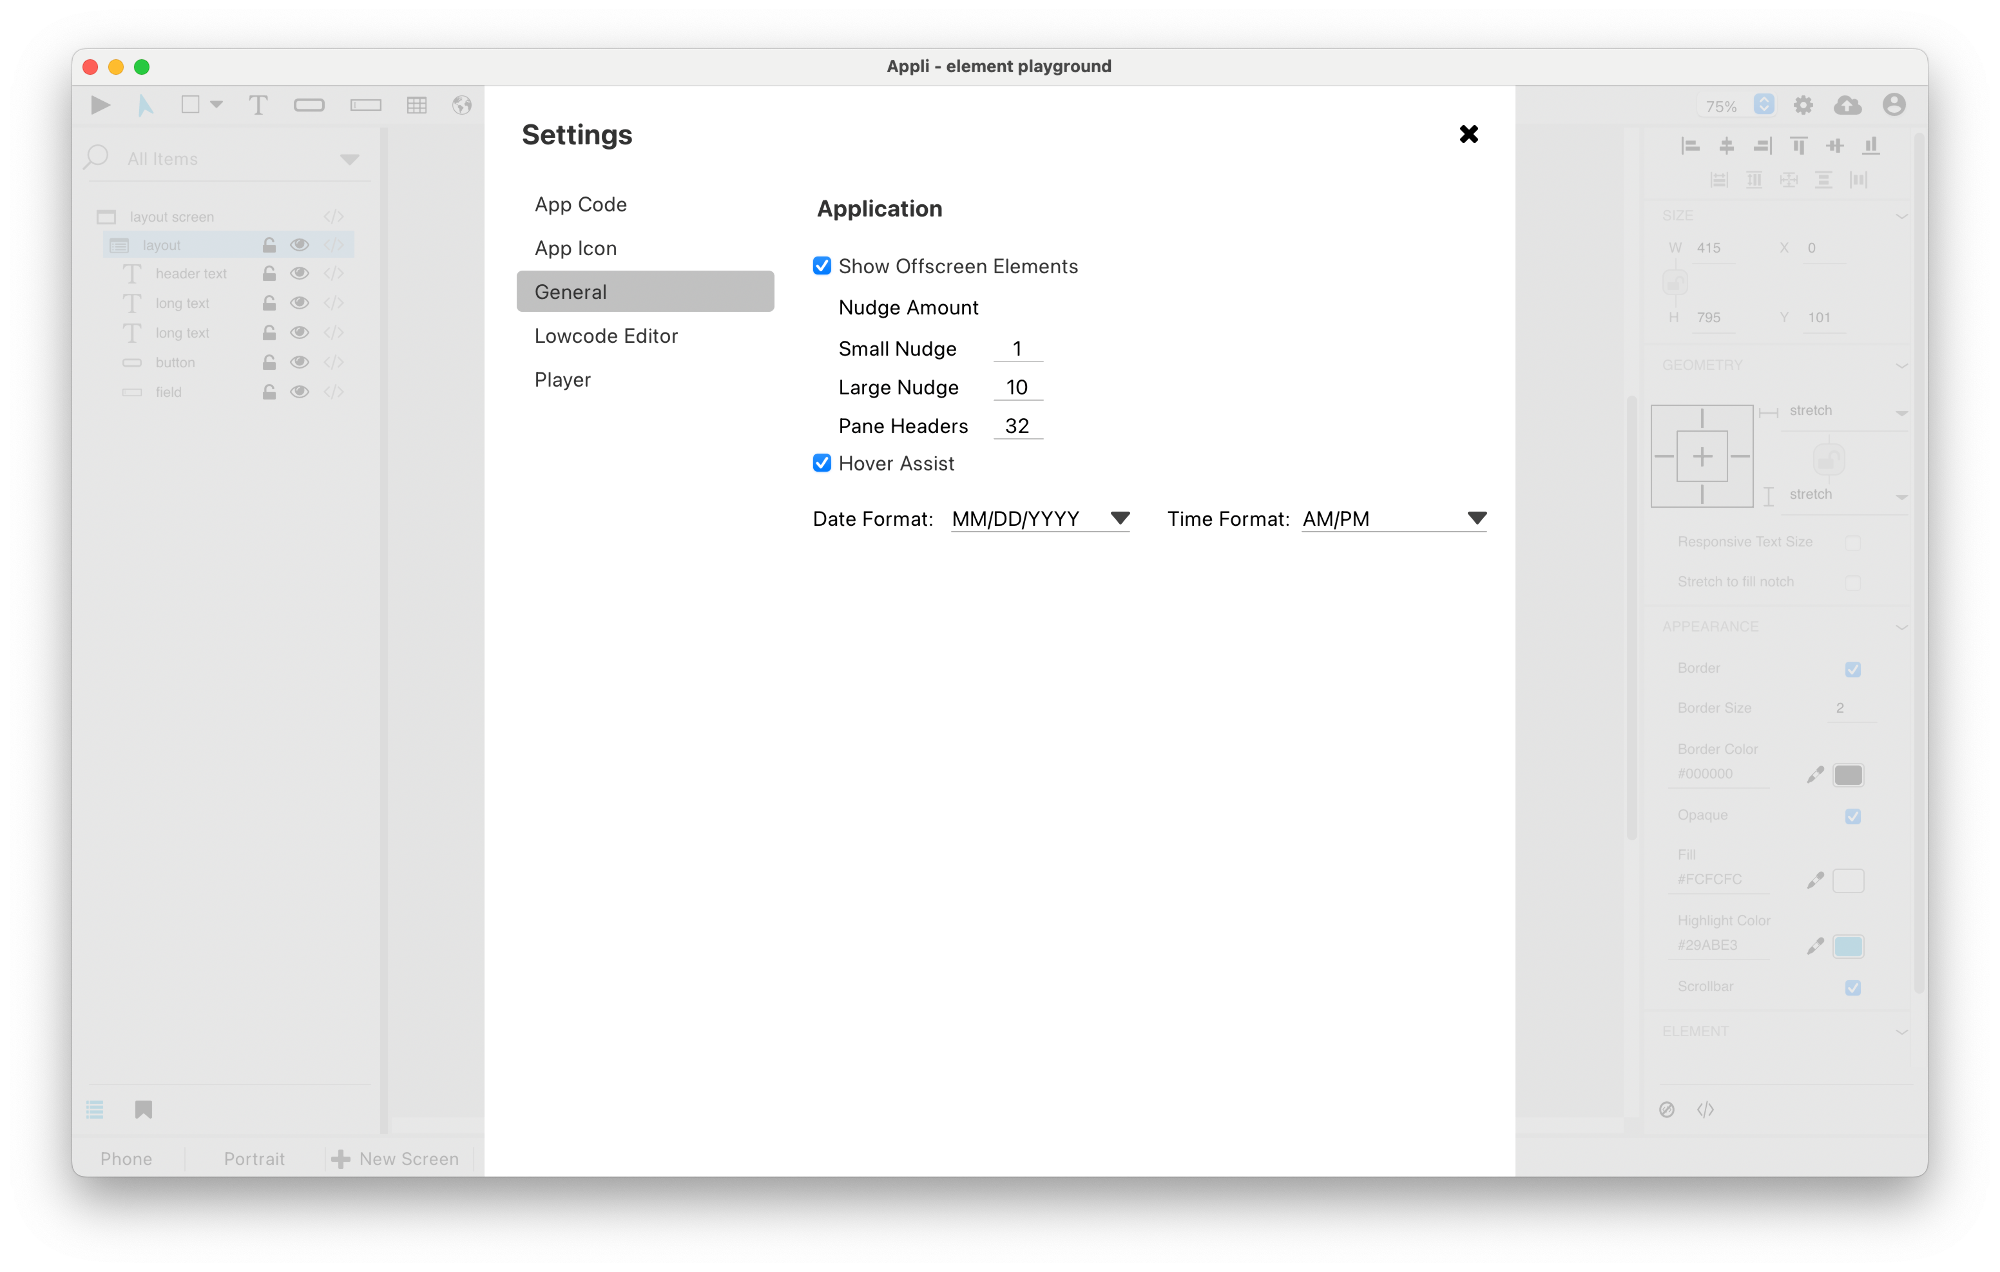
Temporarily resize the layout to span the entire region you want to
scroll. Appli IDE needs to be configured to show offscreen
elements or you won’t be able to see the parts of the layout that
are offscreen. You can toggle the show offscreen elements
preference by using the o keyboard shortcut.
Add the elements inside the layout as if the screen was wider or taller than it is.
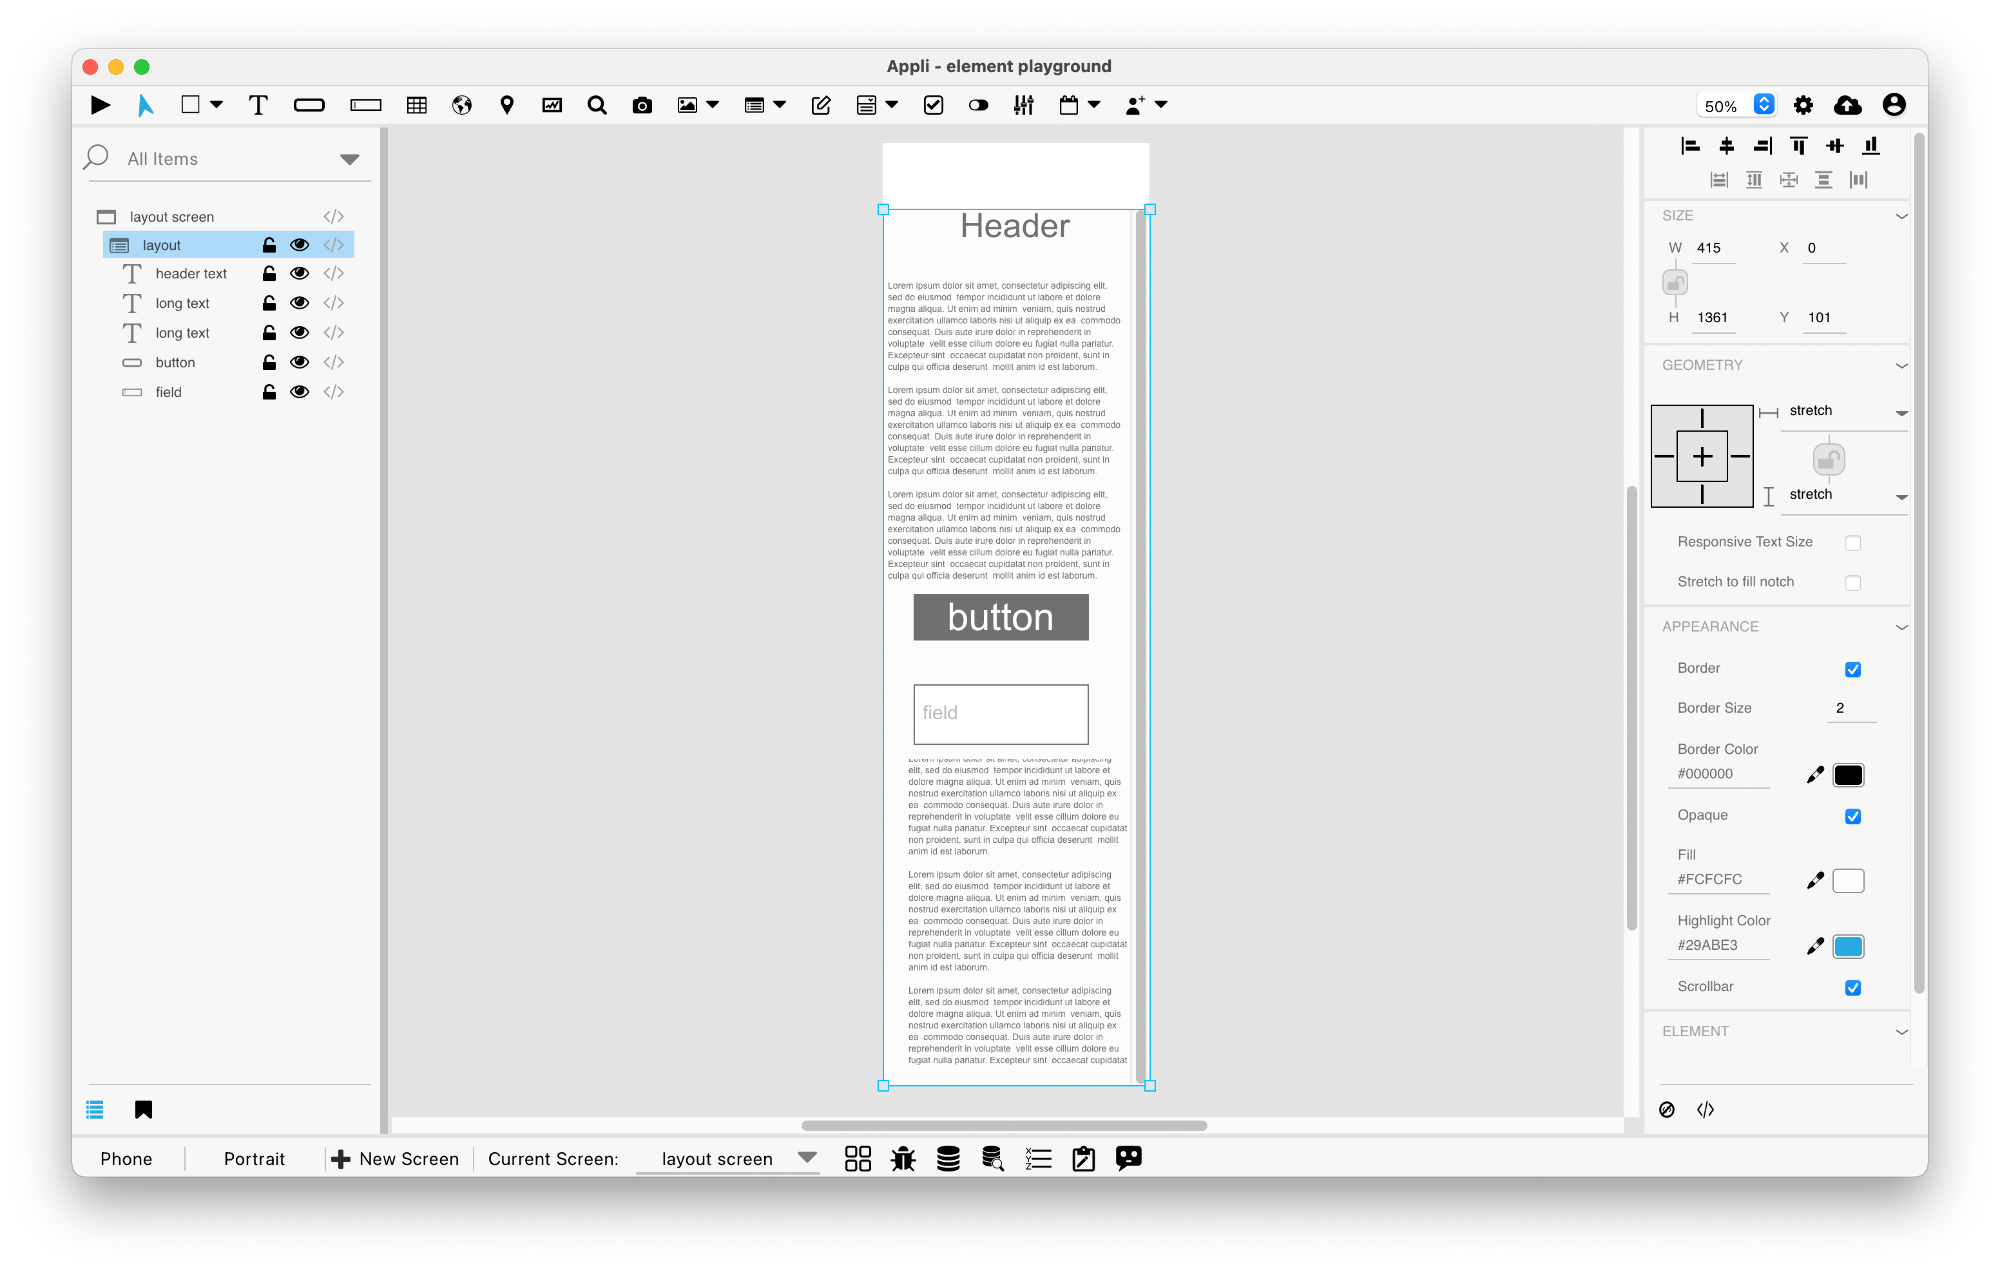
Once you’re happy with it, resize the layout back to the size you need. Since the layout has elements placed outside its final rectangle, the user will be able to scroll it and access those elements.
A key UX challenge is making sure the user knows that they can scroll that region to access more elements. An easy to remember guideline is trying to make the layout the root element of the screen. This way, the whole screen scrolls. That is easier to discover than some small scrolling region inside a larger screen. Remember to place any header or navigation bar outside the layout or you may end up scrolling them out of view.
Remember to set the scrollbar property of the layout to
true. You’ll need to take the scrollbar width into account when
designing your screen. If you make an element span the whole width of
the layout and then add a scrollbar to it, Appli will also add a
horizontal scrollbar to the user interface since some pixels of that
element are being clipped by the vertical scrollbar.
Layouts are database aware
Besides being able to create scrollable regions, layouts can be linked to a database table (just like forms). Use the no-code interface to configure a layout and link it to a table.

Select the table you want to link to the layout and its location. Once that is done, you can further configure the layout by adding elements to it and binding them to keys in the database.
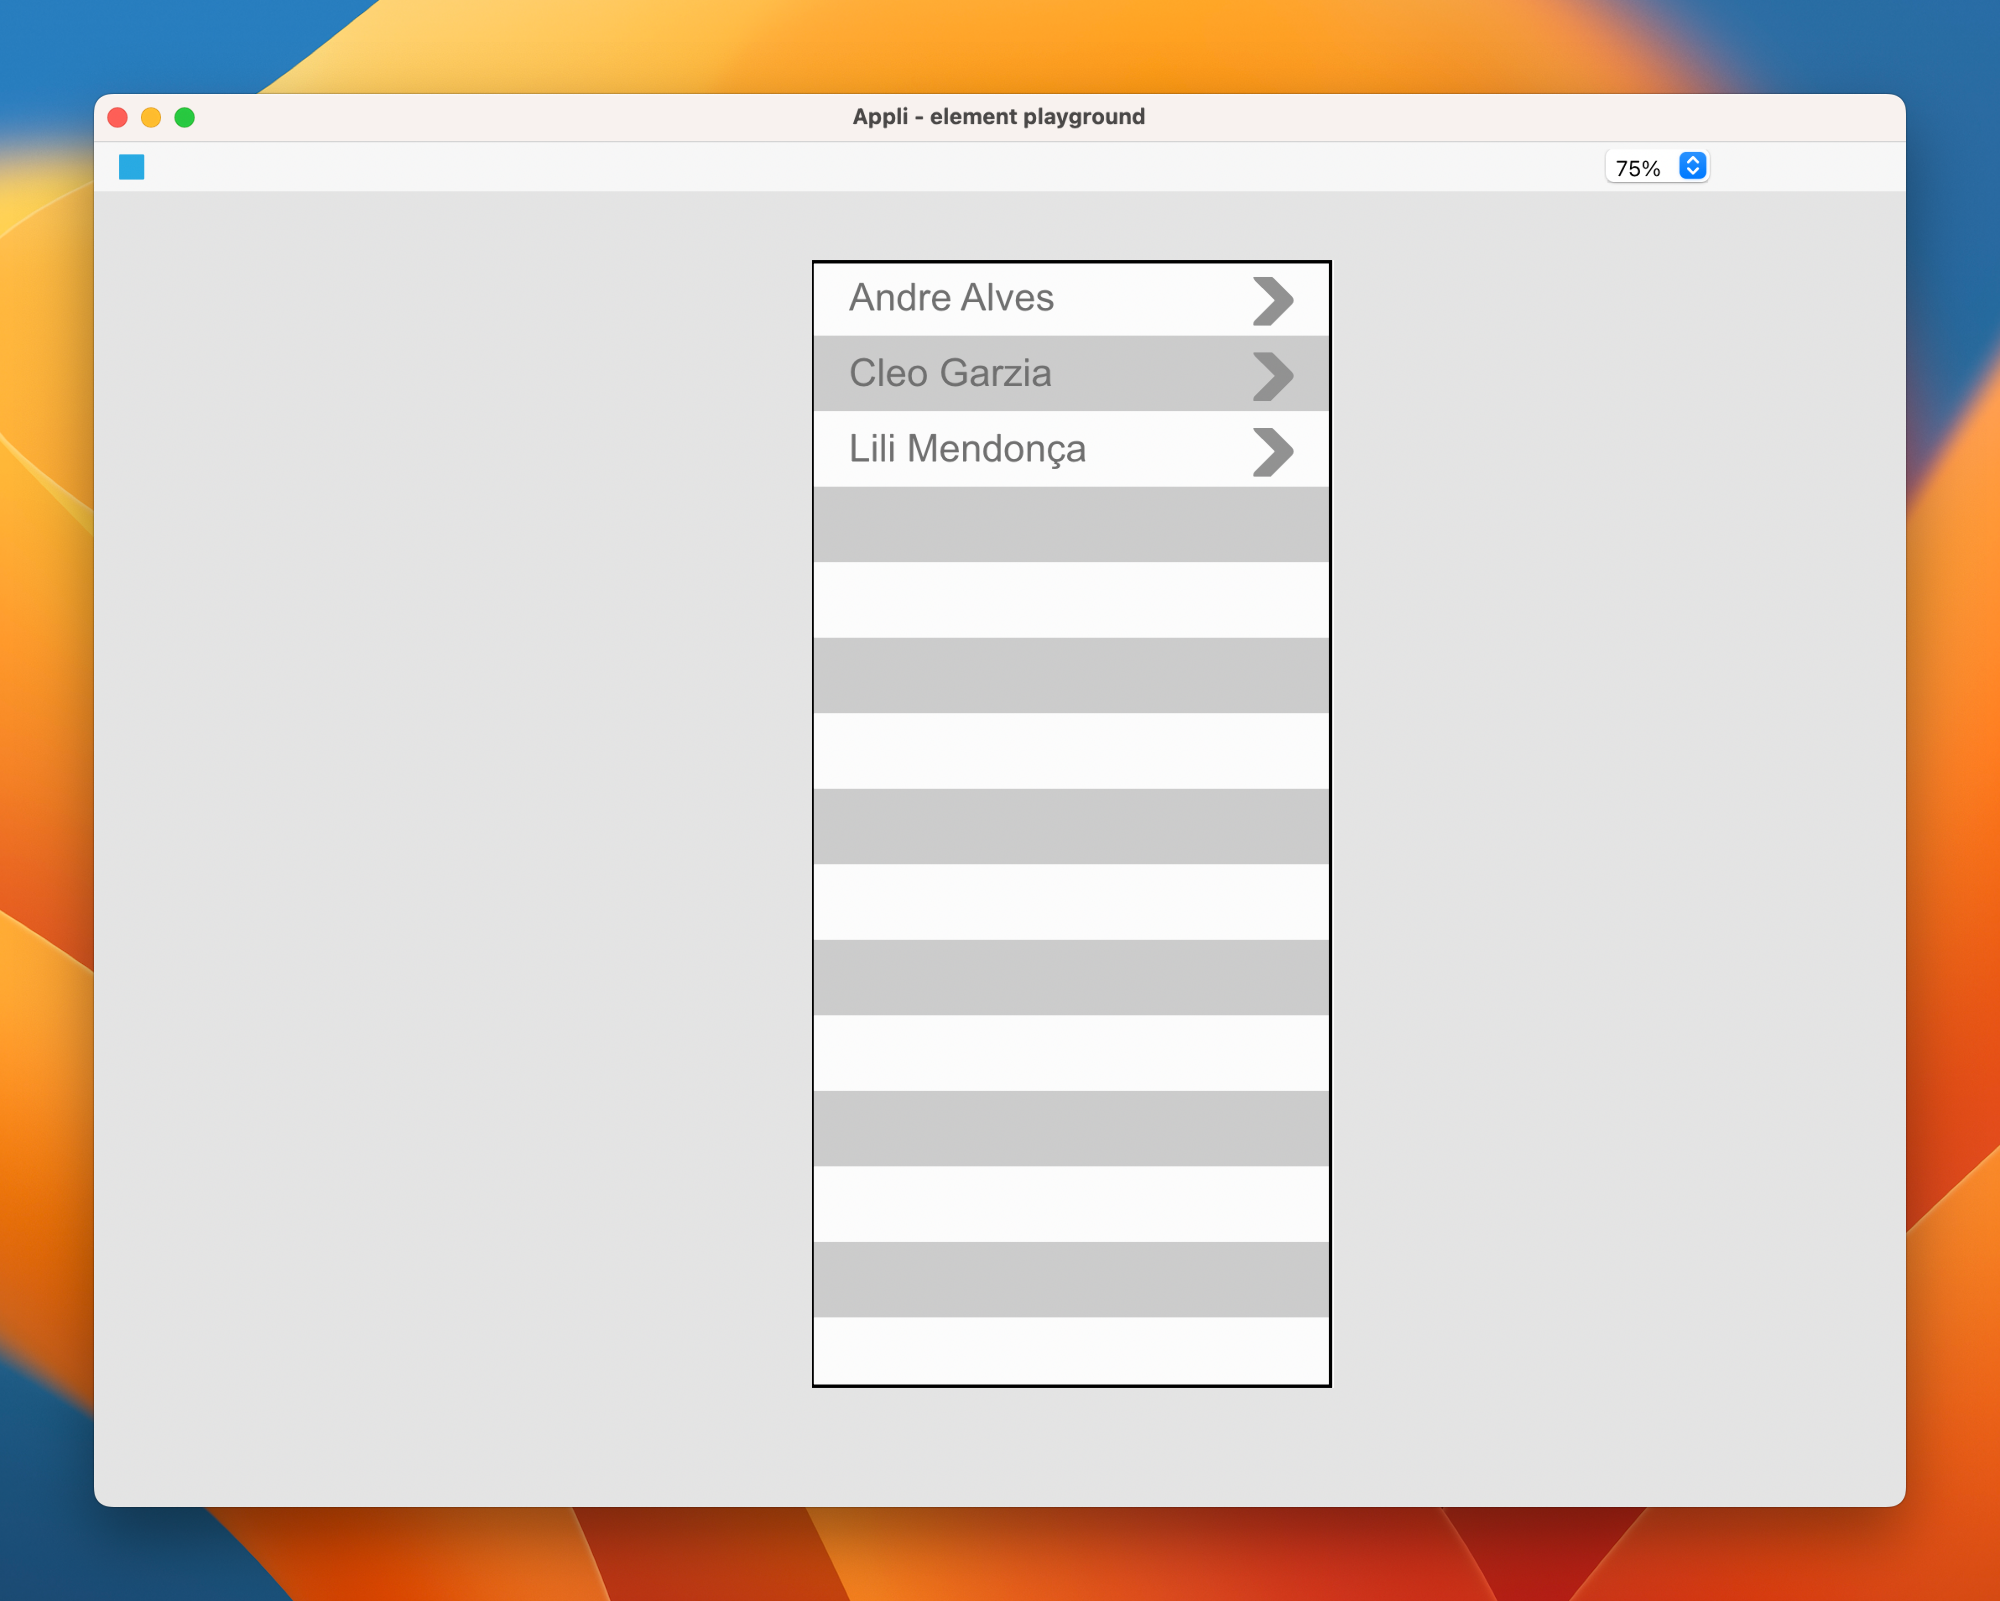
Showing multiple records
The most common use of a database-aware layout is to show a list of records. After linking the layout to a table, it is time to add elements to it.
The objective is to create a template for the rows of records. What you create is a single row representing one record. Appli will repeat that row to build a list of records.
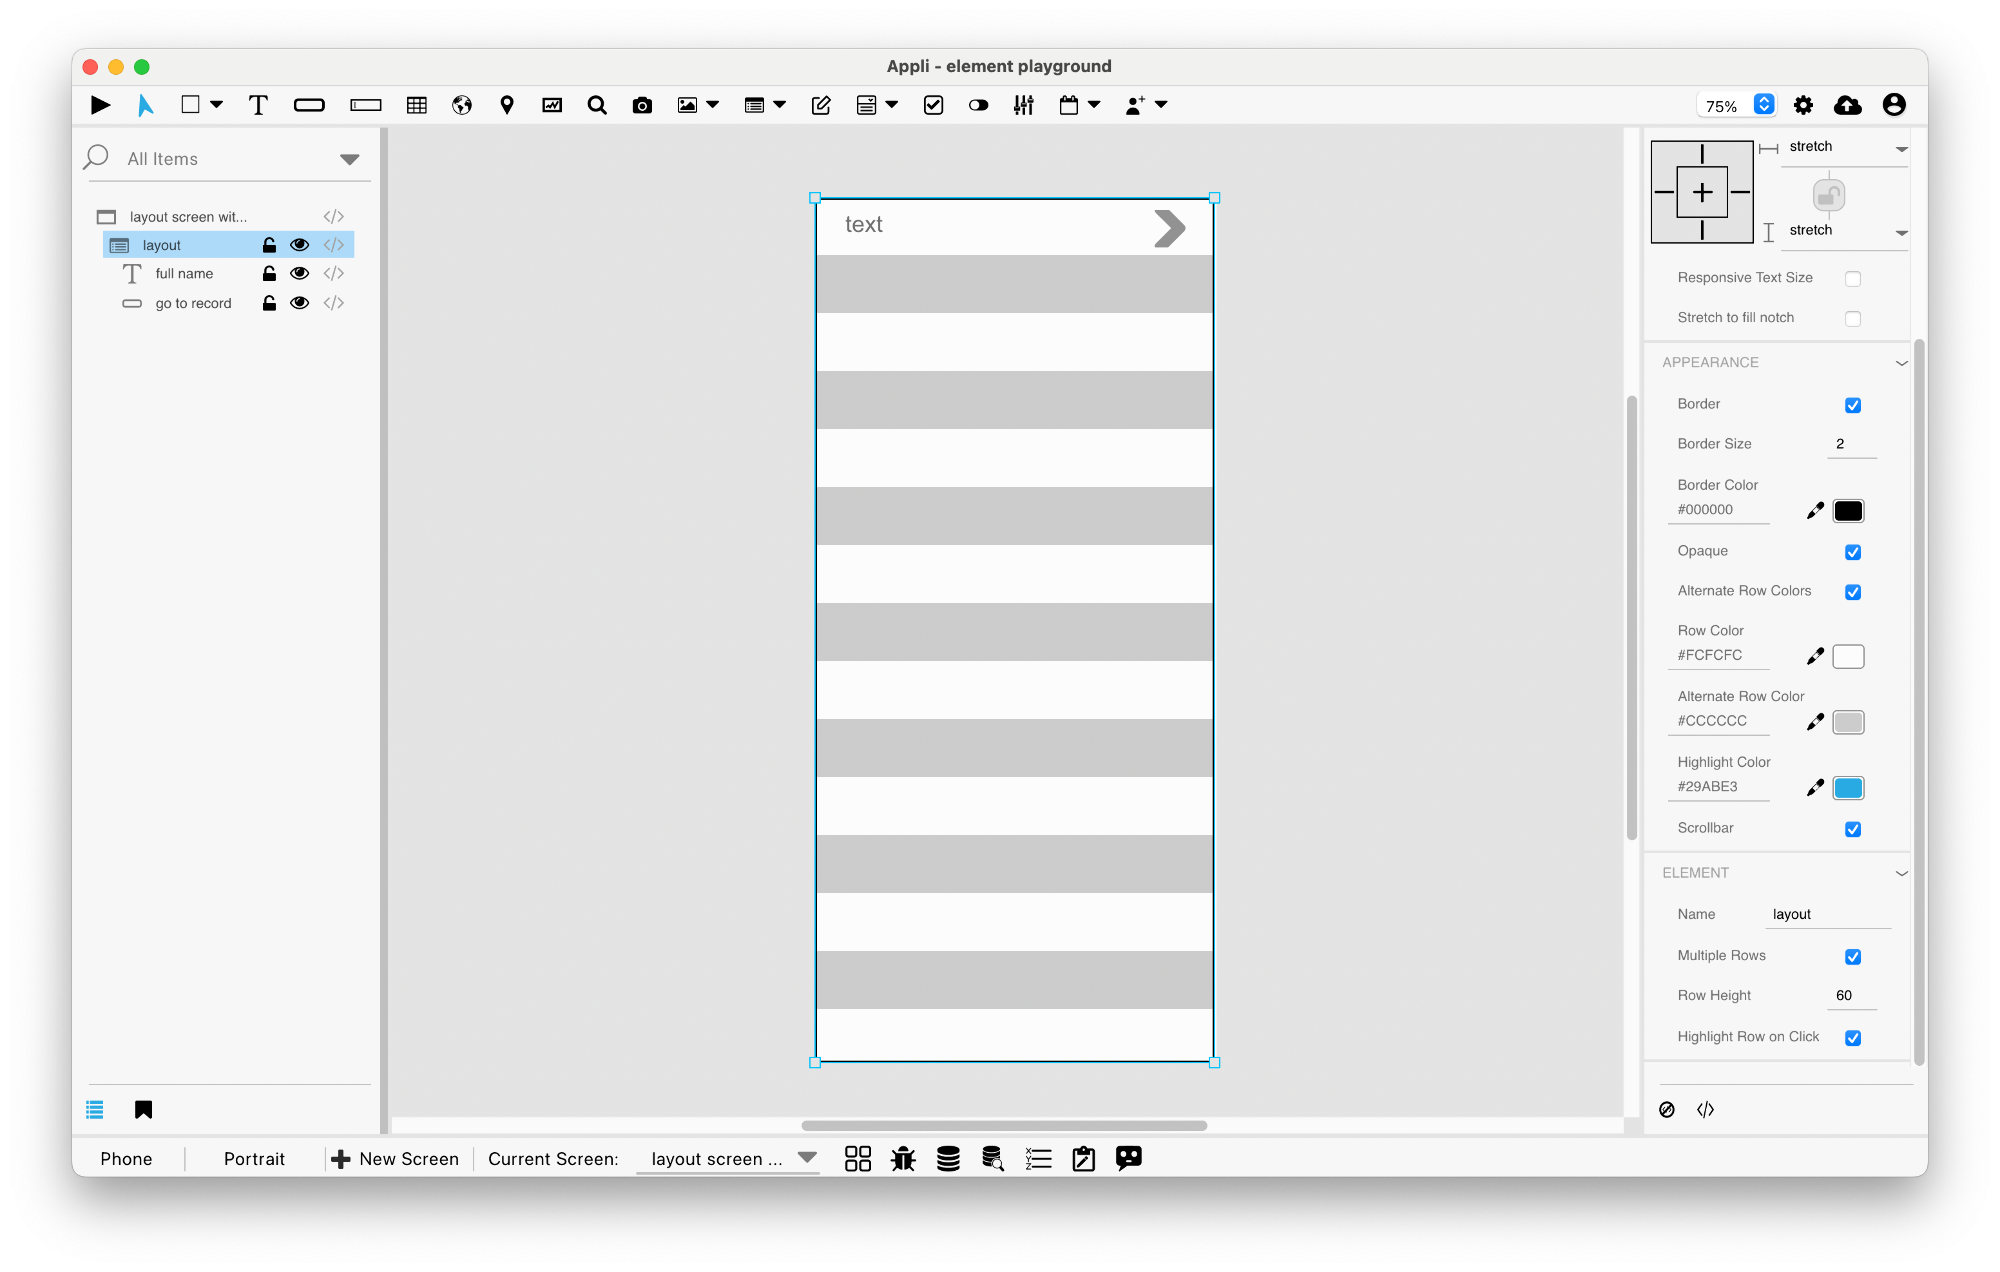
You need to set the Multiple Rows property of the layout
to true to list multiple records. Once you do, Appli will automatically
set it to alternate row colors. New properties related to the row
height and row colors will be available. Configure them to
match your UI.
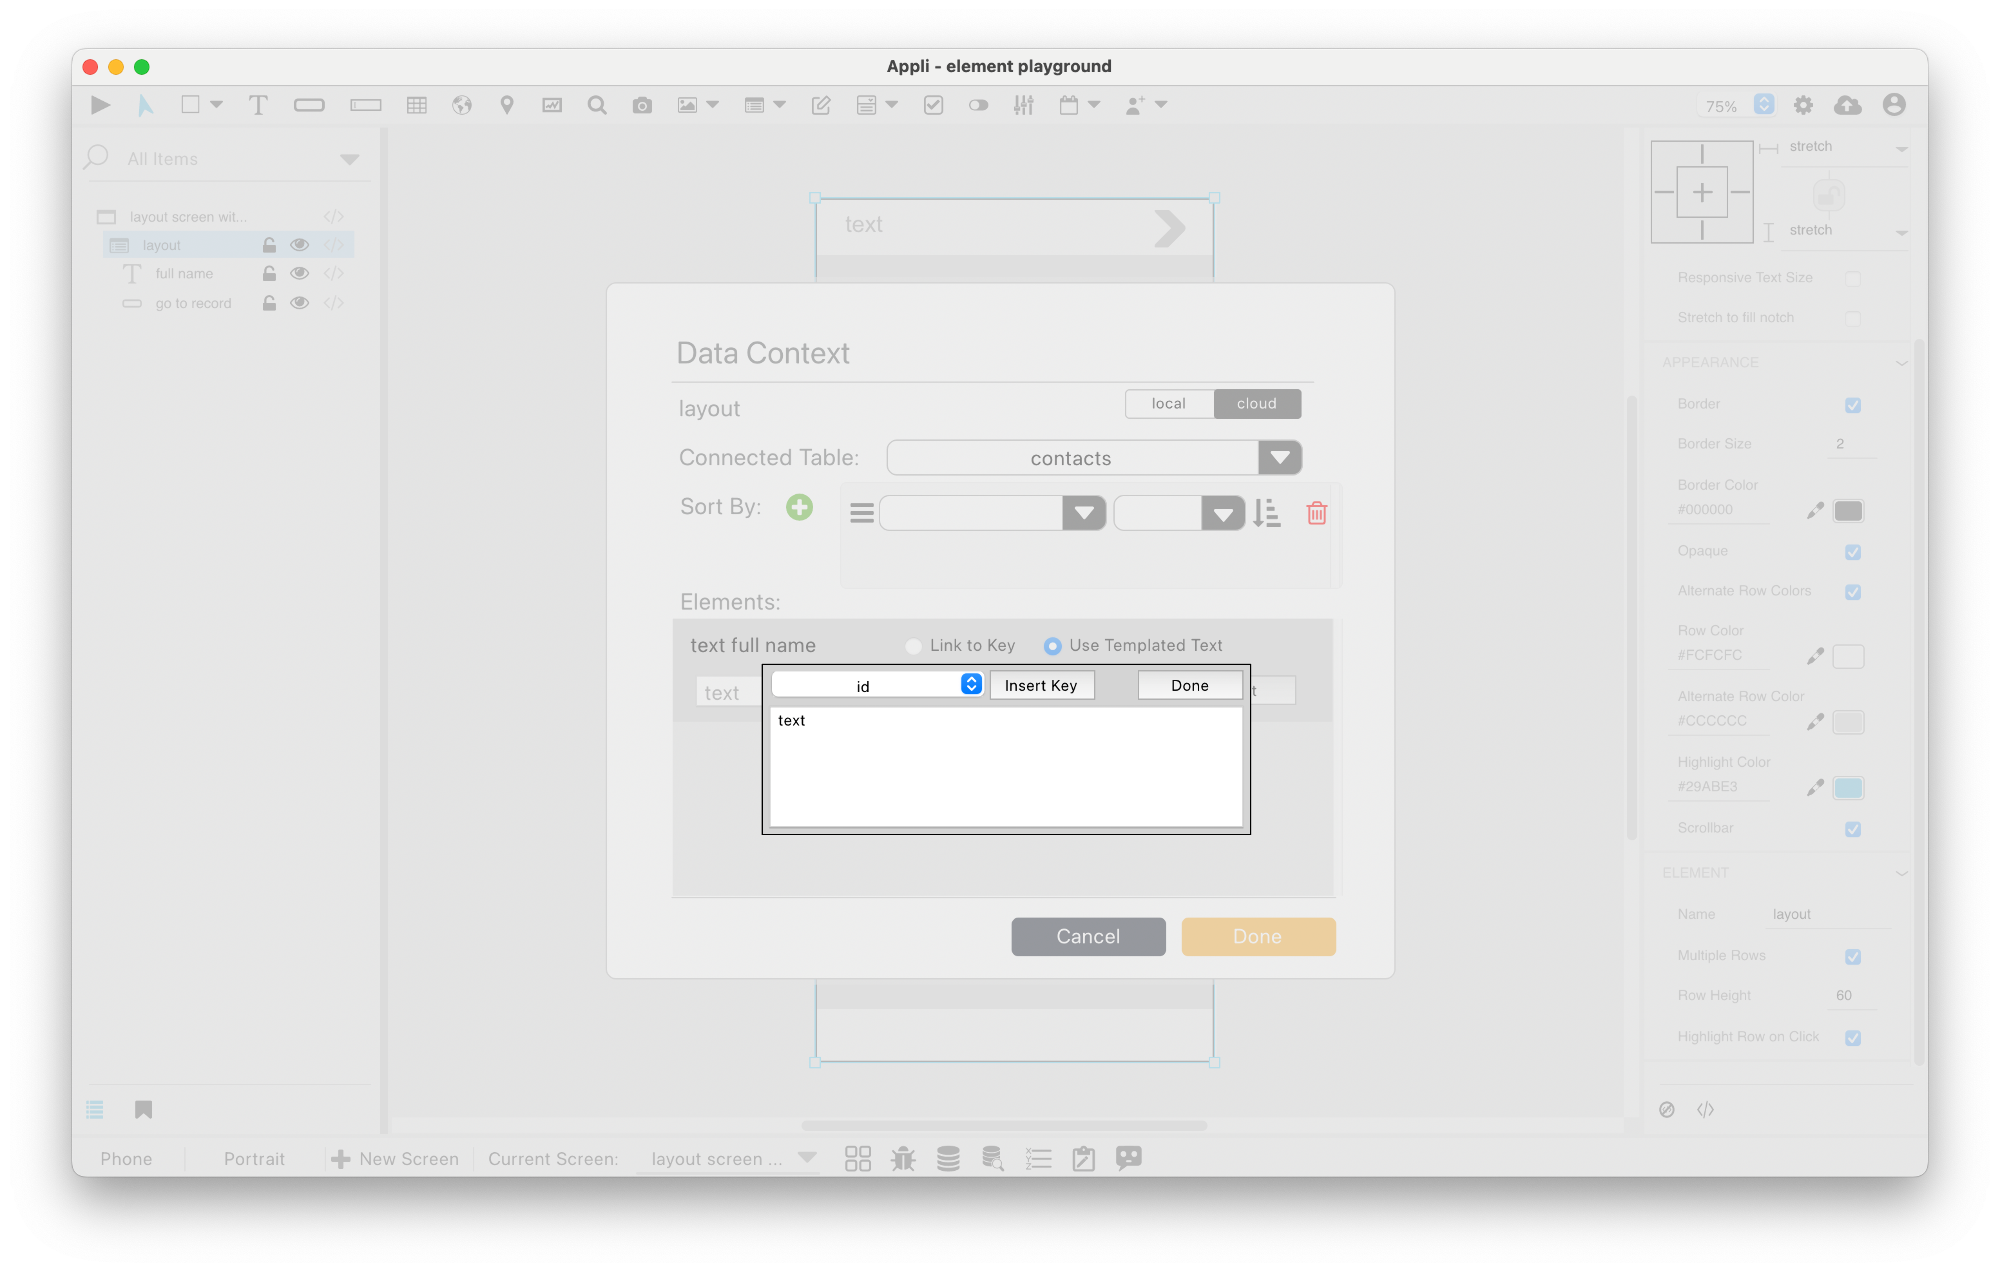
Working with template text
Template text is a flexible way of configuring how a text element that belongs to a layout will show its data. The no-code interface for the layout will display the elements inside it.
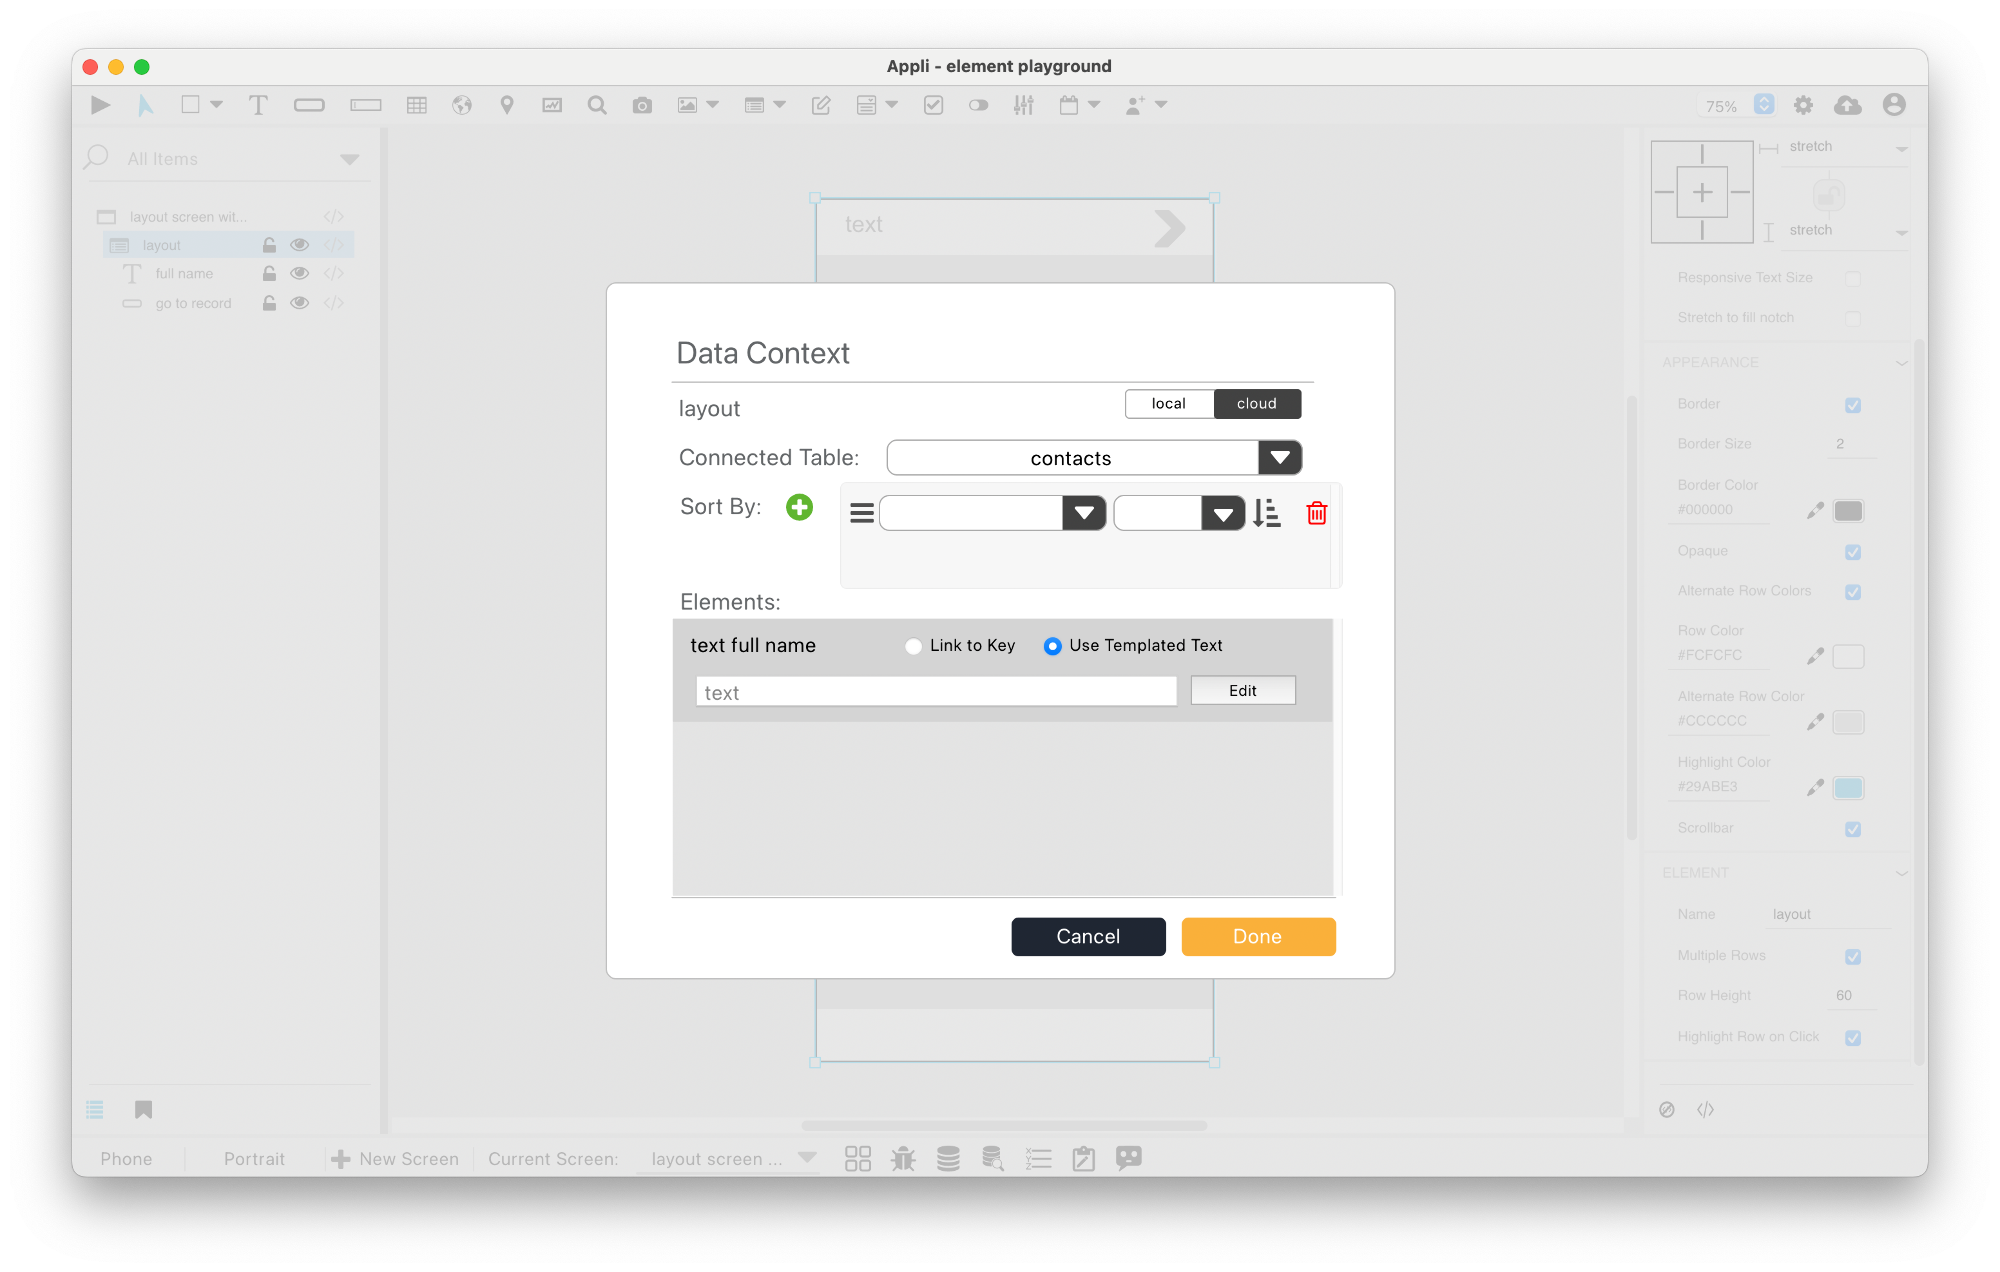
Selecting template text and clicking edit opens the template text editor.
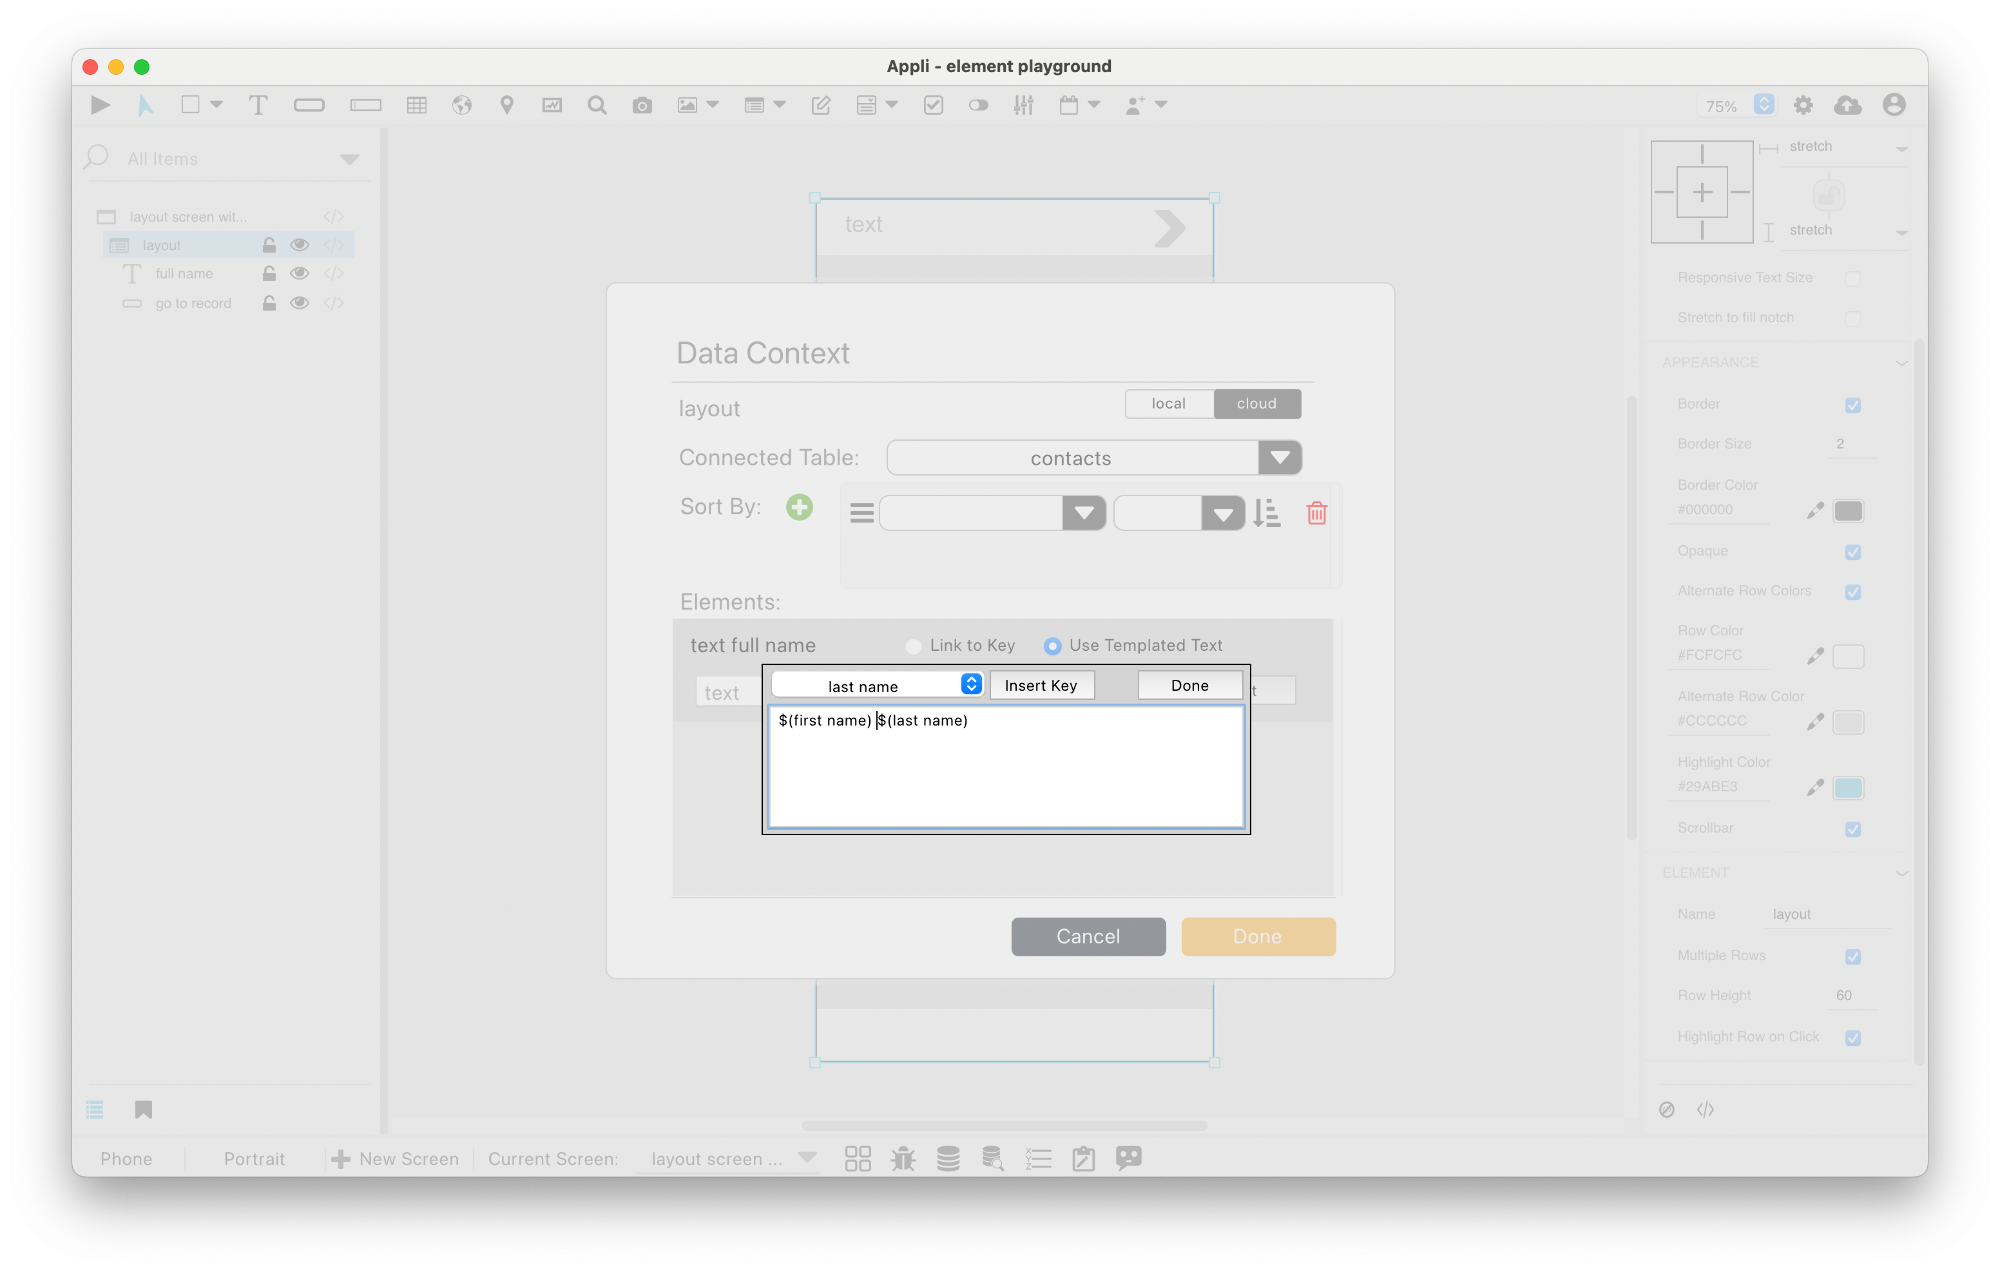
When you run the app, it will repeat itself, listing the records and the template text will be replaced with the values from the table.
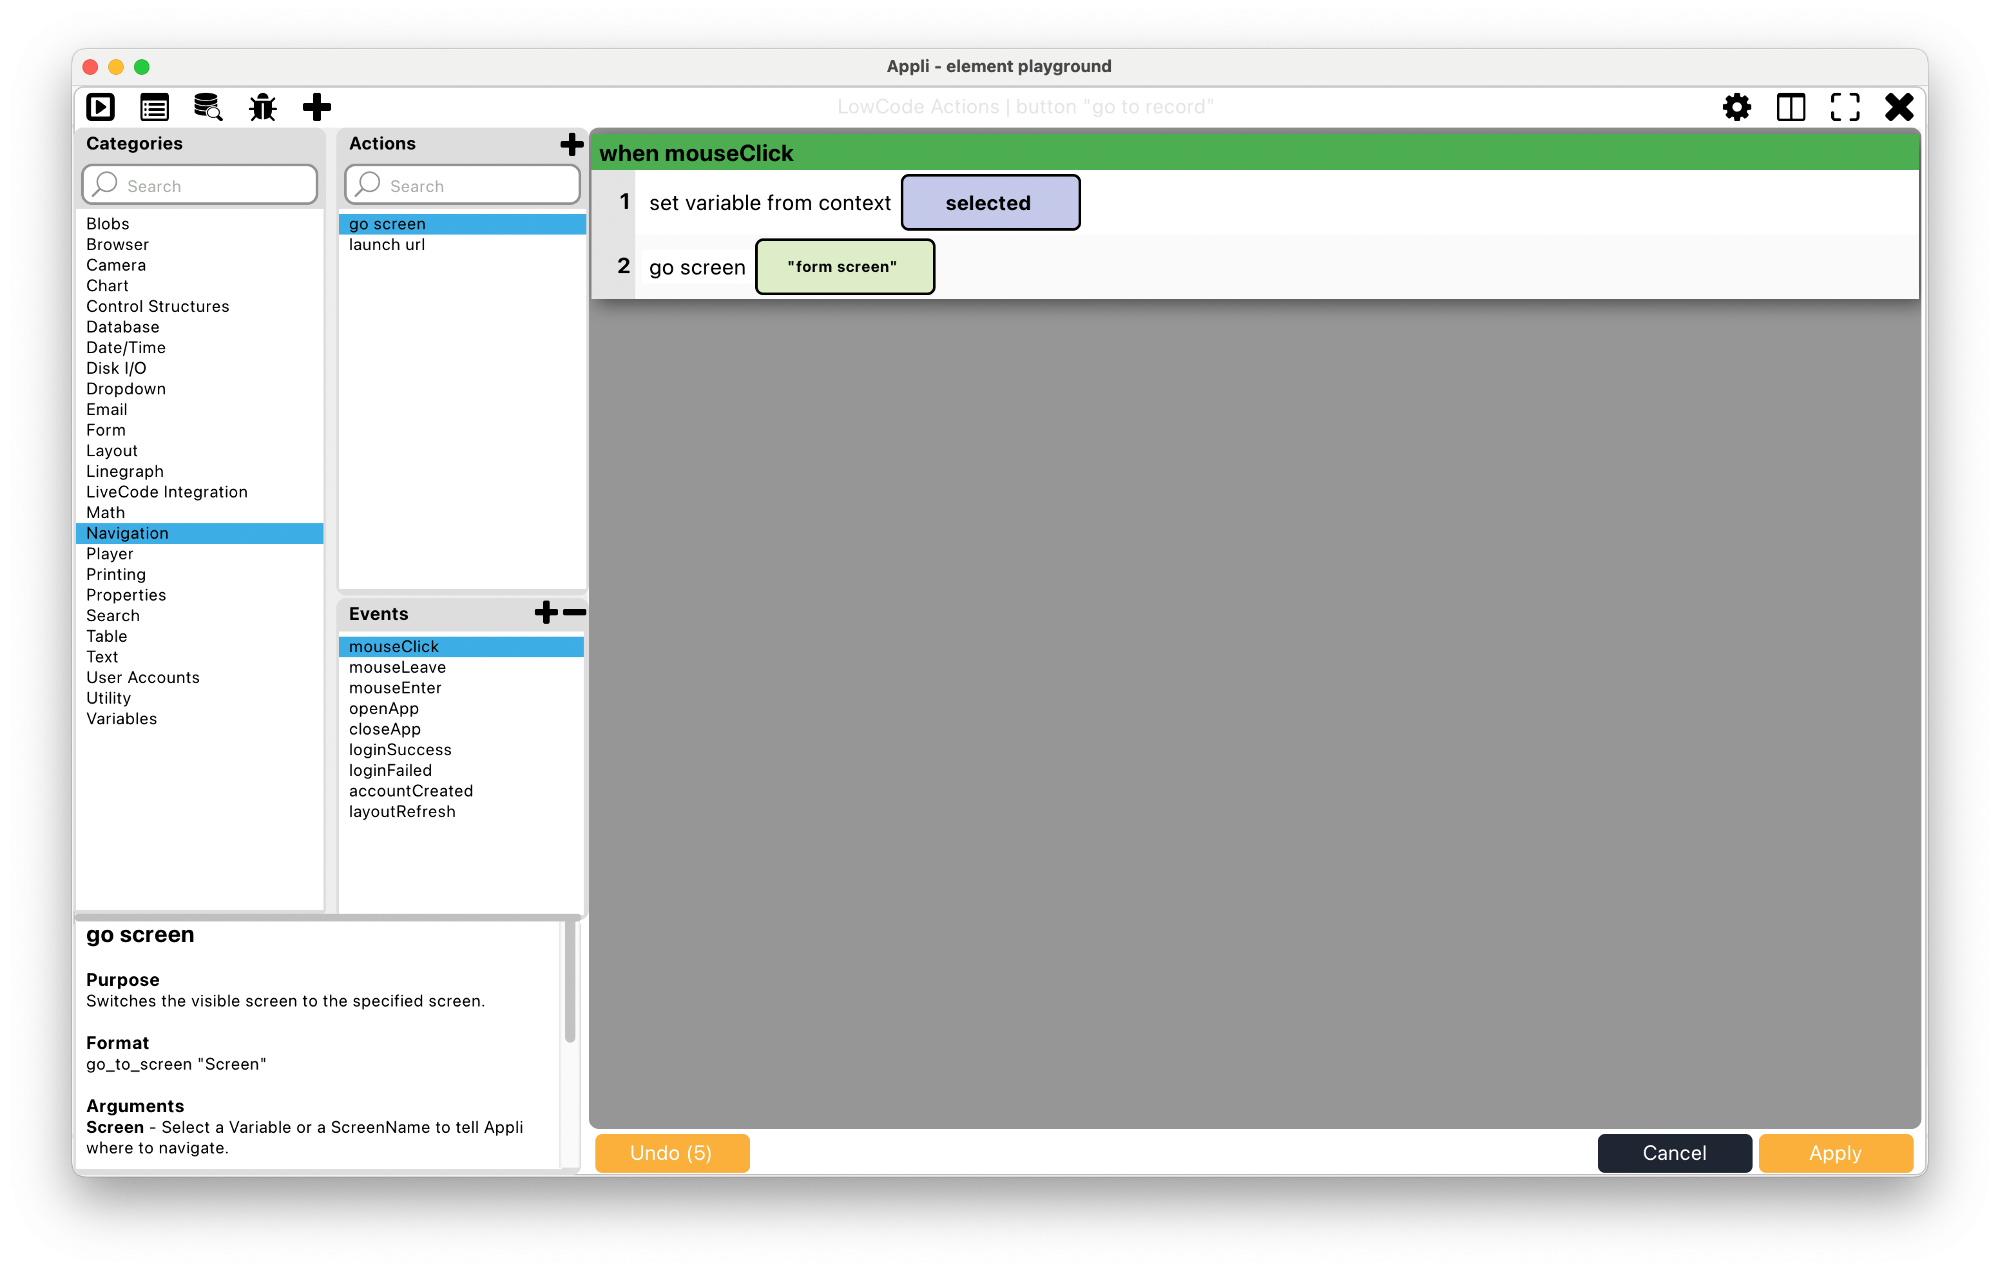
Selecting a record
Use the Set Variable From Context
action to set a variable to the RecordID of the selected
record. Use the mouseClick event of some element in your
row template to call that action. You can use that variable later to
populate a form or some
other workflow.
Consider the row template we’ve shown above with a field and a chevron pointing to the right. The user would click that button to select a contact.
The best way to select a record is to create a variable that points to the selected record, such as shown in this low-code script for the chevron button:
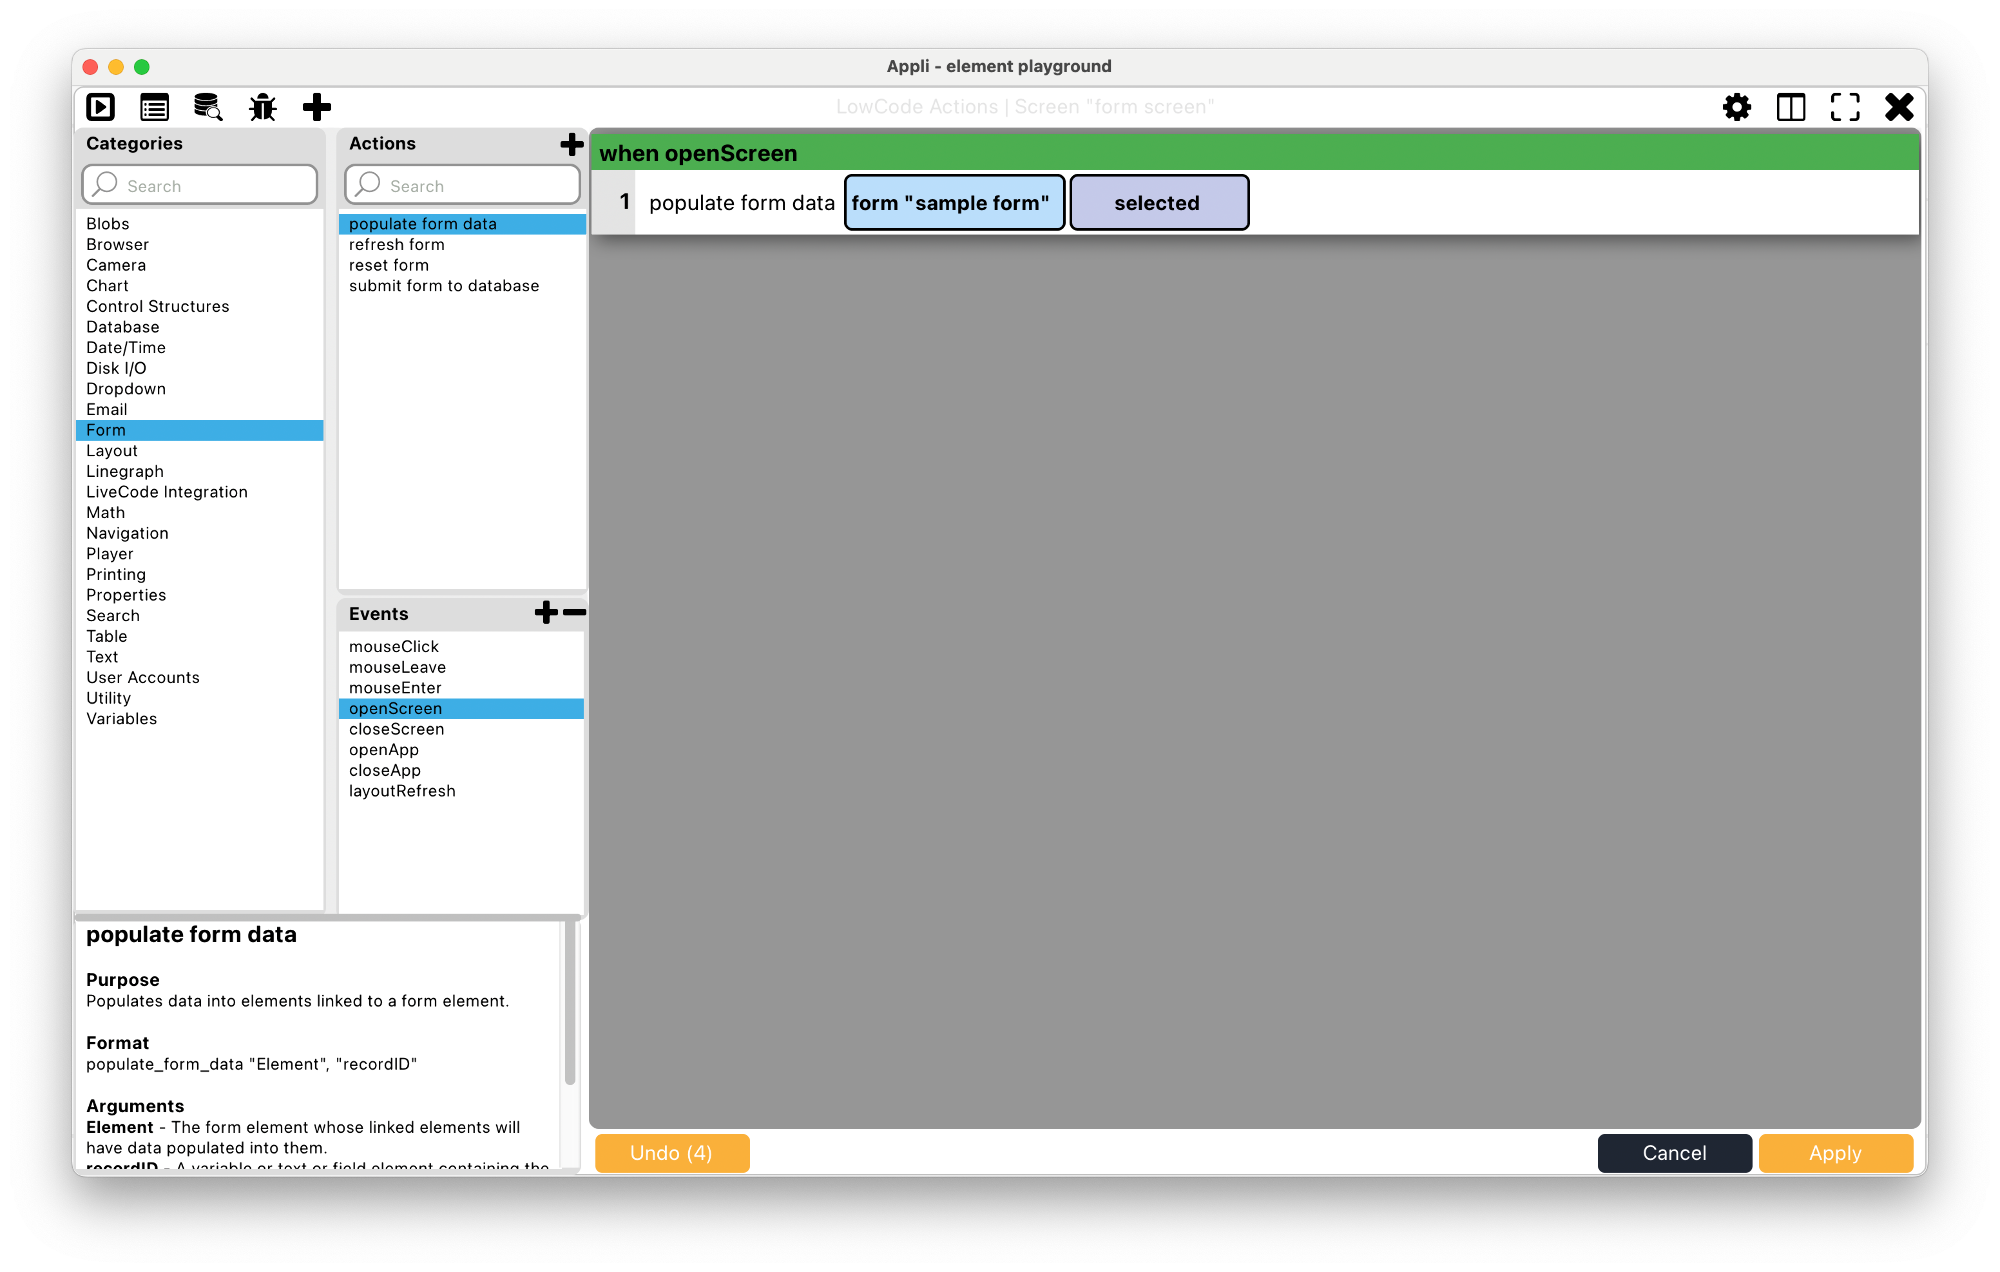
You can then use the variable you set on another screen to populate a form or some other action. Here is an example with a form. This script goes into the screen script:
Showing a single record
That is usually the responsibility of forms, but it can be done with
a layout as well. Just set the RecordID property of the
layout to the record you want.
This chapter was last updated on Fri 13 Oct 2023 16:34:04 BST