Tutorial: Understanding Forms
In the database tutorial, we used a form but didn’t dive deeply into them. Forms are a crucial part of any database-enabled app and having a full understanding of them will make development much easier.
While layouts are often used to show multiple records, forms are used to edit a single record or insert a new record.
Forms are containers
A Form is a container for other elements. After placing it on the playground, one should place elements inside it.
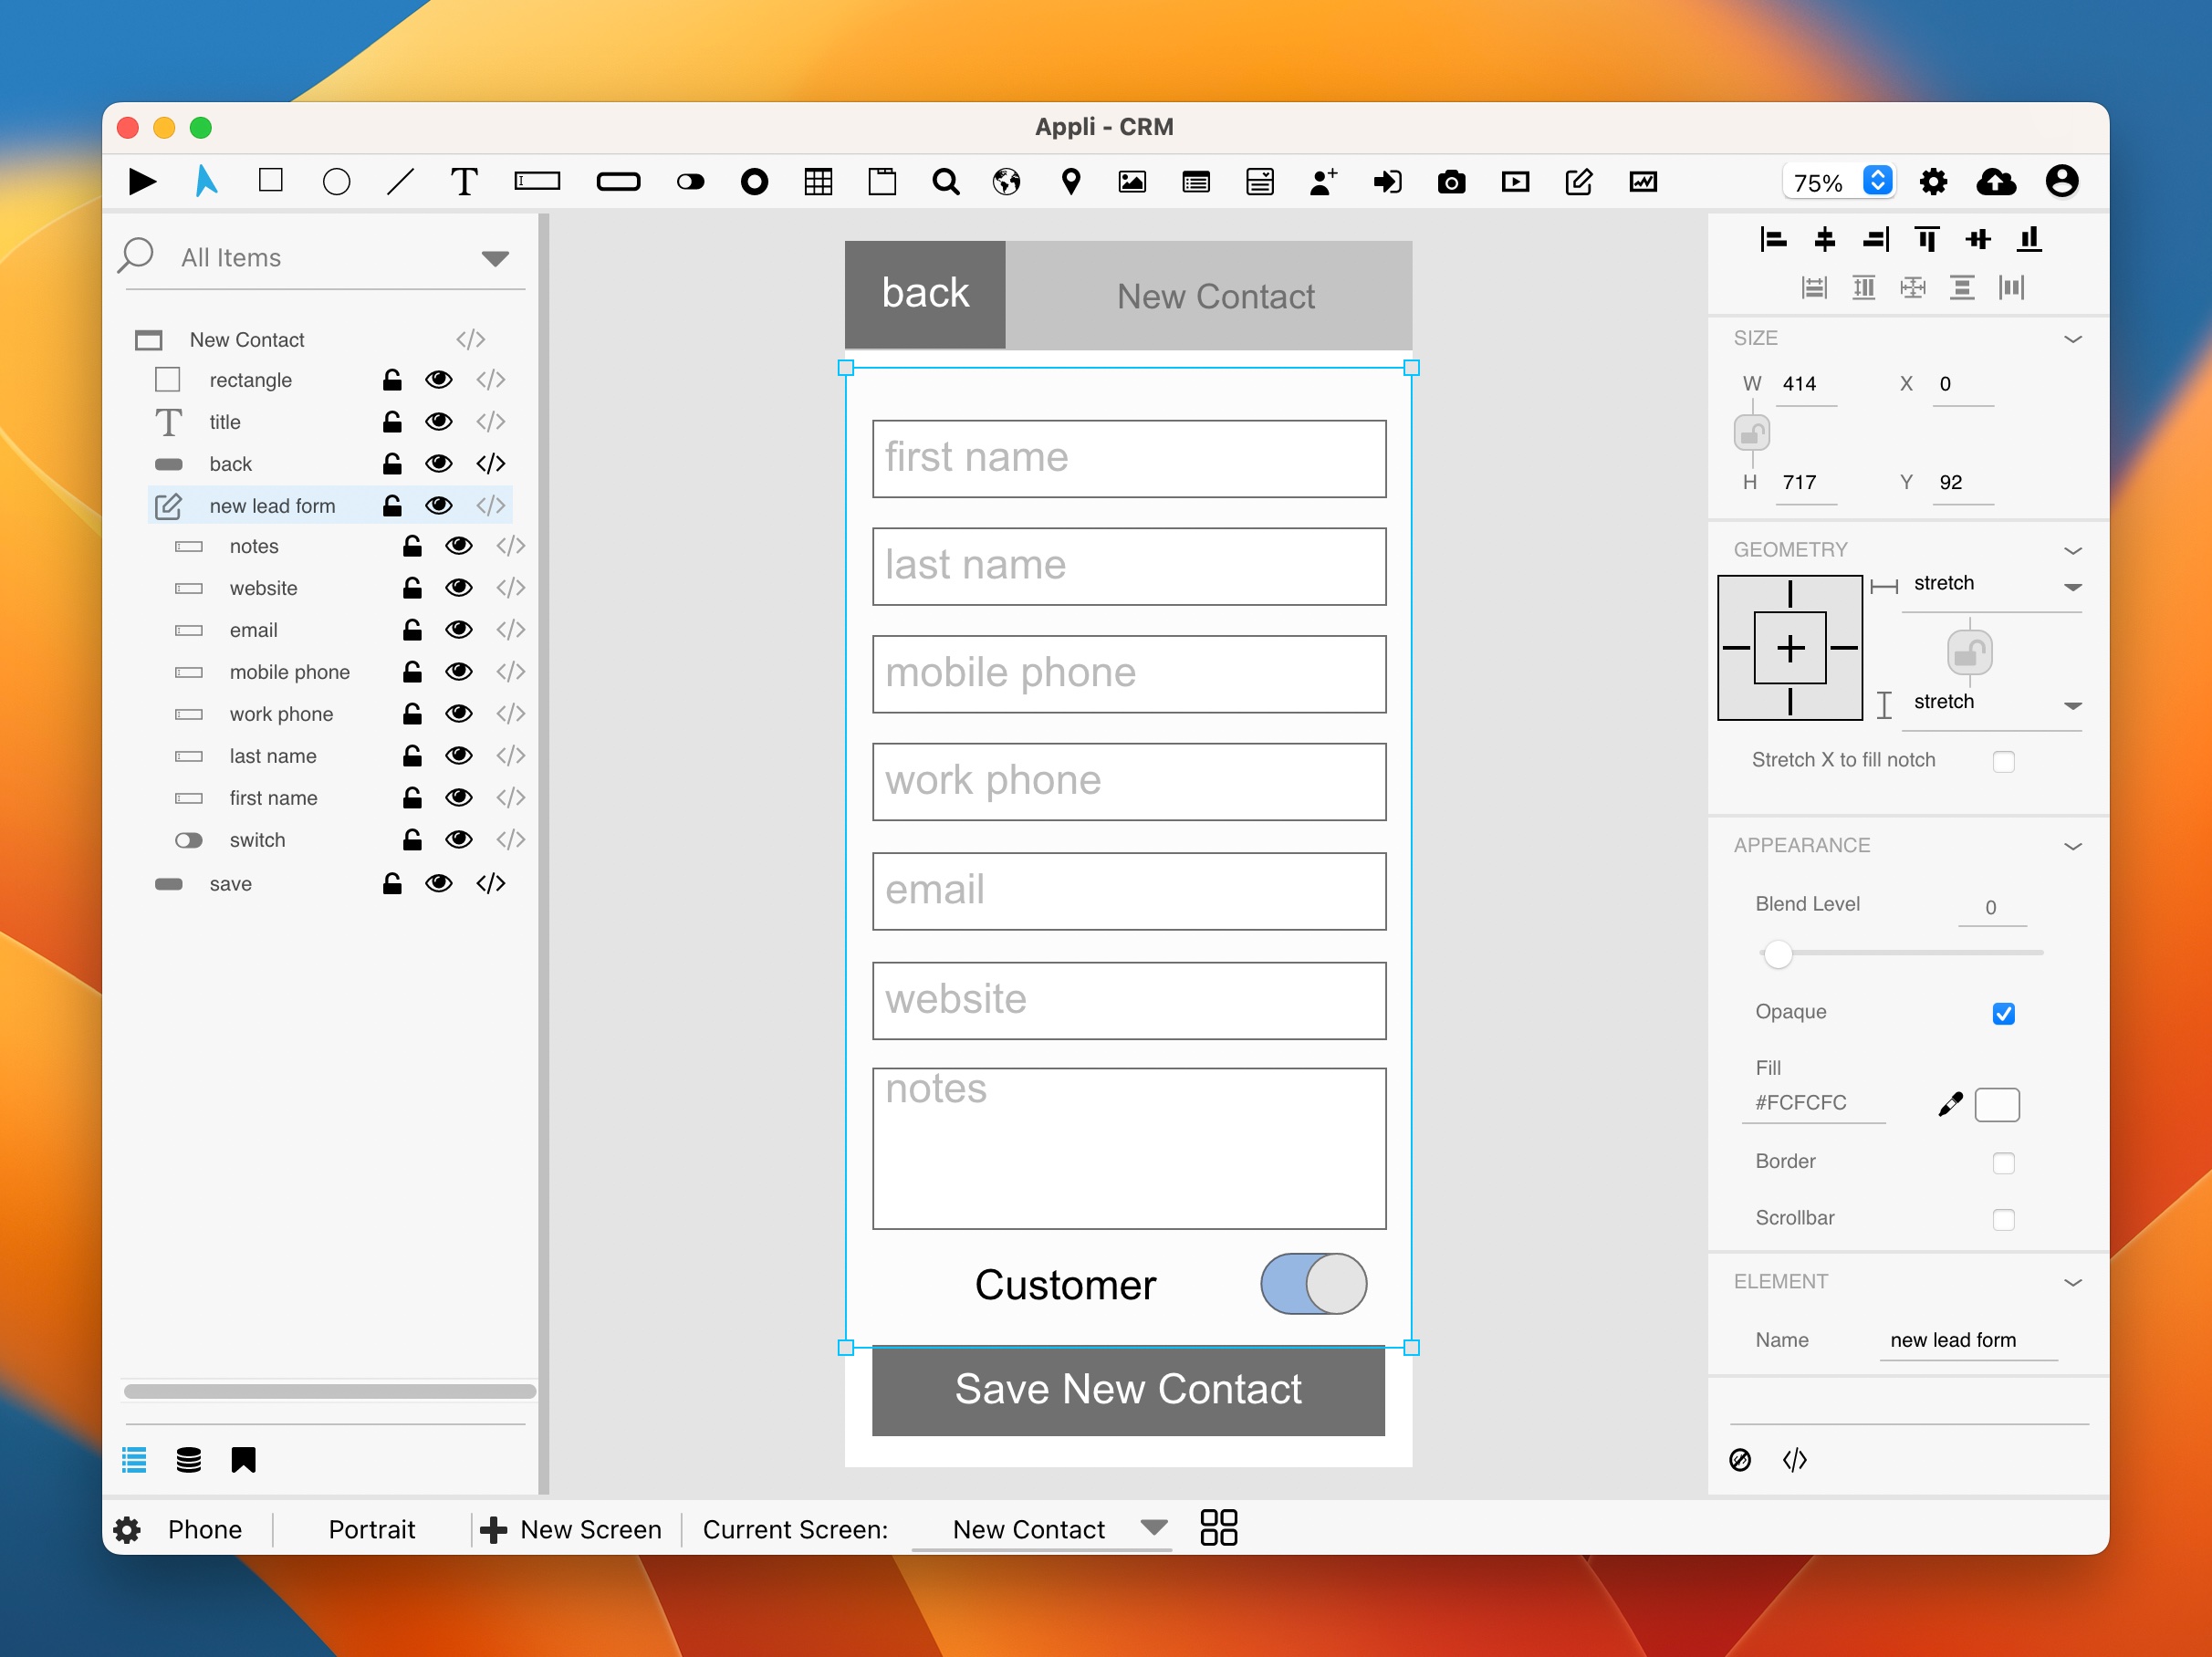
Above you can see a simple form with fields and a switch element inside it. Notice that the form is selected in the playground. You can see the blue rectangle showing the form boundaries and in the project browser the elements contained inside the form are shown under it.
Adding elements to a form
To add an element to a form, either draw the element inside the form or move it into the form boundaries. You can also drag an element in the project browser and place it under the form.
Forms can use the following elements as inputs: fields, dropdowns, switches, and radios.
Invisible elements inside forms
Dragging a field in the project browser into a form will make that field invisible if it is outside the boundaries of the form.
Having an invisible field is quite useful as it can be used as a hidden data container for storing values for internal use without cluttering the UI the user sees.
Just be careful that if you move that field in the playground, it might exit the form if its final place is outside the form rectangle. Remember to use the project browser to place it inside the form again if you moved it.
If you want to have an invisible element in a form and don’t want to move it outside the form’s boundaries, you can use the eye icon on the project browser to toggle the element visibility.
Forms are database aware
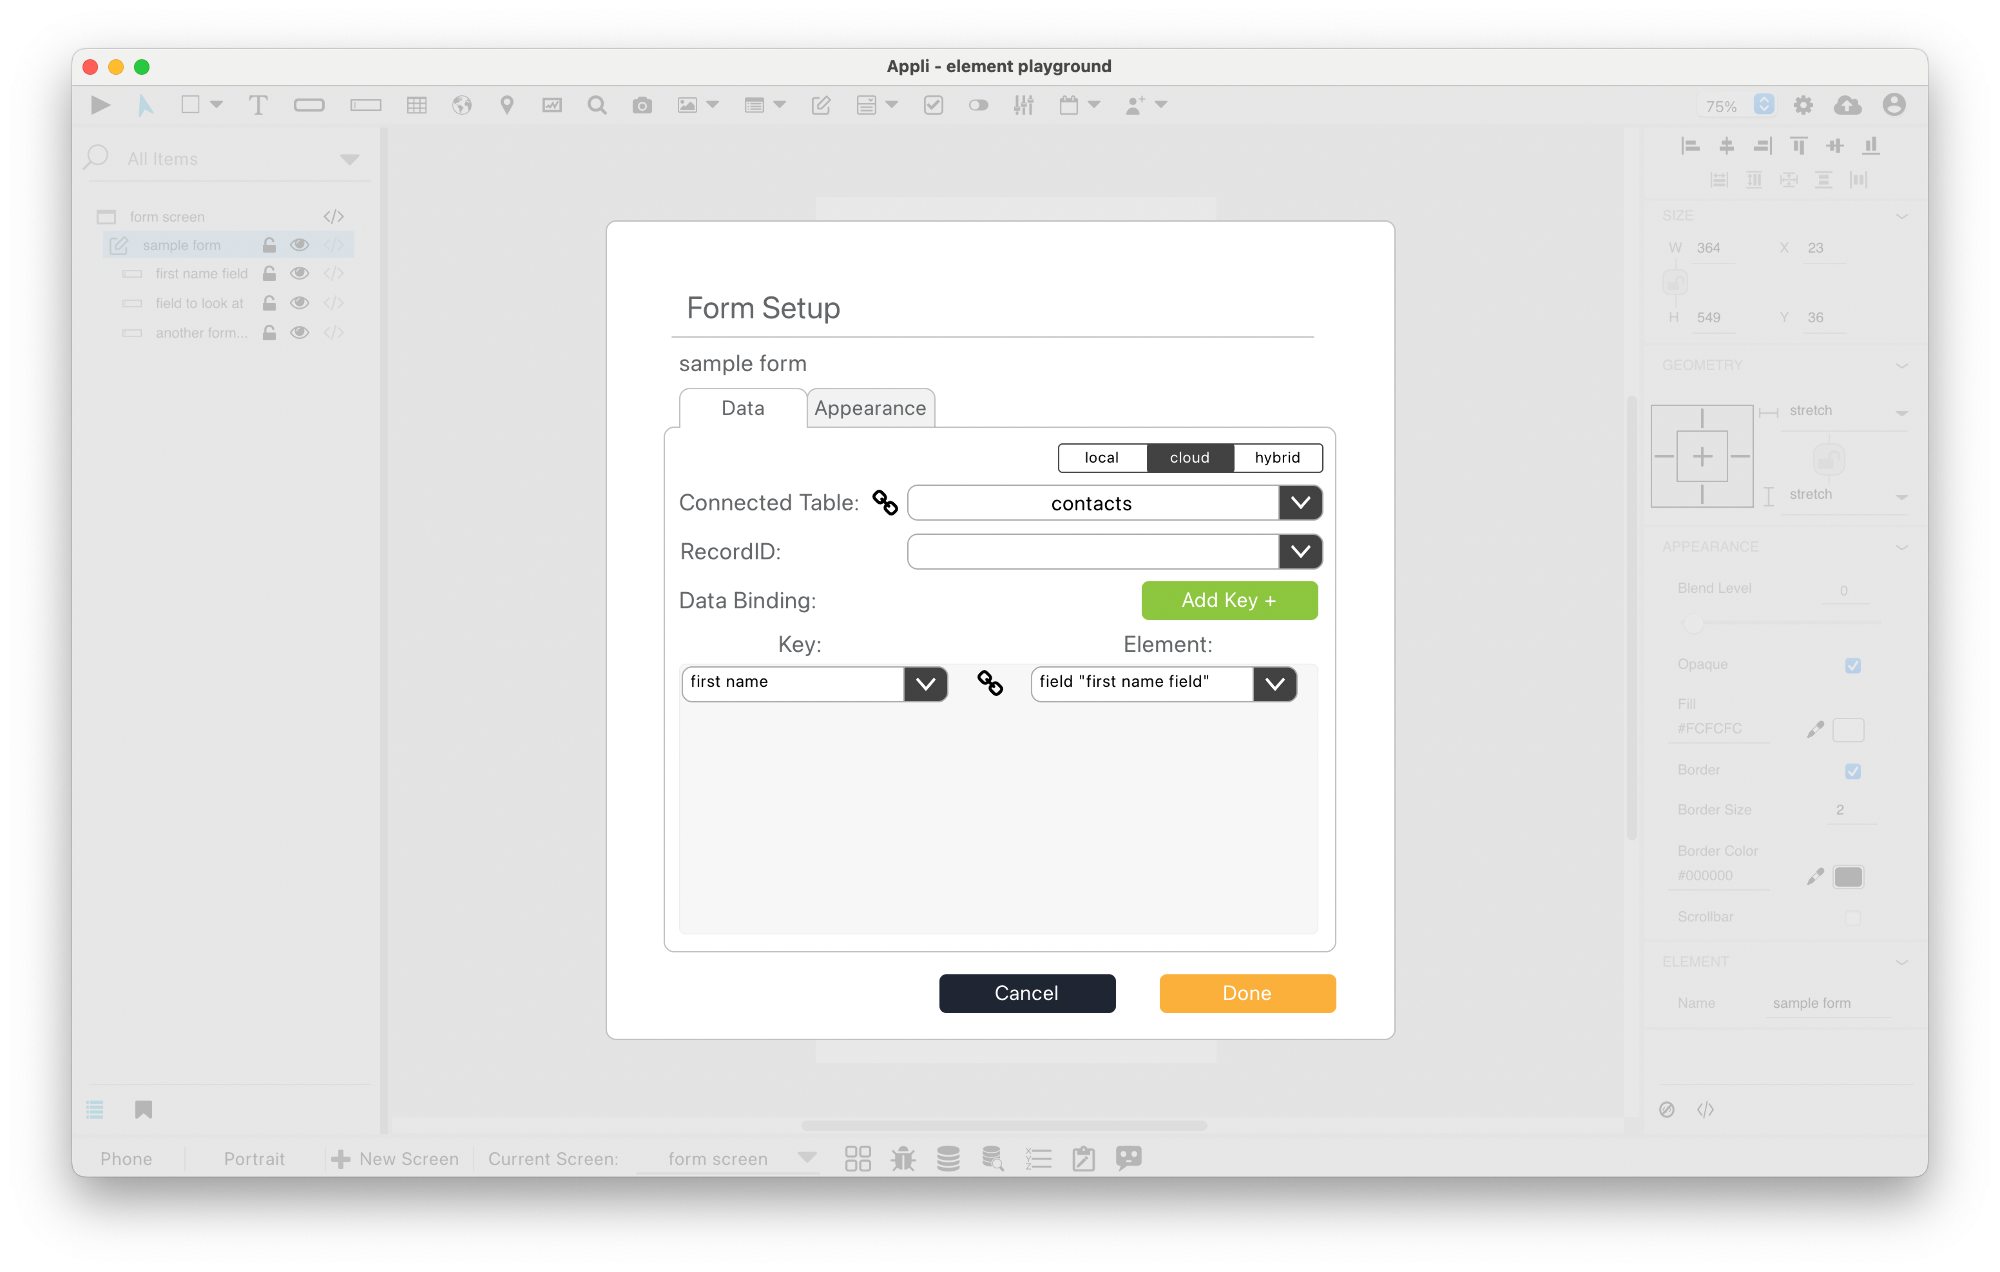
Like layouts, a form is a database-aware container. Use the no-code interface to configure it and bind it to a database table.

Select the context for the database (local or cloud) and the table you want to connect to that form.
Binding elements to data
Once a form is connected to a table, the elements inside it can be linked to keys in that table. In the forms no-code interface, click the Add Key + button to create a new element to key relationship.
Inserting new records
If a form is not showing an existing record, then it can insert a new record into the table. The bound elements will provide the values for the new record. Any key in the table that has no corresponding element will be empty.
There is a whole category of actions to handle forms. To insert a new record, use Submit Form To The Database action. That action is normally placed inside a button labeled Save or something similar.
Editing records
Forms are normally used to edit records. Use the populate form data to load a record into the form. You’ll need to pass a form element and a record as arguments for that action. The record usually comes from a layout with a list of records, but it can also come from the database itself if you store them in a record.
You can also use any of the set property actions to set the RecordID property of the form to the selected record, but populate form data is easier.
populate form data will set the
RecordIDproperty of the form and load the data into it.
Once the RecordID is set, submitting the form to the
database will update that record instead of saving a new record. If you
want to insert a record instead of updating one, you’ll need to clear
the RecordID property first.
Usually, selecting a record and editing it are actions that happen on
different screens. A common workflow is to use set variable from
context in a screen with a layout followed by go to
screen to go to the screen with the form. On the
openScreen event for the screen itself, a call to
populate form data uses the variable set in the previous event
to load data into the form.
If a form has its
RecordIDset, you’ll be able to see it in the no-code interface.
This chapter was last updated on Wed 8 Feb 2023 16:33:35 GMT